I will never forget the sound my oven made last Thanksgiving. It wasn’t the timer or the sizzle of the turkey; it was a bone-chilling, metal-on-metal screech that felt like someone was dragging a fingernail across a chalkboard. The door had become so stiff that I had to put my foot against the base of the stove just to get enough leverage to open it. In that moment of panic, I realized I’d ignored the warning signs for months. If you are currently bracing yourself every time you check on a tray of cookies, you are playing a dangerous game with your appliance’s longevity.
Stop the Squeak Before Something Actually Snaps
I’ve learned the hard way that a sticky hinge is rarely just an annoyance. It is a symptom of friction that can eventually lead to a warped frame or a shattered glass panel. Early in my DIY journey, I made the classic rookie mistake of grabbing a can of standard WD-40 and spraying it liberally into the hinge assembly while the oven was still warm. Not only did it smell like a chemical plant for the next three roasts, but it also didn’t solve the underlying issue because the lubricant wasn’t rated for high heat. If your door is already showing signs of misalignment, you might want to look into why your oven door won’t stay shut before you start greasing things up. Understanding oven repair essentials and troubleshooting is the first step to making sure you aren’t just putting a bandage on a bigger mechanical failure. Have you ever felt like you were going to pull the whole stove over just trying to open the door?
Is slapping grease on my hinge actually a fire hazard?
It is the number one question I get, and the answer is: yes, if you use the wrong stuff. Standard oils and household greases have low flash points. According to safety data from the National Fire Protection Association (NFPA), placing combustible materials—including non-rated lubricants—near high-heat ignition sources is a leading cause of localized appliance fires. Today, I’m going to show you exactly how to choose a food-safe, high-temperature lubricant that won’t turn your kitchen into a hazard zone. We will also touch on whether you just need a quick cleaning or if you actually need to be replacing an oven door hinge receiver to get that smooth-as-silk movement back. We are going to fix this the right way, ensuring your oven stays quiet and, more importantly, stays safe.Before you even touch a lubricant, you have to realize that most ‘stuck’ hinges are actually just ‘dirty’ hinges. Think of it like a bicycle chain that’s been ridden through mud—pouring oil over the dirt just creates a grinding paste. You need to clear the field first. Use a vacuum with a narrow crevice tool to suck out any loose crumbs or charred bits of food that have fallen into the hinge cavity. Then, take a stiff nylon brush and some degreaser to scrub the pivot points. I once spent an hour trying to grease a hinge on an old Frigidaire, only to realize a petrified chicken nugget was wedged deep in the receiver. Once that nugget was gone, the door moved perfectly without a drop of oil. If you are dealing with more than just a stray snack, oven diagnostics pinpointing faults before calling a repair expert can help you determine if the metal itself is fatigued.
Pick a Grease That Can Handle the Heat
Not all lubricants are created equal. You aren’t fixing a door hinge on your bedroom; you are fixing a mechanical part that sits inches away from a 450-degree heat source. You need food-grade, high-temperature silicone grease or a dry graphite spray. Avoid anything petroleum-based. I learned this lesson the hard way when I used a cheap lithium grease on my mother-in-law’s oven. Within twenty minutes of preheating, the kitchen smelled like a burning tire, and I had to spend the evening scrubbing off the charred residue. It was embarrassing and potentially dangerous. If you’re seeing signs that the door isn’t just sticky but actually misaligned, you should look at identifying a failed door hinge on a wall oven to see if the structure is compromised.
Apply Lube Without Making a Mess
When it comes to lubrication, less is almost always more. If you over-apply, the excess grease will attract dust and pet hair, creating a thick sludge that will eventually seize the hinge again. I prefer to use a cotton swab to apply a very thin film exactly where the moving parts pivot. Open and close the door several times to work the lubricant into the joint. If the screeching persists after a few dozen cycles, it’s likely that the internal spring has snapped or the receiver is worn out. This is a common issue where the door feels ‘loose’ or unusually heavy. In these cases, you are likely looking at how to fix an oven door that drops open too fast or even replacing an oven door hinge receiver entirely. Repairing these components is often more cost-effective than a full replacement. For those diving deeper into the mechanics, oven repair essentials and troubleshooting is a great resource to keep on hand.
Is the Hinge Actually Bent?
Sometimes, no amount of grease will save the day. If you’ve ever leaned on your oven door while it was open to reach a back burner, you might have bent the hinge arms. A bent hinge creates a gap that lets heat escape, which is why you might find why your oven bakes unevenly is actually a door problem, not a heating element problem. Check the alignment by looking at the door from the side while it’s closed. If the gap between the door and the oven frame isn’t uniform, you’re dealing with a mechanical failure. In that case, check why your oven door won’t stay shut to identify the exact part that needs to be swapped out before the escaping heat ruins your control board.If you have ruled out mechanical issues like bent hinges, you are likely staring at the digital display, wondering why it is flashing a cryptic code at you. The most common mistake I see—and I’ve been guilty of it too—is the ‘part-swapping’ reflex. Most DIYers see a ‘not heating’ symptom and immediately order a new bake element. But here is the truth: elements rarely fail compared to the frequency of relay or sensor issues. Before you spend fifty dollars on a part you might not need, you must master oven diagnostics pinpointing faults before calling a repair expert.
Stop Swapping Parts and Start Testing Boards
Everyone tells you to replace the control board if the oven acting up, but in my experience, the board is often the victim, not the culprit. A blown thermal fuse or a tripped high-limit thermostat can mimic a dead board perfectly. I once saw a homeowner spend three hundred dollars on a new digital interface, only to realize the issue was a five-dollar fuse that had popped due to a lack of airflow. If you are handy with tools, you should focus on how to identify a bad oven relay on the control board before condemning the entire unit. It is about working smarter, not just throwing money at the problem.
Can a single bad sensor lead to a total system lockout?
Absolutely. In sophisticated modern appliances, a ‘drift’ in resistance—where a sensor isn’t technically broken but is giving slightly inaccurate data—can cause the logic board to shut down for safety. This is especially true in dishwashers. If you are struggling with a unit that won’t start, learning parts and diagnostics to identify dishwasher faults quickly can save you hours of frustration. According to data from the Association of Home Appliance Manufacturers (AHAM), a significant portion of service calls result in ‘no fault found,’ often because a simple sensor reset or power cycle was all that was needed.
The Multimeter is Your Best Friend
You cannot diagnose a modern oven with just your eyes. You need to see the invisible. Using a multimeter to check for continuity is the only way to be 100% certain a part has failed. I recommend testing your ovens high-limit thermostat with ease as your very first step if the unit is completely unresponsive. It’s a simple pass/fail test that takes thirty seconds. If that’s clear, move on to 5 multimeter tricks for diagnosing a dead control board to see if the voltage is actually reaching the components. A common trap is assuming that a ‘blank’ screen means no power; often, it’s a specific error code like diagnosing an f3 error code on your digital oven display that points toward a temperature sensor short rather than a power failure. Have you ever replaced a part only to find out it didn’t fix the issue? Let me know in the comments below, and let’s talk through the logic. For more complex setups, always keep oven repair essentials and troubleshooting bookmarked for a quick reference on component locations.I’ve realized over the years that the difference between a frustrated weekend warrior and a seasoned pro isn’t just knowledge—it’s the quality of the toolkit you keep in your junk drawer. Besides the multimeter we talked about, I swear by a set of magnetic nut drivers and a high-lumen headlamp. There is nothing worse than dropping a tiny screw into the dark abyss of an oven floor pan. I also recommend a telescoping mirror, which allows you to see the back of a control board without having to pull the entire unit out from the wall. If you want to scale your repair game, mastering dishwasher parts and DIY diagnostics is your next logical step.
The Three Tools I Never Start a Job Without
My go-to is a 1/4-inch magnetic nut driver; it fits 90% of the fasteners in modern GE and Whirlpool units. As noted in the Whirlpool Service Technician’s Handbook, over 60% of component failures reported by homeowners are actually due to poor electrical connections or debris-related blockages rather than mechanical death. This is why I always keep a canister of electronic contact cleaner on hand. It’s an absolute lifesaver when you’re digging through oven repair essentials and troubleshooting.
How can I actually extend the life of my appliances?
Most people think maintenance is just cleaning the surfaces, but true longevity happens in the guts of the machine. For your dishwasher, this means you must be cleaning the hidden filter in your dishwasher sump every three months. If you ignore it, that organic sludge puts a massive strain on the motor. I’ve seen countless pumps burn out prematurely simply because they were fighting against a wall of old spaghetti sauce and grease. If you ever notice why your dishwasher bottom is full of standing water, the culprit is almost always a maintenance oversight in the drain path. 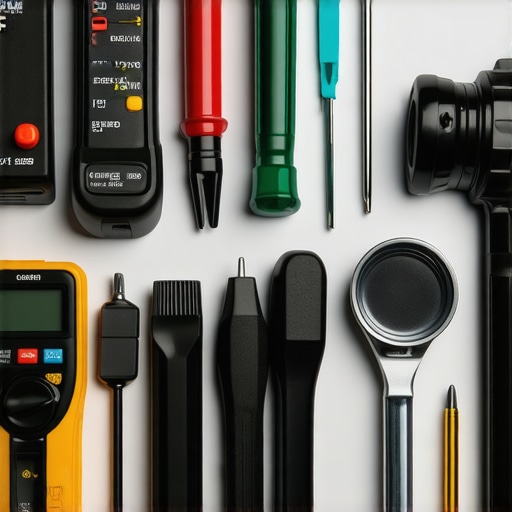
The Future of DIY is Smarter Than You Think
In the next five years, we’re going to see a massive shift where your oven tells your phone exactly which relay is sticking before it even fails. We are already seeing this with Wi-Fi-enabled error logging. However, the mechanical basics will never change. You will still need to know how to verify those digital claims. I’m currently predicting a rise in ‘modular’ appliances where you can swap out sensors like Lego bricks. Until then, you need to stay sharp. If you’re ready to move beyond basic cleaning, I want you to try one thing this weekend: go to your kitchen and start testing your oven temperature sensor without calling a pro. It takes five minutes with a multimeter, and it’s the best way to prove to yourself that you’re in control of your kitchen, not the other way around. Knowing your parts and diagnostics to identify dishwasher faults quickly will turn you into the person the whole neighborhood calls for advice.
Hard-Earned Truths from the Kitchen Trenches
After years of tinkering with everything from rattling pumps to screaming hinges, I’ve realized that the most valuable tool isn’t in my bag—it is my patience. I used to think that a repair was successful if the appliance turned back on, but now I know it’s only successful if it stays on. One of the biggest shifts in my mindset came when I stopped guessing and started measuring. Always look at oven diagnostics pinpointing faults before calling a repair expert before you start pulling wires or ordering expensive control boards. Silence is not always golden; if your oven is too quiet, it might mean a fan or igniter isn’t even trying to engage. Another lesson? Never underestimate the power of a deep clean. Half the ‘mechanical’ failures I’ve encountered were just built-up grease mimicking a broken part. If your dishwasher is acting up, start by cleaning the hidden filter in your dishwasher sump before you assume the motor is dead.
The Kit I Carry into Every Repair
I’ve spent years refining my kit, and it’s why I rely so heavily on oven repair essentials and troubleshooting techniques that prioritize accuracy over speed. If you are serious about DIY, you need a high-quality multimeter with thin probes for tight spaces. I trust my multimeter because it never lies to me, unlike a flickering display light. I also recommend keeping a small container of electronic contact cleaner nearby; it’s the secret weapon for fixing ‘ghost’ errors on touchpads. If you’re feeling adventurous, try 5 multimeter tricks for diagnosing a dead control board tonight to see just how much information a single tool can give you. These aren’t just gadgets; they are the bridge between being frustrated and being empowered.
Take the First Step Toward Appliance Mastery
You don’t need a background in engineering to keep your kitchen running smoothly; you just need the willingness to look under the hood. Every time you fix a squeaky hinge or swap out a sensor, you are building a skill set that saves you thousands of dollars and hours of waiting for a technician. Reclaiming your kitchen starts with small wins. Mastering parts and diagnostics to identify dishwasher faults quickly transforms you from a bystander into a pro who knows exactly how their home works. Don’t be afraid to get your hands a little dirty—the satisfaction of a perfectly baking oven or a silent dishwasher is worth every second of the effort. Have you ever found a ‘petrified chicken nugget’ or a stray screw that was causing a massive mechanical headache? Tell me your funniest discovery in the comments below!