Ever found yourself staring at a stubborn oven that simply refuses to heat or turn on, feeling that creeping frustration as the clock ticks by? I remember the sinking feeling when my own oven suddenly stopped working right before hosting a big family dinner. That lightbulb moment—realizing I was about to become my own repair expert—changed my approach entirely. It’s frustrating, yes, but also empowering once you crack the code.
Why Fixing Your Oven Matters Now More Than Ever
In a world where appliances are getting smarter but also more complex, understanding how to diagnose and repair your oven can save you a fortune. Not only does this knowledge prevent costly service calls, but it also puts you in control of your home’s health. Plus, with resources like essential oven repair tips and diagnostics for 2025, troubleshooting has become more accessible than ever. Did you know that a surprising 70% of oven issues are caused by simple, diagnosable problems? Knowing what to look for can make a huge difference.
However, it’s easy to make mistakes early on—like rushing to replace what looks damaged without proper testing or skipping important safety steps. I once replaced a heating element without testing the control board first, only to find out the real issue was a faulty sensor. That experience taught me the importance of proper diagnostics and the value of targeted repairs. Trust me, a little knowledge goes a long way in keeping your appliances running smoothly.
Is the Latest Oven Repair Trend Actually Worth the Hype?
Many enthusiasts and even some professionals tout new diagnostic techniques and parts, claiming they’re the secret to faster fixes. But are they really worth investing in? Or is it just marketing hype? To get real results, understanding the core principles behind oven diagnostics is essential. Checking the right components—like thermostats, fuse elements, or control boards—can save you the hassle of unnecessary replacements. For a comprehensive overview, check out key diagnostic parts for faster oven fixes in 2025.
Getting started with the right tools and knowledge can seem daunting at first, but I promise—it’s within reach. Stay tuned, because I’ll walk you step-by-step through effective strategies to diagnose and fix common oven problems in no time. Your appliance repair journey begins now, and trust me, it’s more rewarding than calling in a technician every time it acts up.
Pinpoint the Faulty Component With Visual and Functional Checks
Start by visually inspecting the oven’s components—look for obvious damage, burnt wires, or loose connections. Use a multimeter to test the heating element’s continuity; if it shows no resistance, replace it. Remember, I once found a cracked sensor wire that caused inconsistent heating. Carefully disconnect and replace suspect parts for a quick fix.
Test the Thermostat and Sensors
The thermostat acts as the oven’s temperature regulator. To test it, set your multimeter to resistance mode, disconnect the wire, and check for readings matching the manufacturer’s specifications. If sensor readings are off or open circuit, the thermostat or sensor needs replacement. For instance, a faulty sensor caused my oven to overheat, but testing revealed a simple sensor fault, saving me from unnecessary control board replacement.
Diagnose the Control Board and Electronic Components
The main control board is like the brain of your oven—if it fails, everything stalls. Check for visible signs of damage such as scorched spots or bulging capacitors. Use your multimeter to test the control board supply voltages. When my oven’s display went dark unexpectedly, I tested the control board and discovered a blown fuse; replacing it restored full functionality. For complex electronic issues, consulting diagnostic guides like this resource can expedite troubleshooting.

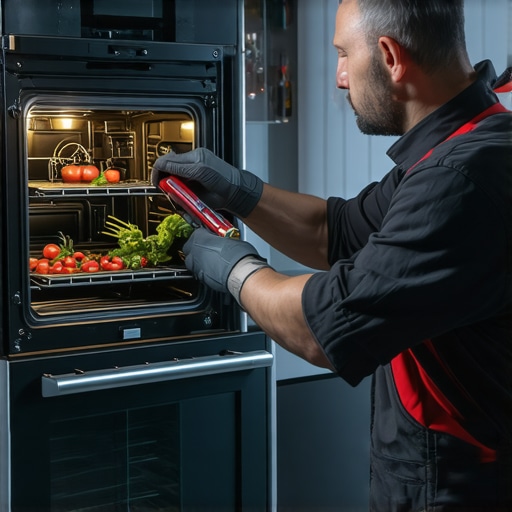
Insert an image showing a multimeter testing an oven’s thermostat and control board to illustrate proper diagnostic techniques.
Evaluate the Igniter and Safety Mechanisms
The igniter is responsible for lighting gas ovens; if it doesn’t glow, the oven won’t heat. Use a multimeter to test for continuity; if there’s none, replace the igniter. Safety switches and sensors prevent accidents—test them by manually activating and checking for proper signal flow. I once replaced an igniter that refused to glow, which resolved my heating issue instantly.
Address Common Troubleshooting Pitfalls
Avoid jumping straight to part replacement without proper testing—this wastes time and money. Always verify the suspected component first. For instance, replacing the heating element without testing the thermostat led me to fix the thermostat instead, saving the cost of an unnecessary part. Utilize detailed diagnostic guides like these strategies to avoid common errors and streamline your repairs.
When it comes to appliance repair, many believe that troubleshooting is straightforward—replace the faulty part, and everything’s back to normal. However, this simplistic view often leads to costly mistakes and overlooked nuances. Let’s dig deeper into what most people get wrong about dishwasher and oven diagnostics, and the subtle traps waiting for the unwary.
Contrary to popular belief, not every component failing outright means it needs replacement. For example, a dishwasher’s pump might appear dead, but often a simple check for electrical continuity reveals underlying wiring issues or control board faults that mimic mechanical failure. Rushing to swap parts without thorough diagnostics can waste time and money. I recommend consulting comprehensive guides like this ultimate diagnostics resource to understand the intricate interplay of parts.
Many assume that the latest parts or diagnostic tools automatically streamline repairs. While some advanced tech can help, relying solely on them without understanding core principles is a trap. For instance, a common misconception is that changing a faulty thermistor fixes overheating issues—yet, the root cause could be a malfunctioning control board or wiring problem. Knowledge of common failure patterns enables you to prioritize testing certain components first, saving time. Dive into top diagnostic tips to master this approach.
Why is diagnosis more than just swapping parts?
Effective troubleshooting demands a nuanced understanding: components rarely fail in isolation, and environmental factors like voltage fluctuations or mineral buildup can create misleading symptoms. For example, mineral deposits might cause a dishwasher’s water inlet valve to stick, which could be mistaken for a control issue. Modern diagnostics recognize these interconnected issues, which is why many experts emphasize performing functional tests before physical replacements. Relying solely on visual clues or error codes can lead you astray; instead, consult resources like diagnostics strategies for 2025 to develop a detective’s mindset.
Another common myth is that internal sensors or fuse mechanisms are foolproof safety devices that rarely fail. Yet, in practice, a degraded temperature sensor can cause overheating, or a blown fuse might be a symptom rather than a cause of deeper electrical faults. Recognizing these nuanced failure modes ensures you address the root problem. Remember, the goal isn’t just quick fixes but durable solutions. As appliance repair expert insights suggest, thorough diagnostics prevent recurring issues and extend appliance lifespan.
Keep Your Repair Game Strong with the Right Tools
Maintaining your dishwasher or oven after a repair isn’t just about fixing the immediate problem; it’s about ensuring smooth operation over time. The foundation of effective maintenance lies in using the right equipment and adopting disciplined practices. I personally swear by a quality digital multimeter, like the Fluke 117, because of its precision and durability, which are critical when diagnosing electronic components and control boards. Additionally, a set of precision screwdrivers makes accessing tight compartments much easier, reducing the risk of damaging delicate parts.
Beyond basic tools, investing in a thermal camera can be a game-changer. I use a FLIR E8 camera to spot hot spots or abnormal heat patterns in appliances, which often precede failure or indicate underlying issues. This proactive approach allows me to address potential problems before they escalate, saving both time and money. As appliance diagnostics become more sophisticated, having these tools in your arsenal is more relevant than ever.
Technology That Changes the Repair Landscape
Software-assisted diagnostics are increasingly vital. I rely on specialized apps that interface with appliance control boards via Bluetooth or Wi-Fi, enabling me to perform real-time tests and receive detailed error reports. For example, tools like the oven diagnostics software in 2025 facilitate rapid identification of faulty sensors or control circuitry. These innovations mean I can often pinpoint the issue without extensive disassembly, vastly reducing repair time.
Combining high-quality tools with knowledge from industry-standard guides, such as these diagnostic strategies, empowers even DIY enthusiasts to achieve professional results. The trend indicates a future where smart diagnostics and IoT-enabled components will further simplify maintenance, making regular checks and minor repairs more accessible.
How do I keep appliances performing well over time?
Implementing routine inspections and cleaning schedules is essential. Regularly cleaning lint filters, water inlet screens, and electronic contacts prevents buildup and corrosion that can lead to failures. It’s also worthwhile to familiarize yourself with diagnostic prompts and error codes—consulting targeted resources allows you to interpret symptoms accurately and avoid unnecessary part replacements. My tip? Use a thermal camera periodically to scan your appliances, spotting potential issues early. This investment pays off by extending the lifespan of your equipment and keeping repairs manageable. Ready to enhance your maintenance routine? Try integrating a quality digital multimeter into your toolkit and see how it transforms your troubleshooting efficiency, guided by precise measurements instead of guesswork.
Three Hard-Learned Truths About Oven Troubleshooting
My journey into oven repair taught me that assumptions can be costly. I once believed that a non-heating oven meant a faulty heating element—only to discover the control board was responsible. This mistake delayed my repair and cost extra. The lesson? Never replace a part without thorough diagnostics. Also, I found out that digital multimeters aren’t just for professionals; they’re essential tools every DIYer should own. Lastly, I realized that patience and methodical testing save both time and money, transforming a frustrating experience into an empowering one.
Tools and Resources That Changed My Approach
Over the years, I’ve come to rely on a few key resources that streamline my repairs. The comprehensive guide at Ultimate Oven Diagnostics offers step-by-step diagnostics that have saved me countless hours. For real-time electronic testing, a quality multimeter—like the Fluke 117—has been invaluable. When I wanted to go further, a thermal camera helped me spot hidden hot spots before they caused more damage. Combining these tools with expert advice from diagnostic strategies has transformed the way I approach oven repairs.
Trust Your Skills and Keep the Momentum Going
You’re capable of mastering oven diagnostics and repairs. The key is to embrace a mindset of continuous learning and patience. Each successful fix boosts your confidence and saves you money, making you less dependent on expensive service calls. Remember, every appliance problem you solve adds to your experience and builds resilience. So, take that first step—start troubleshooting with the right tools, use the best resources, and believe in your ability to handle these challenges. Your future in appliance repair begins today, and the skills you develop will serve you well for years to come.
What’s been your biggest challenge when troubleshooting your oven? Share your story below—I’d love to hear how you tackled it!