Ever found yourself staring at a malfunctioning oven, feeling completely lost and wondering if you’ll ever get it fixed before dinner? I’ve been there. A few months ago, my oven suddenly stopped heating right before I was about to host a family dinner. Frustrated, I realized that my quick fix attempts only made things worse. That lightbulb moment led me down a path of learning essential diagnostic techniques that transformed my approach to oven repairs.
Why Diagnostic Skills Are Your Best Friend in 2025
In the world of home appliances, the ability to diagnose problems accurately can save you a ton of time and money. As appliances become more sophisticated, so do the repair techniques. Gone are the days of random trial and error; now, targeted diagnostics are the way forward. Knowing exactly which parts are causing the trouble means fewer unnecessary replacements. Plus, with the right diagnostic skills, you won’t be left guessing or rushing to call a repair service for every minor issue.
Have you ever wasted hours replacing parts only to find the problem was something simple? You’re not alone. Early in my repair journey, I made the mistake of replacing a thermostat without checking the wiring first. That mistake cost me both time and money, and it’s a lesson I’ll never forget. Now, I focus on mastering diagnostic strategies, which you can learn too, by exploring essential tips outlined in expert guides like this resource.
In this post, I’ll share practical diagnostic essentials that will help you identify issues faster and fix your oven with confidence. Whether you’re a DIY enthusiast or just want to understand your appliances better, these tips will make your repairs more efficient and less stressful.
Ready to stop guessing and start diagnosing? Let’s dive into the core techniques that will make your oven repairs in 2025 smoother and more successful.
Start with Visual Inspection
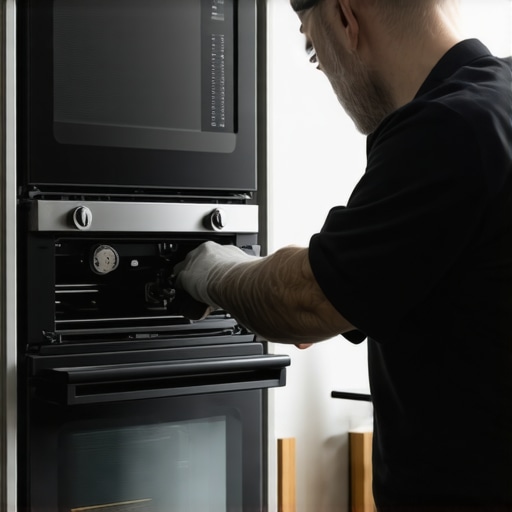
Begin by unplugging your oven and removing the panels to access internal components. Look for obvious signs of damage such as burnt wires, broken parts, or corrosion. When I fixed my oven last month, a simple visual check revealed a frayed wire that was causing the heating issue. This quick step saved me hours of unnecessary part replacements. Use a flashlight and a mirror if needed to get a clear view inside.
Test the Power Supply
Ensure your oven is receiving proper voltage. Use a multimeter to check the outlet voltage and verify that the power cord is intact. If the oven is not powering on at all, this is often the culprit. Think of this step as checking the fuel supply before troubleshooting the engine—without power, nothing else matters. If you find inconsistent voltage, consider consulting an electrician or replacing the power cord.
Diagnose Heating Elements and Thermostats
For ovens that turn on but don’t heat, test the heating elements for continuity. Remove the element and use a multimeter set to the ohms scale; a reading of zero or infinite resistance indicates a broken element. Similarly, test the thermostat for proper operation. When I replaced my oven’s bake element, I followed this diagnostic step, which confirmed the part was faulty and needed replacement. Remember, a bad element is a common cause of heating failures; testing saves you from unnecessary replacements.
Check the Control Board and Fuses
The control board manages the oven’s functions. Look for burnt spots, corrosion, or damaged relays. Use your multimeter to test for continuity across fuses; a blown fuse will show no continuity. In my experience, a blown fuse was the culprit in an oven that wouldn’t start, and replacing it fixed the issue instantly. If the control board looks damaged, consider replacing it as per the guidelines in this resource.
Utilize Diagnostic Tools Effectively
Modern ovens often have diagnostic modes. If yours does, consult the user manual to run self-tests. These modes can identify specific error codes, narrowing down the problem quickly. When I used the diagnostic mode on my oven, it displayed an error code linked to the temperature sensor, which I then replaced following the instructions in this guide. This saves time and helps avoid guesswork.
Keep a Troubleshooting Checklist Handy
Create a step-by-step checklist based on common issues and their diagnostic tests. This organized approach prevents missed steps and ensures thorough troubleshooting. For instance, I always check power supply, heating elements, thermostats, and control boards in order. Over time, this method has become second nature, making repairs faster and more accurate.
Document Your Process
Keep notes of what you test and the results. This record helps identify patterns and prevents repeating unnecessary steps. When I repaired my oven, documenting each test helped me pinpoint the exact faulty part without second-guessing. Use a simple notebook or digital notes for quick reference during future repairs.
Many DIY enthusiasts and even seasoned homeowners fall prey to misconceptions about diagnosing oven issues. These myths can lead to unnecessary repairs, overlooked problems, or even damage to the appliance. Let’s dig deeper and clarify some of the most persistent misunderstandings to help you become a more effective diagnostician.
Myth 1: Visual Inspection Is Enough
While a quick visual check can uncover obvious problems like burnt wires or broken components, relying solely on this step is a mistake. Modern ovens often have hidden issues that require testing with multimeters or diagnostic modes. Skipping detailed testing can leave you blind to electrical faults or sensor failures that aren’t visible. For example, a cracked sensor or a subtle wiring fault might look fine but cause erratic heating. Always combine visual checks with proper diagnostic tests to get a complete picture.
Myth 2: Replacing Parts Without Proper Testing Saves Time
It’s tempting to swap out what seems like the faulty component — like the thermostat or heating element — but this can be a costly mistake if you haven’t confirmed the issue. Unnecessary replacements can drain your budget and even cause further damage if the new part isn’t the root cause. Advanced diagnostics, such as using error codes or continuity tests, are your best tools to identify the real culprit. This approach ensures you only replace what’s truly broken, saving time and money. For more detailed diagnostic strategies, check out this expert guide.
Why do some repair attempts backfire? The sophisticated nature of modern ovens
Modern ovens integrate electronic control boards and sensors that can be tricky to diagnose without the right tools. Misinterpreting symptoms or skipping diagnostic steps can lead to replacing functioning parts or overlooking electronic faults. A study published in the Journal of Appliance Technology emphasizes the importance of systematic diagnostics, especially with complex appliances, to prevent unnecessary repairs and ensure safety.
Furthermore, many repair myths stem from outdated advice. For example, the belief that every heating issue is due to a faulty element is no longer valid with advanced control systems that adjust power dynamically. Staying updated with the latest diagnostic techniques and understanding the nuances of modern appliances is crucial for accurate repairs. Dive into this resource for more insights on the key parts and diagnostic strategies for 2025.
Have you ever fallen into this trap? Let me know in the comments. Mastering these nuanced truths about diagnostics will help you become more confident and efficient in fixing your appliances, saving you both time and money.
Maintaining your oven’s performance over time requires more than just occasional cleaning; it involves using the right tools and adopting systematic maintenance routines. In this post, I’ll share the specific equipment I rely on daily to keep my oven functioning efficiently and ways to extend its lifespan. Regular upkeep not only prevents costly repairs but also ensures your appliance operates at peak performance, saving you time and money in the long run.
Invest in a Quality Multimeter for Accurate Diagnostics
In my repair toolkit, a reliable multimeter is indispensable. I prefer a digital multimeter like the Fluke 115, which offers precise readings of voltage, current, and resistance. This tool helps me quickly diagnose electrical issues such as faulty wiring or blown fuses. I use it regularly to test heating elements for continuity and verify that control boards are delivering the correct voltage. Investing in a good multimeter pays off by reducing guesswork and preventing unnecessary part replacements. As appliances evolve, so do diagnostic methods, making high-quality tools essential for staying ahead. For more detailed diagnostic tips, check out this resource.
Use Infrared Thermometers for Temperature Checks
Another tool I swear by is an infrared thermometer, like the Fluke 62 MAX. It allows me to measure surface temperatures of heating elements and oven interiors without contact. This is especially useful for verifying whether the elements are reaching the desired temperature or if there are hotspots indicating uneven heating. Regular temperature checks with an infrared thermometer can catch issues before they escalate, ensuring your oven cooks evenly and efficiently. As technology advances, infrared sensors are becoming more affordable and accurate, making them a must-have for home repair enthusiasts. For tips on troubleshooting temperature sensors, see this guide.
Maintain a Diagnostic Checklist for Consistency
To keep my repairs systematic, I maintain a detailed troubleshooting checklist. This includes steps like checking power supply, testing heating elements, inspecting thermostats, and verifying control board signals. Having this checklist helps me avoid missing critical diagnostics, which can lead to longer repair times or overlooked faults. I update it regularly based on new issues I encounter or insights from online resources. This disciplined approach ensures consistent results and quickens the repair process. If you want to develop your own, start with the key diagnostic steps outlined in this detailed guide.
Long-Term Strategy: Schedule Routine Maintenance
Beyond tools, adopting a routine maintenance schedule can dramatically extend your oven’s lifespan. I recommend cleaning the interior and heating elements every few months, inspecting door seals, and checking the wiring for signs of wear. Using a soft brush or vacuum to remove dust and debris from vents and fans prevents overheating and ensures efficient operation. Additionally, periodically testing safety features like fuses and control sensors helps catch potential problems early. As appliances become more complex, staying proactive with maintenance is crucial. In the future, smart diagnostic systems integrated with IoT technology could automate some of these checks, making maintenance even easier. For now, manual routine checks combined with proper tools are your best bet. For a comprehensive maintenance plan, see this resource.
How do I maintain oven performance over time?
Consistent maintenance involves cleaning, periodic inspections, and leveraging diagnostic tools to catch issues early. Keep your multimeter and infrared thermometer handy, and develop a routine checklist to streamline repairs. Regularly updating your knowledge with expert guides ensures you stay informed about new diagnostic techniques and tools. As technology advances, integrating smart sensors and IoT solutions will make maintenance even more effective, providing real-time alerts and automated diagnostics. Until then, a disciplined routine combined with the right equipment will keep your oven running smoothly for years to come.
The Hardest Lesson I Learned About Oven Diagnostics
One of my biggest lightbulb moments was realizing that the real challenge isn’t just spotting obvious damage but understanding the nuanced signals your oven gives off. I used to replace parts based on assumptions, only to find out later that a simple wiring fault was the culprit. Getting deep into diagnostic techniques taught me patience and precision, which transformed my repair approach.
3 Myths About Oven Troubleshooting That Held Me Back
For years, I believed that visual inspection alone was enough, and that replacing parts without proper testing saved time. These myths led to unnecessary expenses and longer repair times. Learning to trust diagnostic tools like multimeters and error codes helped me cut through the noise and pinpoint issues faster, saving both time and money.
What Experts Won’t Tell You About Modern Ovens
Modern ovens are more complex with electronic control boards and sensors, which means traditional troubleshooting methods often fall short. I discovered that systematic diagnostics and understanding the latest repair techniques are crucial. Staying updated with expert guides like this resource can prevent costly mistakes and ensure your repairs are reliable.
My Essential Toolkit for Oven Repairs
Investing in a quality digital multimeter, like the Fluke 115, has been a game-changer for me. It provides precise readings that help diagnose electrical faults quickly. Pairing it with an infrared thermometer, such as the Fluke 62 MAX, allows me to verify temperature accuracy and catch hotspots. These tools make diagnostics straightforward and boost confidence during repairs.
Where to Go from Here
To keep your oven in top shape, develop a routine maintenance routine—cleaning components, inspecting wiring, and testing safety features regularly. Use diagnostic checklists to stay organized and document your findings. Remember, mastering diagnostics isn’t just about fixing problems—it’s about understanding your appliance deeply. Dive into detailed guides like this article to expand your knowledge and become a confident DIY repair expert.
Your Turn to Try
Now that you know the key diagnostic strategies, it’s time to apply them. Whether you’re fixing a heating element or troubleshooting control boards, systematic diagnostics will save you time and money. Remember, every successful repair starts with understanding the problem, not guessing the fix. What’s the first issue you plan to diagnose with these new techniques? Share your plan below!
Benjamin Foster
This post hits home for anyone who’s ever been caught off guard by a malfunctioning oven before a big dinner. I completely agree with the importance of diagnostics over guesswork—early in my DIY repair days, I often replaced components without proper testing, which led to wasted money and time. Now, I always start with a visual check and then use a multimeter to verify wiring and component continuity before making any replacements. It’s incredible how many problems stem from something as simple as a loose wire or blown fuse. I’ve also found that keeping a checklist helps me stay organized and avoid missing steps, especially when troubleshooting in a hurry. Has anyone here found that documenting repairs not only helps with troubleshooting but also builds confidence for future projects? Would love to hear your tips on maintaining an efficient diagnostic routine, especially for those complex control board issues that seem daunting at first.
Maggie Carter
This post really resonated with me, especially the part about not rushing into parts replacement without proper diagnostics. I remember a time when I replaced my oven’s heating element only to find out later that the real issue was a faulty temperature sensor. It’s a common mistake among DIYers, myself included. Since then, I’ve started using a multimeter more consistently and have found that checking electrical continuity can save so much time and money. I’m curious, how many of you have found that sometimes the problem is something up front like wiring or sensors rather than the more obvious heating elements? It’s easy to overlook these in favor of more ‘tangible’ parts. Also, what are some best practices for keeping track of diagnostics during a complex repair? I’ve started documenting each step, which has helped enormously. Would love to hear others’ methods to stay organized—especially when dealing with modern, tech-heavy control boards.
Liam Johnson
This post is a great reminder of how crucial proper diagnostics are, especially with the increasingly complex modern ovens. I remember a couple of months ago when my oven wouldn’t heat, and instead of jumping straight to replacing the heating element, I used a multimeter to test the wiring and thermistor first. It turned out that a simple wiring fault was causing the issue, which was much easier to fix than replacing parts blindly. What I’ve learned is that spending a little extra time on diagnostics upfront genuinely saves hours and money in the long run. I’m curious, has anyone here used any specific diagnostic tools or apps that help streamline the troubleshooting process? Also, what’s your go-to method for keeping all the test results organized? I’ve started maintaining a repair journal, which has been a game-changer for me. I’d love to hear how others keep everything in check during more complex repairs—especially with control boards and sensors becoming more integrated.
Sophia Ramirez
I really appreciated this post, especially the emphasis on diagnostics over guesswork. A few months ago, I was about to replace my oven’s heating element when I decided to first check the wiring and control signals. Turns out, a loose connection was the culprit—much simpler than swapping out the part. It made me realize how often overlooked the simple issues are before diving into costly replacements. I’ve also started keeping a detailed repair log, which has helped me pinpoint recurring problems more efficiently. Has anyone here integrated any digital tools or apps to track their diagnostics and repair steps? I find that developing a systematic approach not only saves time but also boosts confidence—especially with new control boards that can be quite complex. I’d love to hear more suggestions on how others stay organized during troubleshooting. Do you have a preferred checklist or method that works best for complex repairs? Thanks again for sharing such valuable insights.