Ever pulled out my dishwasher rack and immediately spotted a tiny, almost invisible hole, but enough to worry about? That moment hit me hard—those little tears seem insignificant until they start to spread, causing rust and compromising the rack’s integrity. It reminded me of that old saying: “A stitch in time saves nine,” especially when it comes to appliance fixes. I used to dismiss small damages, thinking they’d just fix themselves—or that I’d need a costly replacement. But let me tell you, I learned the hard way that ignoring those tiny holes can lead to bigger problems down the line.
Why Patching Small Dishwasher Rack Holes Matters More Than You Think
When I first noticed a small tear in one of my dishwasher racks, I thought, “No big deal.” But over the next few washes, I saw the tear grow larger, and rust started forming around the edges. Not only does rust stain your dishes, but it can also weaken the entire rack, leading to breakage. According to appliance repair experts, small damages like minor holes can escalate quickly if left unaddressed, affecting the dishwasher’s overall performance and durability. Addressing these tiny issues early can save you money and time—and keep your dishwasher running smoothly for years.
Is Patching a Small Hole in a Dishwasher Rack Really Worth It?
It’s natural to wonder if patching is just a temporary fix or if it’s worth the effort. I admit, I initially thought my DIY patch wouldn’t hold up, especially after a few unsuccessful attempts in the past. One mistake I made was using unsuitable materials that didn’t adhere well or rusted quickly. But after some research and trial, I discovered effective patching methods that are both affordable and reliable. Trust me, patching that tiny hole saved me from buying an entirely new rack, which can cost a pretty penny. If you’re skeptical, remember: small cracks and holes often threaten the longevity of your entire dishwasher rack, and a quick fix now can prevent costly replacements later.
Are you facing this exact problem with your dishwasher rack? Keep reading, and I’ll show you step-by-step how I patched my rack in a way that lasts, using materials you probably already have around the house. Time to turn that tiny flaw into a thing of the past!
Gather Your Tools and Materials
Start by collecting essential supplies: a cleaning brush, mild detergent, fine-grit sandpaper, waterproof epoxy or metal repair putty, masking tape, and a small putty knife. I remember the time I cleaned the area thoroughly, making sure to remove any debris or rust—this step is crucial for proper adhesion. Ensure you’re working in a well-ventilated space and wear gloves to protect your skin. Having everything ready saves time and keeps the repair smooth.
Clean and Prepare the Damaged Area
Thorough cleaning is like preparing a surface for painting—dirt and rust will prevent the patch from sticking properly. Use a brush and mild detergent to scrub around the tiny hole, removing any grease or residue. For stubborn rust, gently sand the area with fine-grit sandpaper to create a smooth, clean surface. This process might get messy, but it’s worth the effort; I once used an old toothbrush to reach tight spots, which worked surprisingly well.
Apply the Epoxy or Repair Putty
Seal the Hole from Inside
Mix the waterproof epoxy or metal repair putty according to the manufacturer’s instructions. Then, carefully press the mixture into the hole using a small putty knife or toothpick, ensuring the entire tear is filled. I learned that pressing firmly helps the patch bond better, especially in tight spots. Holding the patch steady for a few minutes allows it to set. Remember, a smooth finish helps prevent future snagging or tearing.
Reinforce from Outside
Once the inner patch is set, apply an additional layer over the exposed surface if necessary, especially if the hole is large or rough. Cover the area with masking tape to hold the patch in place while it cures. Patience is key here; waiting at least 24 hours ensures maximum strength before exposing it to water or dishwasher heat. I once rushed this step, and the patch failed after just a few washes—so don’t skip the wait.
Test the Repair Before Reinstalling
After curing, gently test the patch by applying slight pressure. If it feels solid, the repair is ready for the dishwasher. Before putting it back into use, run a short cycle without dishes to verify there are no leaks or weaknesses. I remember doing this test, and catching a small bubble that was about to peel off, saving me from future messes. For more detailed diagnostics, you can explore DIY dishwasher diagnostics.
Maintain Your Repaired Rack
Inspect the patch regularly for signs of wear or peeling. Clean the area gently to avoid disturbing the repair, and consider applying a protective coating if recommended by the product instructions. This upkeep extends the life of your patch and ensures smooth operation. Remember, addressing small issues like this promptly keeps your dishwasher performing efficiently, much like how timely experiments prevent bigger failures in a lab.
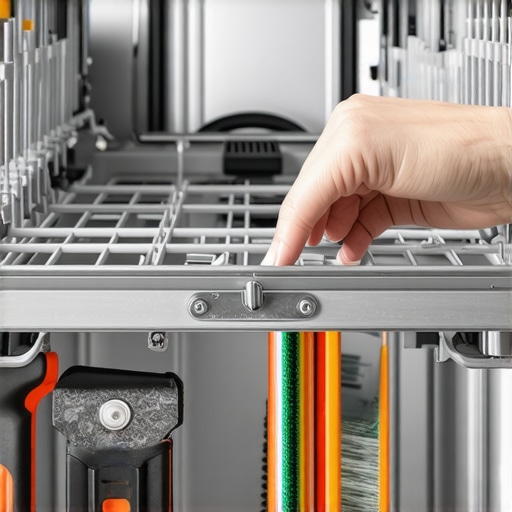
Many DIY enthusiasts and homeowners harbor misconceptions about appliance parts, especially regarding oven repairs, diagnostics, and dishwasher maintenance. These myths can often cause more harm than good, leading to costly mistakes or overlooked issues. As someone deeply familiar with appliance troubleshooting, I want to shed light on some of these nuanced truths that often get lost in generic advice.
First, there’s a widespread belief that all parts are interchangeable or universal. While some components, like filters or gaskets, may fit multiple models, many parts, especially heating elements or control boards, are specific to a certain make and model. Assuming a generic part will work can result in poor performance or even damage. According to experts at appliance diagnostics, always verify your part number before purchasing replacements.
Next, many think that diagnosing an appliance is straightforward — just replace the suspected part and hope for the best. However, this approach often leads to trial-and-error, wasting time and money. Advanced diagnostics require understanding the nuances of electrical resistance, continuity, and the interplay of components. For example, when testing your dishwasher’s heating element, it’s vital to check its resistance accurately; a reading of zero or infinite ohms indicates a fault, but a mid-range value suggests a good element. For precise testing methods, consider reviewing this guide.
Can This Fault Be Fixed Without Replacing Parts?
This is a common question among advanced DIYers. Many faults might seem to require a full replacement, but nuances in diagnostics sometimes reveal that cleaning or realigning components can restore functionality. Mineral buildup, for example, often appears as a faulty heating element, but descaling or cleaning might resolve the issue. Ignoring these subtleties could lead to unnecessary replacements. For a deep dive into such diagnostic nuances, check out oven repair tips.
Another advanced mistake is overlooking the importance of proper tool use and testing procedures. Just like a surgeon needs precise instruments, diagnosing appliances accurately relies on multimeters and correct testing techniques. Misreading voltage or resistance can make you chase phantom faults. For thorough understanding, consult this expert guide.
Lastly, there’s a myth that repairing appliances is always cost-effective. While DIY repairs can save money, they also harbor risks if you overlook minor nuances—like failing to ensure waterproof seals or rechecking connections after fixing. This can lead to leaks, safety hazards, or further damage. Being aware of these finer points and knowing when to call in professionals is essential. Remember, a well-informed repair is often safer and more durable than a hurried attempt. For best practices, see our comprehensive DIY diagnostics guide.
Have you ever fallen into this trap? Let me know in the comments!
 Maintaining your appliances beyond initial repairs requires the right tools and a strategic approach. As I’ve learned from troubleshooting countless dishwasher and oven issues, investing in quality diagnostic equipment pays off in the long run. One indispensable tool I rely on is a digital multimeter, specifically models like the Fluke 117. Its accuracy helps me test electrical components such as heating elements and control boards with confidence. I always keep a set of precision screwdrivers and a cordless drill on hand—these speed up component removal and installation, reducing time spent on repairs. For diagnostics software, I recommend using appliance-specific apps like ‘Appliance Diagnostics’ that guide step-by-step troubleshooting, saving you from guesswork. Looking ahead, I predict that smart diagnostic tools integrated with IoT will become mainstream, allowing real-time appliance health monitoring via apps, enabling preemptive repairs.
How do I maintain appliances over time? Regular inspections are crucial. Every few months, I check for loose connections, corrosion, or signs of wear, especially around door seals or gaskets. Cleaning spray nozzles and filters helps maintain optimal water flow in dishwashers, which you can learn more about in our guide on [cleaning mineral buildup](https://appliancebargainz.com/how-to-clean-mineral-buildup-from-dishwasher-spray-nozzles). Also, scheduling periodic testing of electrical components ensures early detection of potential failures. For instance, testing the resistance of your dishwasher’s heating element with a multimeter prevents unexpected breakdowns. Remember, preventive maintenance often saves money and prolongs the life of your appliances.
A practical tip: try the detailed resistance testing method explained in [testing the resistance on your dishwasher’s heating element](https://appliancebargainz.com/testing-the-resistance-on-your-dishwasher-heating-element). It’s a simple yet powerful way to verify your component’s health—doing this routinely can catch issues before they escalate. Keep practicing diligent diagnostics, and your appliances will reward you with years of dependable service.
The Hardest Lesson I Learned About Parts and Repairs
Early in my DIY journey, I often believed that a small hole or tear in an appliance was insignificant — just a minor flaw that wouldn’t cause much trouble. But experience taught me that ignoring these tiny issues is like neglecting the first crack in a dam; it only gets worse over time. Patience and attention to detail are crucial, especially when repairing dishwasher racks or diagnosing oven glitches. The subtle nuances, like a correctly mixed epoxy or properly cleaned components, can make all the difference.
Tools I Swear By to Stay Ahead
My toolbox isn’t complete without a top-notch digital multimeter, such as the Fluke 117, which helps me unravel complex electrical questions effortlessly. I also rely heavily on precision screwdrivers, a quality cleaning brush, and appliance-specific diagnostic apps that guide me through troubleshooting. Trusting reputable sources like this comprehensive guide saves me time and ensures I don’t miss critical steps.
Keep Going — Your Appliances Will Thank You
The world of appliance repair is rich with learning, and every fix deepens your understanding. Whether patching a small tear or diagnosing a stubborn oven fault, your hands-on experience builds confidence and saves money. Remember, each repair is a chance to enhance your skills and extend the life of your trusted appliances. Embrace the challenge, stay curious, and never hesitate to test new methods — your home will run smoother because of it.
What’s the most unexpected repair tip you’ve learned along the way? Share your insights below and inspire fellow DIY enthusiasts!