If you’ve ever stood in front of your dishwasher, frustration bubbling, as it stubbornly refuses to turn on or complete its cycle, you’re not alone. I vividly remember my own lightbulb moment—standing there with water half-cooked and a feeling of helplessness—thinking, “Is this thing beyond repair?” That was when I realized how critical it is to understand the simple yet often overlooked components that make our appliances tick. Today, I want to share how diagnosing a failed dishwasher thermal fuse using a probe transformed my DIY repair game, saving me hundreds of dollars and hours of waiting for a repair technician.
Why Knowing This Could Save Your Kitchen Day
Dishwashers are the unsung heroes of modern kitchens, quietly doing their job so we can spend more time enjoying our homes rather than scrubbing pots and pans. But when they stop working unexpectedly, the inconvenience can quickly escalate—delaying dinner, creating chaos, and leaving you wondering if you’ll need a professional’s help. In many cases, a thermal fuse failure is to blame, and the good news is, diagnosing it isn’t rocket science, especially if you have the right tools. Using a probe to test your dishwasher’s thermal fuse can be a real game-changer, cutting down repair costs and giving you a sense of mastery over your household appliances.
Is Testing a Thermal Fuse with a Probe Truly Worth the Hassle?
Early on in my repair journey, I made the mistake of assuming every fault required a replacement part or a call to a pro. Turns out, many dishwasher issues stem from simple electrical faults like a blown thermal fuse, which can be identified with a multimeter or a specialized probe. Understanding how to perform these tests not only demystifies appliance repair but empowers you to handle minor problems before they spiral into costly repairs. According to industry experts, a thermal fuse failure is often caused by overheating or electrical faults, making prompt diagnosis essential for effective troubleshooting. Want to learn how to safely and accurately test your dishwasher’s fuse? Keep reading—help is just a few steps away.
Prepare Your Workspace and Gather Tools
Start by unplugging your dishwasher from the power source to ensure safety. Then, locate your thermal fuse—usually found behind the control panel or near the heating element—by consulting your dishwasher’s manual or troubleshooting guide. Collect a multimeter with a probe attachment, which will help in precise testing and is more effective than a traditional test pen for this purpose.
Access the Thermal Fuse Carefully
Use a screwdriver to remove the panels guarding the fuse while keeping track of all screws. Handle components with care to avoid damage. If you’re uncertain about the fuse’s location, refer to diagrams in this diagnostic guide. During my first attempt, I mistakenly unscrewed the wrong panel, but once I recognized the fuse’s precise position, the testing became straightforward.
Test the Fuse Using a Probe
Set your multimeter to the continuity or resistance (ohms) setting. Attach the probe tips to each terminal of the fuse—if your fuse has two terminals, probe both. A good fuse will show very low resistance, indicating continuity, while a blown fuse will read as open (no continuity). When I tested my fuse, I used a fine-point probe to ensure stable contact—initially, I had difficulty, but gradually it became easier with patience.
Interpreting Test Results
If the multimeter indicates no continuity, the fuse is blown and needs replacement. This is often the cause of your dishwasher malfunction. Be cautious—fuses are fragile; apply gentle pressure with the probe tips. For a visual comparison, refer to this diagnostic article that shows typical fuse outcomes.
Reassemble and Confirm Operation
Once tested, reattach the panels securely and reconnect the dishwasher to power. Before running a full cycle, consider performing a short test to verify the fuse’s integrity. If the fuse was the issue, your dishwasher should operate normally now. Remember, regular checks can prevent unexpected breakdowns and extend appliance life.
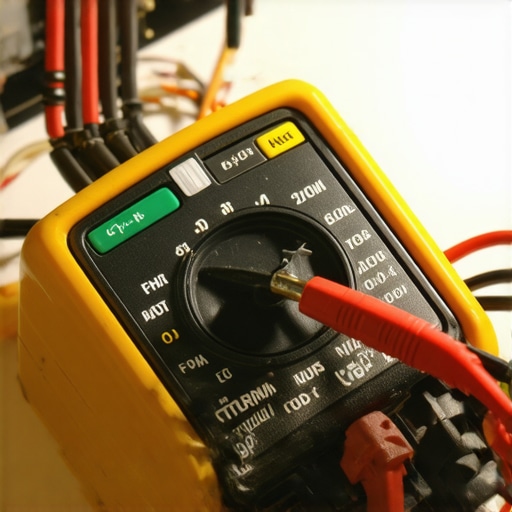 Many DIY enthusiasts believe that troubleshooting appliances like ovens and dishwashers is straightforward—just follow a checklist and replace parts as soon as something seems off. However, this oversimplification often leads to costly mistakes. For instance, a prevalent myth is that if an appliance isn’t functioning properly, the most expensive or obvious part must be faulty. In my experience, conducting nuanced diagnostics requires understanding how multiple components interact and recognizing subtle signs that point away from apparent culprits. Rushing to replace a thermal fuse or heating element without thorough testing can not only waste time but also overlook more intricate issues, such as faulty control boards or electrical wiring problems.
What about complex electrical faults—can a simple continuity test truly detect them? The truth is, many advanced issues—like intermittent connections or micro-cracks in circuit traces—are invisible to basic probes. Experts recommend using specialized diagnostic tools, such as thermal cameras or circuit analyzers, to uncover hidden faults. According to industry research, misdiagnosing these nuances can result in premature part replacements, increasing repair costs and decreasing appliance lifespan. Therefore, developing a deeper understanding of appliance internals and diagnostic techniques is crucial for any serious DIYer or professional technician. Don’t fall into the trap of oversimplification; instead, focus on honing your diagnostic skills to identify root causes accurately. For more insights on precise troubleshooting, check out our comprehensive guide on dishwasher diagnostics or explore oven fault pinpointing. Remember, precision in diagnostics saves money and extends appliance life. Have you ever fallen into this trap? Let me know in the comments.Invest in Precision Diagnostic Tools
To ensure your appliances stay in top shape, I personally rely on a high-quality digital multimeter with fine-point probes. These allow me to perform accurate tests on components like thermal fuses and heating elements, identifying faults before disassembly. A multimeter set to the continuity or resistance mode helps me quickly spot open circuits, reducing guesswork and preventing unnecessary replacements. For complex electrical issues, I use a circuit analyzer that detects micro-cracks or micro-welds invisible to traditional probes. Investing in the right tools streamlines maintenance, saves you money, and extends the lifespan of your appliances.
Develop a Routine Maintenance Schedule
Consistent checkups go a long way in preventing major breakdowns. I recommend visual inspecting accessible parts monthly—cleaning spray arms, checking for debris or scale buildup—and testing critical components like thermostats and fuses periodically. For dishwashers, inspecting the check valve or spray arm can identify clogs that cause poor cleaning or leaks, avoiding costly repairs. Regular maintenance not only improves efficiency but also allows you to catch minor issues early, avoiding the cascade of failures that leads to total replacement.
Use Specific Methods for Long-Term Results
Applying methodical diagnostic techniques is key for longevity. For instance, after replacing a faulty heating element, I run a series of test cycles to verify stable temperature regulation and no residual resistance issues. For ovens, recalibrating temperature sensors using a precision oven thermometer ensures consistent baking—more accurate than relying solely on internal thermostats. Utilizing tools like infrared thermometers can help you monitor hot spots, ensuring uniform heat for baking or broiling. Emphasizing methodical testing and calibration helps maintain appliance performance over years, rather than months.
Preparing for Scale and Wear Over Time
As appliances age, components naturally degrade. Understanding when to replace parts like door seals or control boards is crucial. I keep an eye on signs like rising energy consumption or inconsistent cycles, which often indicate that parts are nearing failure. Consulting authoritative guides, such as this resource, helps me time replacements before catastrophic failure. Regular cleaning and part replacements prolong the life of appliances, saving money in the long run.
Scaling With Advanced Diagnostics and Sustainable Practices
Looking ahead, the future involves smarter diagnostic tools—like IoT-enabled sensors—that monitor appliance health and notify homeowners of potential issues before breakdowns occur. Embracing these innovations can lead to more sustainable maintenance routines, reducing waste and repair costs. As industry experts suggest, integrating AI-driven diagnostics with our existing tools can revolutionize how we manage appliance health, making maintenance more proactive than reactive. Start by experimenting with calibration techniques or advanced testing procedures discussed in this guide to elevate your DIY skill set.
How Do I Maintain My Appliances Over Time?
Consistency is key. Regular inspections, calibration, and using accurate diagnostic tools ensure your dishwasher and oven perform optimally for years. Keep a maintenance calendar and document issues when they arise to identify patterns and plan proactive replacements. By adopting a systematic approach, you can prevent minor faults from escalating into major, costly repairs.
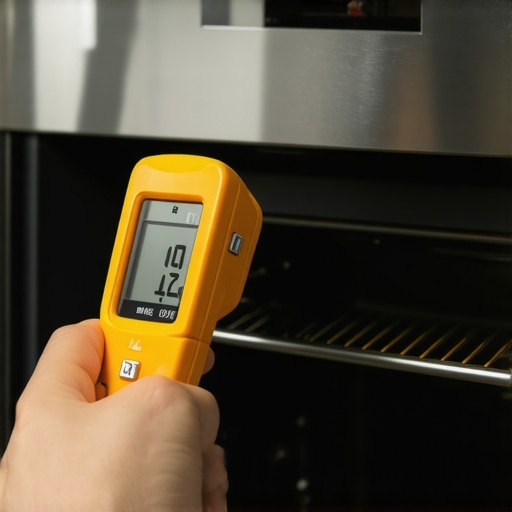
For example, using an infrared thermometer to check oven hotspots regularly can prevent uneven baking and extend the life of internal components. Visualize this practice with an illustration of an infrared gun pointed at an oven’s interior, highlighting its role in maintaining uniform temperature and appliance longevity.
What I Almost Overlooked in My Repair Journey
One of the hardest lessons I learned was the importance of methodical testing over guesswork. Rushing to replace a fuse or heating element without proper diagnostics led me down costly rabbit holes. The real breakthrough was realizing that understanding the interaction between components—like wiring, sensors, and control boards—can save you time and money.
Another insight was the power of patience; a steady hand and careful probe work reveal hidden faults that quick tests miss. For example, micro-cracks in circuit traces causing intermittent failures often hide in plain sight, but a keen eye and the right tools uncover them.
Lastly, I discovered that investing in quality diagnostic tools—like a fine-point multimeter and infrared thermometer—can elevate your troubleshooting from trial-and-error to precise repair. These tools don’t just make tests easier; they help you understand your appliance’s behavior on a deeper level.