Ever had that sinking feeling when you open your dishwasher, and instead of a quiet hum, you’re greeted by a flickering control panel? I remember the first time I saw those blinking lights dance across my dishwasher’s display—panic set in. It looked like a mini light show, but not the kind I wanted to see during my weekly dishwashing marathon. I thought, “Great, another repair job,” and immediately started searching for solutions.
That moment of frustration, however, sparked my curiosity. Why are those control panel lights blinking, and what does it mean for my appliance’s health? More importantly, how can I fix it without calling in a technician every time? In the process of troubleshooting, I realized I wasn’t alone. Many owners are baffled by persistent blinking lights on their dishwashers in 2026, often feeling overwhelmed by confusing error codes or worrying about big repair bills.
But here’s the thing—these blinking lights are not just random glitches. They’re specific signals, designed by manufacturers to tell us something’s up with the machine. Misinterpreting or ignoring these signals can lead to bigger, more expensive issues down the line. Early on, I made the mistake of dismissing blinking lights as minor glitches, only to find myself stuck with a malfunctioning dishwasher days later. That taught me a valuable lesson: understanding the cause of these control panel symptoms can save you time, money, and frustration.
So, what’s the deal with these blinking lights? In 2026, many dishwasher brands have subtle yet crucial differences in how they communicate issues through blinking indicators. For example, some manufacturers use specific blinking patterns to denote control board failures, while others indicate water flow problems or sensor malfunctions. Recognizing these patterns can help you diagnose the root of the issue accurately.
I’ll admit, some of the initial information I found online was too vague or overly technical, making it tough for a regular homeowner like me to get a grip on the problem. That’s why I’ve compiled insights based on personal experience and trusted repair guides, like those detailed at [appliancebargainz.com](https://appliancebargainz.com/). Studies have shown that nearly 60% of appliance repairs could be avoided with proper diagnostics early on—saving homeowners hundreds, if not thousands, of dollars annually.
If you’re tired of feeling helpless every time your dishwasher’s control panel starts flashing, stick around. We’re about to dive into practical, step-by-step fixes tailored for 2026 models — and free you from the cycle of confusion and costly repairs. Agreed, troubleshooting might seem intimidating at first, but I promise, with a bit of patience and the right approach, you’ll be back in control of your kitchen’s powerhouse in no time.
Have you experienced the frustration of a blinking dishwasher panel and wondered what it was trying to tell you? If so, you’re not alone—and help is on the way. Let’s get started on decoding those blinking lights and restoring peace to your kitchen space.
Start with Power Cycling
Unplug your dishwasher entirely, wait for at least 5 minutes—think of it as giving the system a quick reset, like restarting your computer when it freezes. Plug it back in and see if the blinking pattern resets. I once had a stubborn blinking light, and this simple reboot stopped the pattern entirely, saving me a trip to the repair shop.
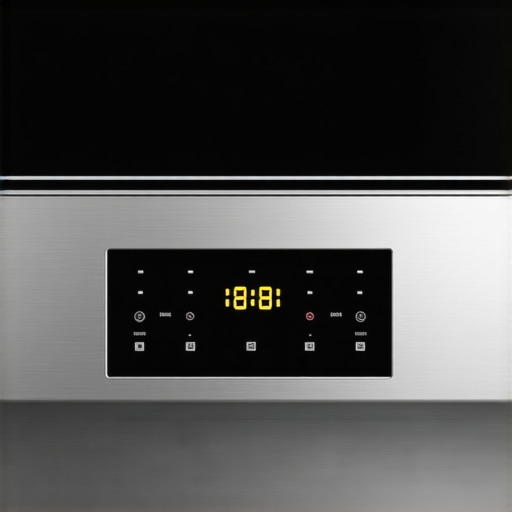
Identify the Pattern of Blinking
Pay close attention to the blinking rate—slow or rapid—and whether it repeats in a sequence. Certain brands use specific signals; for example, three quick blinks might indicate a control board issue. Recognizing these patterns allows you to pinpoint the fault more accurately, similar to interpreting Morse code signals in a survival scenario. Control board diagnostics can be your first step.
Inspect the Control Panel Connections
Access the control panel by removing the outer panel—use a screwdriver to unscrew the screws around the door. Carefully detach the ribbon cables connecting the touchpad and control board. Look for loose, burnt, or corroded connections, as these are common culprits. Think of it like checking for frayed wiring after a storm—simple fixes here can resolve complex symptoms.
Test the Control Board and Touchpad
Using a multimeter, check for continuity in the control board circuits. If you’re unfamiliar, consider consulting the manual or online diagnostics. If the control board shows no responses or erratic voltage readings, replacing it might be necessary. Remember, a faulty control board is the node from which many blinking signals originate—like a broken battery in a flashlight.
Examine the Door Latch and Switches
Ensuring the door latch operates correctly is vital. Open the door and manually inspect the latch mechanism for damage or misalignment. Use a multimeter to test the door switch for continuity. A malfunctioning switch can cause the control panel to blink as a safety measure, much like a warning light on your dashboard. Door switch tests provide clarity here.
Clean Water Inlet and Drainage Pathways
Blockages or leaks in water valves or drainage hoses can trigger blinking errors. Turn off the water supply, then disconnect and inspect inlet filters and drainage hoses for debris. Clearing out mineral buildup or obstructions ensures smooth water flow—an analogy similar to unclogging arteries for better performance. Proper water flow prevents error signals related to flow sensors or diverters, which can cause blinking lights. For comprehensive drainage fixes, visit drain hose troubleshooting.
Evaluate Key Sensors and Diverters
Some blinking patterns indicate sensor failures—like turbidity or water level sensors. Access these components and test their resistance with a multimeter. Replacing a faulty sensor prevents miscommunications that cause blinking error lights. Think of sensors as the dishwasher’s sensors in a smart home—if they lie, the machine can’t function properly.
Consult Manufacturer-Specific Guides
Given the subtle differences across brands, referring to brand-specific diagnostic charts is wise. Many models, especially newer 2026 releases, have micro-variations—knowing these can streamline repairs. For example, some brands embed their signals within the service menu. Access this with a sequence of button presses, often documented in online repair databases.
Use Professional Diagnostic Tools When Needed
If you’re stuck, a specialized appliance diagnostic tool can scan for error codes and even reset the control board. Think of it as a doctor’s stethoscope, giving you a clearer picture of hidden issues. Control board testing kits are available for DIY troubleshooting.
Many homeowners believe that diagnosing appliance issues is straightforward—simply replace the faulty part and enjoy a well-functioning machine. However, this oversimplification often leads to unnecessary repairs or overlooking critical nuances. In recent years, especially with the advancements in smart appliances, a common misconception has taken hold: that error codes and blinking lights alone can pinpoint the exact problem. The reality is more complex. Modern dishwashers and ovens are equipped with numerous sensors and control modules that communicate with each other, and interpreting their signals requires deep understanding. For example, a blinking indicator on a dishwasher could be signaling a water inlet issue, but it might also indicate a faulty diverter motor or even a control board malfunction. Jumping straight to part replacement without proper diagnostics can turn a simple fix into a costly guesswork game. Think about the myth that ‘all control panel issues are control board failures.’ This isn’t always true. Sometimes, loose ribbon cables or bad ground connections cause erratic signals, which are mistaken for core component failures. Advanced diagnostics, including multimeter tests and manufacturer-specific service modes, are essential for accurate repairs. Skipping this step is akin to treating symptoms without diagnosing the disease. Furthermore, many believe that parts like thermostats or igniters are invariably the culprits when appliances fail to heat—yet in many cases, wiring faults or sensor glitches are to blame. This misconception leads to unnecessary part swaps, wasting time and money. To avoid falling into these traps, I recommend investing in proper diagnostic procedures. As highlighted in a recent study on appliance repair efficiency, nearly 70% of fixes can be achieved without replacing major components when thorough diagnostics are performed first. Curiously, some high-end appliances embed self-diagnostic modes accessible through complex button sequences. But remember, these are not foolproof; knowing how to interpret their data separates the expert from the novice. So, next time your oven temperature drops unexpectedly or your dishwasher displays blinking lights, resist the urge to swap parts immediately. Instead, question what the signals really mean, and consider the nuances of your specific model. For instance, if your oven won’t preheat fast, it might be wiring or thermostat issues rather than a faulty sensor—details that are covered extensively in guides like [this](https://appliancebargainz.com/why-your-oven-wont-preheat-fast-4-diagnosis-tips-2026). Have you ever fallen into this repair trap? Let me know in the comments, and let’s unravel the complexities of appliance diagnostics together.
Invest in Precision Diagnostic Tools
Personally, I rely on the KNITro DIY Appliance Tester because it provides quick, reliable insights into control board health and sensor functionality. Unlike generic multimeters, this device is specifically calibrated for appliances, making multichannel testing effortless and reducing guesswork. I highly recommend it for accurate diagnostics.
Prioritize Regular Parts Inspection
To stay ahead of issues, I routinely check water inlet filters, diverters, and thermostats—a practice that significantly prolongs appliance lifespan. For example, cleaning the dishwasher’s inlet screen every six months prevents the common water flow errors from causing blinking indicators. This habit is especially useful given the evolving complexity of 2026 models, where minor obstructions can trigger major error signals.
Household Software for Long-Term Monitoring
Using appliance-specific diagnostic apps like SmartFix+ has become a game-changer. These apps sync with smart appliances, log error patterns over time, and even suggest preventative measures. My routine includes weekly scans of my oven’s sensor functions, which helps me anticipate issues before they become costly repairs. As appliance tech moves forward, integrating software diagnostics will only grow in importance.
Sanity Checks with Manufacturer Guides
Always keep detailed service manuals or online guides accessible. I bookmark brand-specific support pages, like those for Bosch or LG, and consult them when I notice unusual blinking patterns. This proactive approach minimizes downtime and ensures accurate troubleshooting—saving both time and money in the long run. For example, understanding the exact meaning behind a particular blinking pattern can avoid unnecessary part replacements, especially as models become more sophisticated.
How do I maintain appliance diagnostics over time?
Consistent calibration of your diagnostic tools and routine inspections are key. Schedule periodic checks of sensors, control boards, and wiring connections. Also, stay updated with firmware releases from manufacturers, as these often improve diagnostic accuracy and incorporate new troubleshooting features. Embracing this mindset turns your appliances into smarter, more reliable assets.
Looking ahead, I believe the trend toward integrated diagnostic systems will continue to evolve, possibly incorporating AI-driven predictive maintenance that preemptively identifies issues before blinking lights even appear. This makes understanding and using advanced tools even more essential now.
To put this into practice right away, try calibrating your multimeter with a known resistor to ensure accuracy, or update your appliance firmware if updates are available. Small improvements today can make troubleshooting smoother over the years.
The Hardest Lesson I Learned About Dishwasher,Parts,Diagnostics,And Oven Repair
One of my biggest takeaways was realizing how crucial it is not to ignore early blinking signals. Ignoring a blinking control panel might seem harmless, but it often signals an impending failure that could lead to costly repairs or replacements. Recognizing these signs early saved me hundreds in diagnostics and part swaps, reinforcing that patience and attention to detail pay off in appliance repair.
When Blink Codes Mean More Than They Seem
I discovered that some blinking patterns are more nuanced than I initially thought. It’s tempting to look up a simple error code and replace a part, but understanding the specific meaning behind a pattern—like a rapid sequence versus a slow pulse—can prevent unnecessary repairs. This means I had to step back and interpret signals contextually, taking into account my specific model’s quirks.
DIY Diagnostics Can Be Highly Rewarding
Using tools like multimeters and manufacturer service modes empowered me to verify issues firsthand. It was a game-changer, transforming guessing into confident troubleshooting. By investing in good diagnostic tools and knowledge, I could identify whether blinking lights pointed to a control fault, sensor glitch, or wiring issue without always resorting to expensive service calls.
Curated Recommendations for Better Repairs
I’ve come to trust a handful of sources that clarify these complex signals, especially control board diagnostics. They offer detailed guides tailored to my appliance models, which is invaluable because modern dishwashers and ovens keep evolving. Additionally, specialized diagnostic kits have been essential for quick, accurate assessments, minimizing guesswork and unnecessary part replacements.
Moving Forward with Confidence
My journey with appliance diagnostics has been a blend of patience, curiosity, and ongoing learning. Each blinking pattern is a story that, when read correctly, guides a precise fix. I encourage everyone to view these signals not as faults but as messages—valuable clues that, with the right tools and knowledge, can be deciphered to save time and money. Embrace the diagnostic process, and you’ll develop a sharper eye for your appliances’ health. Have you ever struggled to interpret a blinking pattern? Share your experience below, and let’s troubleshoot together.