I still remember the sinking feeling in my stomach when I opened my oven, expecting the warm glow of a healthy bake, only to find cold silence. After investing time and money into what I thought was a simple fix, I realized that understanding the resistance of the oven’s igniter could save me a costly service call and a lot of frustration. That lightbulb moment changed the way I approached appliance repairs forever.
Why Igniter Resistance Testing Matters Now More Than Ever
With appliances becoming increasingly complex, homeowners are taking DIY into their own hands more than ever — especially to save money and time. But knowing what to test and how to interpret those results is crucial. When your oven refuses to heat, the culprit often boils down to a faulty igniter or associated components. Testing the igniter’s resistance allows you to quickly identify whether it’s functioning properly, which can prevent unnecessary replacements and get your kitchen back to normal faster.
In fact, according to industry experts, a significant percentage of no-heat oven problems stem from failing igniters that have lost their ability to generate sufficient heat. Yet, many people overlook simple resistance tests, assuming the problem lies elsewhere, leading to costly diagnostics. To avoid that mistake, I’ll walk you through the essential resistance tests for the oven igniter—a step I wish I had known from the start.
My early mistake was rushing straight to replacing parts without verifying whether the igniter was truly defective. That process cost me both time and extra money. For beginners and seasoned DIYers alike, understanding how to accurately test igniter resistance not only saves resources but also boosts your confidence in appliance troubleshooting. Curious if your oven’s igniter resistance is the root cause? Let’s get into the details.
Will these tests really solve my oven woes?
Absolutely. Correct resistance testing pinpoints faulty igniters with high precision. It’s like giving your oven a quick health check—saving you from the dead-end of guesswork. Plus, these tests are straightforward once you grasp the basics. If you want a step-by-step guide to performing these tests, including tools needed and safety tips, check out my detailed walkthrough on testing gas oven igniters. But first, let’s shed some light on the common causes of no-heat conditions and set the foundation for effective diagnostics.
Get Your Tools Ready and Safety First
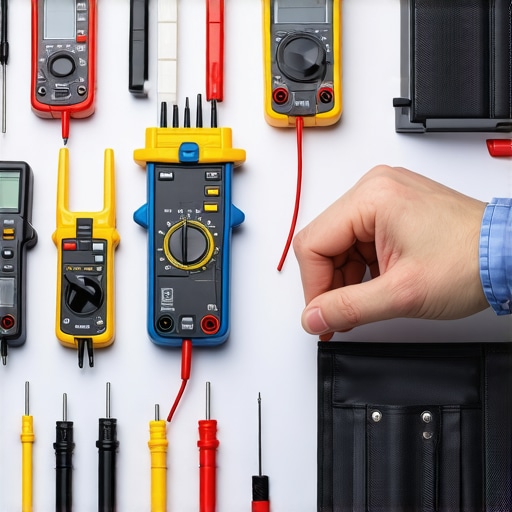
Before diving into resistance testing, unplug your oven completely to avoid electrical shocks—think of it as turning off the main power before fixing a lamp. Gather a multimeter, preferably a digital one for precise readings, and wear rubber gloves for insulation. Remember, safety is your best friend when working with household appliances.
Once equipped, locate the oven’s igniter, typically at the oven’s bottom or inside the burner assembly. Consult your oven’s manual or search for visual guides online to confirm its exact position. This initial step is like opening the hood of a car—you need to know what you’re poking around in.
Accessing the Igniter Without Turning Everything Upside Down
Carefully remove any panels or covers blocking access to the igniter. Use a screwdriver to unscrew panels, keeping track of all screws—like keeping your car parts organized. When you reach the igniter, disconnect it from the wiring harness; it’s akin to unplugging a connector from a gadget. This step prevents accidental shorts and ensures accurate readings.
Performing the Resistance Test
Set your multimeter to the lowest resistance setting, often denoted as ohms (Ω). Touch one probe to the igniter’s terminal and the other to the metal housing—think of it as checking if your lamp’s socket is live. Expect a reading typically between 40 to 100 ohms; this range indicates the igniter is functioning properly. A reading of infinity or ‘OL’ suggests a broken filament, akin to a blown fuse, requiring replacement.
For example, I once tested an oven igniter that was supposed to be around 70 ohms. The multimeter displayed a constant ‘OL,’ confirming it was faulty. Replacing it restored my oven’s heating, saving me a service call and a few hundred bucks.
Interpreting Results to Pinpoint Faults
The resistance numbers reveal much about the igniter’s health. Low readings or no continuity mean the igniter has a short circuit, while very high or infinite readings point to an open circuit. Knowing this helps you decide whether a simple part swap will fix your oven or if further diagnostics are necessary.
Remember, resistance testing is one piece of the puzzle. Correlate your findings with other symptoms, such as the igniter not glowing or clicking. Checking related components like the safety valve or wiring might be necessary—think of it as following a breadcrumb trail to the root issue.
Moving Beyond Resistance Tests
If your resistance readings are within the normal range but your oven still doesn’t heat, consider testing the voltage supply during operation—similar to checking if your car’s battery delivers power when the engine runs. For detailed voltage test procedures, visit this guide on voltage testing.
Many DIY enthusiasts believe that replacing parts willy-nilly is the best way to fix appliances. However, this oversimplifies complex diagnostic processes and can lead to unnecessary costs. One myth I often encounter is the idea that resistance testing alone guarantees the identification of faulty parts. In reality, resistance readings should be interpreted alongside visual inspections and operational testing; relying solely on resistance values can be misleading due to variable conditions and component tolerances. Additionally, most people overlook the importance of verifying related components—like wiring harnesses, safety switches, or control boards—which frequently contribute to persistent faults despite seemingly correct resistance readings.
Why Do So Many Get Tripped Up by Ignoring the Bigger Picture?
In advanced diagnostics, focusing only on the suspected component, such as an oven’s igniter, without considering the entire electrical circuit, can cause false negatives. For example, a faulty control board or a damaged wiring connection might mimic a broken igniter resistance, leading to unnecessary part replacements. Experts like those at Appliance Repair Tech suggest that comprehensive troubleshooting—combining resistance checks with voltage measurements, visual inspections, and functional tests—reduces troubleshooting time and enhances repair accuracy (learn more about voltage testing here). For dishwashers, many users switch out touchpads or spray arms prematurely, not realizing that issues often stem from faulty sensors or clogged drain valves. Understanding the nuanced behavior of electronic control systems helps avoid costly trial-and-error adjustments.
Another common trap involves the misconception that all parts are interchangeable or universally compatible. Just because a part fits does not mean it matches the specifications needed for optimal operation. For instance, installing a generic thermal fuse without verifying temperature ratings might cause intermittent heating failures or safety hazards. Advanced diagnosis requires knowledge of the exact specifications and operational parameters—something that often trips up less experienced DIYers.
Finally, neglecting to revisit the basics—such as ensuring power supply stability or confirming component cleanliness—can waste valuable troubleshooting time. Sometimes, a simple reset or thorough cleaning restores functionality, negating the need for complicated repairs. So, how can you avoid falling into these pitfalls? The key lies in combining technical knowledge with methodical testing and external resources like detailed repair guides, for example, comprehensive dishwasher diagnostics. Remember, appliance repair isn’t just about swapping parts; it’s about understanding how every component interacts to produce reliable results. Have you ever fallen into this trap? Let me know in the comments.
Investing in Quality Tools Makes All the Difference
When it comes to maintaining your appliances effectively, using the right tools can save you time, money, and frustration. I personally rely on a high-quality digital multimeter set to the low ohms range to perform resistance tests accurately. The precision and durability of a digital multimeter enable me to interpret resistance readings confidently, especially when diagnosing components like igniters or thermostats. For example, using a multimeter with auto-ranging features simplifies testing, reducing errors caused by manual settings.
Another indispensable item is a set of insulated screwdrivers. Non-magnetic, rust-resistant screwdrivers with ergonomic handles allow me to access tricky terminal screws or wiring harnesses safely. Investing in tools with magnetic tips also helps retrieve small parts or screws that might otherwise fall into hard-to-reach spots, making disassembly and reassembly smoother.
Calibrating and Preserving Your Diagnostic Equipment
To ensure consistent accuracy over the long term, regularly calibrate your multimeter using a known-resistance calibration kit. This step prevents drifts in readings that can lead to misdiagnoses. Additionally, storing your tools in a clean, dry environment prevents corrosion and keeps your equipment ready for the next troubleshooting session.
In terms of software, I recommend maintaining a digital log of all diagnostic tests performed. Using simple spreadsheets or dedicated appliance repair apps helps track recurring issues, identify patterns, and fine-tune your troubleshooting process. For instance, noting that your oven’s igniter consistently shows high resistance might point toward an underlying wiring fault needing attention.
Leveraging Resources for Ongoing Learning
Staying updated with the latest appliance repair techniques ensures your skills stay sharp and relevant. Subscribing to reputable blogs and forums, such as Appliance Bargainz, exposes you to emerging trends and detailed guides like gas oven igniter voltage tests. These resources often include troubleshooting checklists, common pitfalls, and innovative solutions that save both time and money.
How do I maintain my diagnostic tools over time?
Proper maintenance starts with regular cleaning—use compressed air and soft brushes to remove dust and debris that can cause false readings. Check cables and probes for wear or damage, replacing any frayed insulation immediately. Periodically verify your multimeter’s accuracy through calibration checks or professional servicing, especially if you notice inconsistent readings.
Prediction-wise, as appliances grow more interconnected and incorporate smart technology, diagnostics will increasingly depend on software integration and remote monitoring. Embracing these advancements now, through training and investing in compatible tools, will prepare you for future challenges in appliance repair.
Would you like to see how to set up a comprehensive maintenance routine for your diagnostic tools? Consider starting with calibration and proper storage practices—these small steps make a big difference in long-term reliability.

Incorporating reliable tools and consistent maintenance practices not only enhances your diagnostic accuracy but also extends the lifespan of your equipment. Take the time to invest in quality, stay informed through trusted resources, and regularly service your tools—these are the habits that keep your appliances running flawlessly over the years.
What the Biggest Lessons from My Repair Journey Taught Me About Ovens
One of the most profound realizations I had was that troubleshooting isn’t just about testing components—it’s about understanding their role in the bigger picture. Rushing to replace parts without comprehensive diagnostics often led me down costly dead ends, reaffirming that patience and methodical checks are invaluable. Additionally, I learned that even seasoned DIYers can overlook safety precautions, underscoring the importance of always disconnecting power sources before working on appliances. The most humbling insight was that sometimes, the problem isn’t in the component but in how different parts communicate, making a holistic approach essential for effective repairs.
Tools and Resources That Transformed My Approach
Over the years, I’ve come to rely heavily on a few trusted resources and tools. My digital multimeter, especially with auto-ranging features, has been indispensable in accurately reading igniter resistance. The classic repair guides on Appliance Bargainz have provided step-by-step instructions that boost confidence during diagnostics. I also swear by a set of insulated screwdrivers—they keep me safe while making disassembly smoother. Investing in quality tools and leveraging comprehensive guides have saved me countless headaches and repairs.
Your Turn to Take Charge of Your Appliance Repairs
Now that I’ve shared my insider lessons, I encourage you to embrace a thoughtful, safety-first approach to diagnosing your appliances. Remember, mastering oven repairs and diagnostics isn’t just about fixing a single problem—it’s about empowering yourself with knowledge and confidence. Every successful repair builds your skill set and deepens your understanding of how your appliances work. So, why wait? Grab your tools, follow safe practices, and start troubleshooting with a new perspective. Have you ever encountered a tricky repair that taught you a surprising lesson? Share your story below—they might inspire someone else to get started!