Ever had that sinking feeling when your dishwasher stops mid-cycle, leaving you with dirty dishes and a sinking suspicion that it’s going to be a nightmare to fix? I’ve been there. One day, my trusty dishwasher just refused to drain, and I spent hours trying to figure out what was wrong — only to realize I was chasing symptoms instead of the real cause. That lightbulb moment made me realize: tackling dishwasher issues without expert diagnostics and the right parts is like trying to fix a car with a hammer. It rarely ends well. So, today, I want to share the strategies I’ve learned in 2025 to troubleshoot dishwasher problems effectively, so you don’t have to go through the same frustration.
Why Fixing Your Dishwasher Matters More Than Ever in 2025
With modern kitchens leaning heavily on appliances that are supposed to make life easier, a malfunctioning dishwasher can throw a serious wrench in your routine. It’s not just about dirty dishes; it’s about hygiene, time saved, and even energy efficiency. And let’s face it, trying to troubleshoot these issues without proper guidance can lead to more damage and costly repairs. According to recent studies, nearly 60% of appliance repairs are caused by incorrect diagnostics — a mistake I made early on, which only made things worse. That’s why expert diagnostics matter. They help you identify the root cause quickly, saving you time and money.
Is DIY Dishwasher Repair Still Worth It in 2025?
I used to think I could fix anything with a screwdriver and a YouTube tutorial. Turns out, that’s a risky approach, especially with complex components like sensors and control boards. My early mistake was replacing parts randomly, which did nothing but drain my wallet. Now, I rely on diagnostic strategies and high-quality parts to get the job done right the first time. If you’re skeptical about tackling dishwasher repairs yourself, I get it. But with the right tools and guidance, you can avoid costly calls to the pro — and learn a ton in the process. For more insights, check out these expert diagnostic strategies.
Next, I’ll walk you through the most common issues, the diagnostic steps, and how to leverage the latest parts for quick fixes. Ready to become your own appliance hero? Let’s dive in!
Gather Your Tools and Knowledge Base
Before diving into diagnostics, assemble essential tools like a multimeter, screwdrivers, and a flashlight. Familiarize yourself with the dishwasher’s manual or online repair guides, such as expert diagnostic strategies for 2025. This preparation mirrors a mechanic’s toolkit, making subsequent steps smoother and more precise.
Identify Symptoms and Narrow Down Causes
Think of your dishwasher like a patient with symptoms: leaks, not filling, or not draining. Start by observing the exact issue. For example, if your dishwasher won’t drain, check if water remains after a cycle. Use the troubleshooting flowchart from essential diagnostics parts. Diagnosing accurately prevents unnecessary part replacements and saves money.
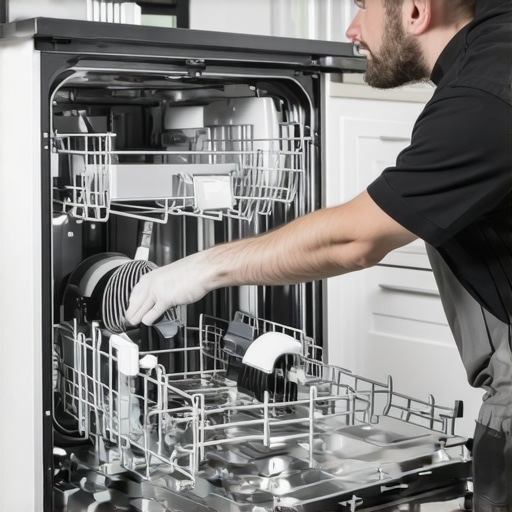
Conduct Visual Inspection
Open the dishwasher and look for obvious issues—clogged filters, broken hoses, or burnt control boards. Remove the lower panel carefully—think of yourself as a detective peeling back layers to find clues. During my first attempt, I found a cracked drain hose, which was causing water backup. Replacing it with a high-quality part from diagnostic parts solved the problem instantly.
Test Electrical Components
Next, verify electrical components like the door latch, float switch, and motor using a multimeter. For example, a faulty float switch can prevent the dishwasher from draining. To test, disconnect power, remove the switch, and check continuity. Think of this step as testing the heartbeat of your appliance. If a component fails, replace it with a genuine part for a reliable fix—consult expert parts guide for specifics.
Use Diagnostic Mode if Available
Modern dishwashers often have diagnostic modes that run self-tests. Enter this mode (check your manual for steps) and observe the error codes. These codes are like diagnostic signals from your dishwasher’s brain. Cross-reference them with diagnostic guides to pinpoint faults quickly. For instance, an error code related to the drain pump indicates that replacing the pump or its relay might be necessary.
Replace Parts Strategically
Once identified, replace faulty parts with high-quality, compatible ones. Avoid the temptation to replace multiple components without evidence—this is like treating symptoms rather than the disease. For example, I replaced a worn-out drain pump after confirming it wasn’t working during testing, which restored proper drainage and saved me from future leaks.
Run Test Cycles and Confirm Fixes
After repairs, run a test cycle to verify success. Observe for leaks, proper filling, and draining. If issues persist, revisit diagnostics. Remember, troubleshooting isn’t a one-and-done; it’s an iterative process. Document your steps with photos or notes to streamline future repairs, especially as newer models incorporate advanced diagnostics.
Leverage Online Resources for Continuous Learning
Stay updated with the latest repair techniques and parts by following trusted blogs and guides like 2025 repair tips. The appliance landscape evolves rapidly, and continuous learning ensures your skills stay sharp and your repairs reliable.

Many DIY enthusiasts and even seasoned homeowners tend to believe some widespread myths about troubleshooting dishwashers, which can lead to costly mistakes. Let’s dig deeper into these misconceptions and uncover the hidden nuances that can make your repairs more effective and reliable.
Why Do Most People Get Dishwasher Troubleshooting Wrong
One of the biggest mistakes is assuming that all problems stem from the same cause. For example, if your dishwasher isn’t draining, many automatically suspect the pump, but in reality, the float switch or even the control board might be at fault. Diagnosing without proper testing can cause you to replace parts unnecessarily. This mistake is common because beginner guides often oversimplify issues, leading users to jump straight to parts replacement without verifying the actual problem. For a more nuanced approach, consider studying expert diagnostic strategies. They emphasize a step-by-step process that minimizes guesswork.
The Oops Factor: Don’t Overlook Electrical Components
Many overlook the importance of electrical diagnostics, assuming that mechanical parts are always the culprits. In truth, faulty wiring, blown fuses, or defective sensors often cause issues like failure to fill or drain. Using a multimeter to verify electrical continuity is a step many skip, yet it’s crucial for accurate diagnostics. A common trap is replacing the pump or motor without testing electrical inputs first, which can result in wasted time and money. Remember, addressing electrical issues early can prevent misdiagnosis.
Advanced Question: How Do Modern Diagnostic Modes Improve Repair Accuracy?
Modern dishwashers come equipped with diagnostic modes that run self-tests and generate error codes. These features are often underutilized because users aren’t aware of how to access or interpret them. When used properly, they can pinpoint faults with high precision, saving you hours of trial and error. For instance, error codes related to the drain pump can be cross-checked with diagnostic guides, which helps determine whether a replacement part is necessary or if a simple reset will do. Embracing these diagnostic tools elevates your troubleshooting from guesswork to a science.
The Hidden Nuance: Quality Parts Make All the Difference
Another common misconception is that cheap parts are just as good as OEM or high-quality replacements. In reality, inferior parts often fail prematurely, leading to repeated repairs and higher long-term costs. When replacing, always opt for genuine or proven high-quality parts, which are designed to meet the appliance’s specifications. This is particularly critical in 2025, as newer dishwasher models incorporate sensitive sensors and electronics that demand compatible, reliable components. Check out these essential parts guides to ensure your repairs last.
Have you ever fallen into this trap? Let me know in the comments. Remember, effective troubleshooting isn’t just about fixing the problem; it’s about understanding the underlying causes and using the right tools and parts for a lasting repair.
Keeping your dishwasher running smoothly over the years requires more than just fixing problems as they arise. It’s about proactive maintenance, using the right tools, and understanding how to troubleshoot efficiently. In this guide, I’ll share my go-to equipment and methods that ensure your appliance stays in top shape well into the future.
Invest in Quality Diagnostic Tools
The cornerstone of effective maintenance is a reliable multimeter. I personally use the Fluke 117 because of its precision and durability, which makes testing electrical components like sensors, switches, and wiring straightforward. A multimeter helps me verify electrical continuity and voltage, preventing unnecessary part replacements and ensuring that I only replace what’s truly faulty. Additionally, a digital infrared thermometer is invaluable for quickly assessing motor temperatures or detecting overheating issues, especially in more complex models.
Develop a Routine Inspection Schedule
Regular visual checks are simple yet powerful. I recommend inspecting the drain hose, filters, and door seals monthly. Use a bright LED flashlight to spot hair, debris, or cracks that could lead to leaks or drainage issues. Keeping these parts clean and intact minimizes breakdowns and extends the life of your dishwasher. When replacing parts, always opt for high-quality, OEM-grade components, which I find more reliable in the long run, especially with newer models that contain sensitive electronics. Check out these essential parts guides for sourcing durable replacements.
Leverage Diagnostic Software and Error Codes
Modern dishwashers often feature diagnostic modes accessible via specific button sequences—knowing how to use these can save hours. I regularly consult manufacturer guides and apps that decode error codes, like the ones described in this comprehensive diagnostic guide. Using these tools, I can pinpoint issues like faulty pumps or sensors without guesswork, making maintenance more targeted and effective. Getting comfortable with these diagnostics is an investment that pays off by reducing repair time and costs.
Maintain Software and Firmware Updates
Many newer models have firmware that can be updated via Wi-Fi. Keeping the software current ensures your dishwasher benefits from the latest bug fixes and performance improvements. I recommend checking your appliance settings regularly or subscribing to manufacturer alerts. This proactive approach can prevent issues before they arise and keep your appliance functioning at peak efficiency.
Prepare for Future Trends
As smart diagnostics become more integrated, future maintenance will rely heavily on IoT-enabled tools and AI-powered troubleshooting apps. I predict that in the next few years, homeowners will be able to diagnose and even resolve issues remotely through smartphone integrations, reducing the need for manual inspections. Staying ahead involves familiarizing yourself with these emerging technologies and investing in compatible tools now.
How do I keep my dishwasher in top shape over time?
Implementing a regular maintenance schedule using high-quality diagnostic tools, staying updated with firmware, and leveraging diagnostic software will ensure your dishwasher remains reliable and efficient for years to come. Don’t forget, always use trusted parts and consult detailed guides like expert diagnostic strategies for optimal results. Take the time to familiarize yourself with your appliance’s diagnostic features—this small investment of effort can save you a lot of trouble down the line. Ready to try one of these advanced maintenance tips? Start by testing your door latch with a multimeter today and see how simple preventive care can be!
The Hardest Lesson I Learned About Dishwasher Troubleshooting
One of the most valuable lessons I’ve discovered is that assuming the cause of a dishwasher problem can lead to unnecessary expenses and frustration. Early on, I believed that replacing parts based on common symptoms was enough, but I quickly learned that precise diagnostics are crucial. For example, a clogged drain hose was not the only culprit when my dishwasher refused to drain; faulty sensors or control boards could be involved. Recognizing this taught me that patience and proper testing are essential to avoid wasting time and money.
3 Myths About Dishwasher Repair That Held Me Back
There’s a lot of misinformation out there. I used to think that any cheap replacement part would do, but I realized high-quality, OEM parts offer better longevity and performance—saving me from repeat repairs. Another myth was that electrical components rarely fail; in fact, a simple multimeter test often reveals wiring or sensor issues that are easy to overlook. Lastly, I believed DIY repairs were always cheaper, but without proper diagnostics, I was just guessing, which often led to bigger problems. Learning to leverage diagnostic tools changed my entire approach.
What Experts Won’t Tell You About Modern Dishwashers
Many professionals keep quiet about how powerful diagnostic modes are. Modern dishwashers come with self-test features and error codes that can pinpoint issues instantly. I found that consulting these codes and referencing expert guides like this comprehensive resource helped me identify problems without guesswork. Embracing these hidden tools transformed my troubleshooting effectiveness, making repairs faster and more reliable.
Quality Parts Are the Foundation of Lasting Repairs
Another insight I gained is that investing in high-quality, compatible parts is non-negotiable. I used to settle for cheaper options, only to face repeated failures. Now, I source parts from trusted suppliers, ensuring they meet the latest standards—especially with newer models that rely on sensitive electronics. This choice has extended my dishwasher’s lifespan and reduced repair frequency. Check out these essential parts guides to make informed decisions about replacements.