Have you ever gone to load your dishwasher only to discover that the door just won’t stay open or suddenly collapsed when you tried to close it? That lightbulb moment of frustration hit me hard when I first experienced it. One quick glance, and I saw the spring was completely snapped — my heart sank. It was a small part, but its absence turned my long-overdue dishwashing routine into a frustrating puzzle.
The Big Deal About a Broken Dishwasher Door Spring
When that spring breaks, everything changes. The door becomes unbalanced, potentially leaking water during cycles, or worse, failing to stay shut when you need it to. At first, I was tempted to ignore it, thinking, “It’s just a tiny spring, surely I can live with this.” But then I realized that ignoring the problem could lead to more costly damage — like water leaks or strain on other components — and that’s just not worth risking.
In this post, I’ll walk you through why your dishwasher door spring might have snapped unexpectedly, how to diagnose the issue, and, most importantly, how you can fix it yourself. Yes, you can save money and time by tackling this repair on your own. Ready to get your dishwasher back in shape? Let’s dive into the what’s and why’s so you can handle this dilemma confidently.
Is Replacing a Dishwasher Door Spring Actually Worth the Effort?
One mistake I made early on was underestimating how critical that tiny spring really is. I thought, “It’s just a spring, how hard can it be?” Turns out, not paying attention to it could make you face bigger problems down the line. That’s why I recommend checking out detailed guides on dishwasher diagnostic tips. Knowing what’s involved beforehand makes all the difference, especially if you’re new to appliance repairs.
So, if you’ve noticed your dishwasher door suddenly acting up, don’t ignore it. It’s a sign that something needs your attention, and with the right approach, you can fix it quickly. Next, I’ll share how to identify whether the spring is the real culprit, and I’ll guide you through the repair process step-by-step.
Remove the Dishwasher Panel Carefully
Start by disconnecting your dishwasher from power to ensure safety. Use a screwdriver to remove the outer panel, exposing the door mechanism. Remember, panels can be delicate; gently pry without forcing to avoid damage. I once cracked a panel because I wasn’t gentle enough—take your time and work slowly. Once accessible, locate the broken spring, which typically attaches between the door and the frame. Use a putty knife or a flat-head screwdriver to pry off any retaining clips holding the panel in place, then gently set the panel aside.
Identify and Gather the Correct Replacement Spring
Check your dishwasher’s model number to find the exact spring type. Springs come in different sizes and tension ratings. To simplify, bring the broken spring to the hardware store or check online for equivalents. I recommend reviewing this guide for detailed part matching. Using an incorrect spring can cause uneven door operation or strain on other components. Having the right part beforehand prevents wasted time and repeated disassembly.
Attach the New Spring with Precision
Utilize a pair of pliers to stretch the new spring slightly if needed, as springs are often designed to be under tension. Carefully hook one end onto the designated pin on the door, then stretch and attach the other end to the frame. A good analogy is like hooking a bungee cord—you want it taut but not overstretched. During this process, I made the mistake of trying to force the spring into place, which could have caused injury or damage. Take slow, deliberate actions, and use gloves for grip security. Testing the door’s movement after attachment is crucial; it should open smoothly and stay in position as designed.
Smooth Operation Means You’re Done
Once the spring is attached, manually open and close the door several times. Watch for uneven movement or sagging, which indicate improper installation. Adjust the spring tension if the door feels too heavy or too light, which might involve repositioning the hooks. If everything operates smoothly, replace the panel carefully, ensuring no wires or components get pinched. Plug the dishwasher back in, and run a short cycle to verify the repair. I always find it helpful to record the process for future reference or if I need to consult parts diagrams again. This hands-on fix not only saves money but also gives you confidence in managing small appliance issues independently.Many DIY enthusiasts believe that fixing appliances like ovens and dishwashers is straightforward, but there’s more to it than meets the eye. A prevalent misconception is that all parts are interchangeable or that newer models don’t require specialized diagnostics. In reality, some parts look similar but have subtle differences that can lead to costly mistakes if not carefully identified. For instance, when replacing heating elements or thermocouples, using an OEM part versus an aftermarket component can significantly impact long-term performance, as highlighted in expert reviews on appliance parts.
Why do so many repair attempts fail despite following tutorials?
The answer often lies in overlooking minor nuances, such as the correct testing procedures or the hidden faults that trigger secondary issues. For example, a dishwasher not drying properly might seem like a heating element problem but could involve a faulty thermostat or a blocked spray arm—diagnosing these requires deep knowledge and precise testing, not just visual inspection. Effective diagnostics are essential to avoid chasing false leads, which can be a common trap for amateurs.
One trap I see often is the assumption that all faulty control boards are dead—many are actually recoverable with a simple reset or by replacing specific relays. This nuance can save you time and money, but it requires understanding how to interpret error codes correctly—something that’s not immediately obvious without experience. According to appliance repair experts, misdiagnosing can lead to replacing perfectly good parts or overlooking more critical faults. Oven diagnostics expertise can help prevent these costly mistakes.
Have you ever fallen into this trap? Let me know in the comments. Remember, the key to successful appliance repair isn’t just replacing parts—it’s understanding the subtle clues the appliance gives you, which often involve advanced diagnostics and a keen eye for detail.
Keep It Running: Essential Tools for Maintaining Your Appliances
Maintaining your dishwasher and oven over time requires more than just hope—it demands the right tools and a methodical approach. My personal favorite is an infrared thermometer, like the Etekcity Laser Grip 774. I use it constantly to check the surface temperatures of oven elements and dishwasher heating coils, helping me diagnose uneven heating issues before they escalate. This simple device provides quick, non-contact readings, saving time and reducing the need for dismantling components unnecessarily.
Another indispensable tool in my kit is a digital multimeter. Not just for electricity basics, a quality multimeter like the Fluke 117 allows me to troubleshoot wiring faults, test thermistors, and verify control board signals with precision. I rely on it to confirm whether a failed heating element is actually blown or if a sensor is sending incorrect data, guiding me toward accurate repairs and avoiding unnecessary parts replacements.
For diagnostic software, I recommend using manufacturer-specific apps when available. Certain oven models, especially newer ones, feature Wi-Fi connectivity that allows remote diagnostics and firmware updates. While I often work with standalone tools, I’ve found that keeping the latest software and firmware handy ensures I can troubleshoot more complex issues efficiently, ultimately extending the life of my appliances and preventing costly callbacks.
How do I maintain my appliances over time?
Implementing routine inspections every few months is vital. For dishwashers, I regularly check spray arms for mineral build-up and clean out spray nozzles using an old toothbrush dipped in vinegar. For ovens, I inspect and clean the thermal fuse and bake Elements—these components tend to degrade over time, affecting performance. Regular cleaning of filters and seals also prevents dirt buildup, which can lead to leaks or uneven operation.
Keeping detailed records of maintenance activities helps me track recurring issues and plan preventive measures. Additionally, using high-quality replacement parts from reputable sources ensures longevity, especially with items like heating elements and control boards. Advanced knowledge of parts compatibility, aided by comprehensive guides like the dishwasher diagnostic guide, prevents mismatched components that could cause further damage.
Looking ahead, automation and smart diagnostics are shaping the future of appliance maintenance. Smart sensors will detect irregularities early, alerting homeowners before major failures occur. I believe integrating these technologies with DIY tools will empower us to prolong appliance lifespan even further.
Ready to Level Up Your Maintenance?
Try using an infrared thermometer to check your oven or dishwasher heating elements today. This will give you instant insights into potential issues and help you decide whether a DIY repair is feasible or if professional intervention is necessary. Remember, staying proactive with maintenance not only keeps your appliances running smoothly but also saves you money in the long run. For more tips on diagnostics or parts replacements, don’t hesitate to reach out to me.
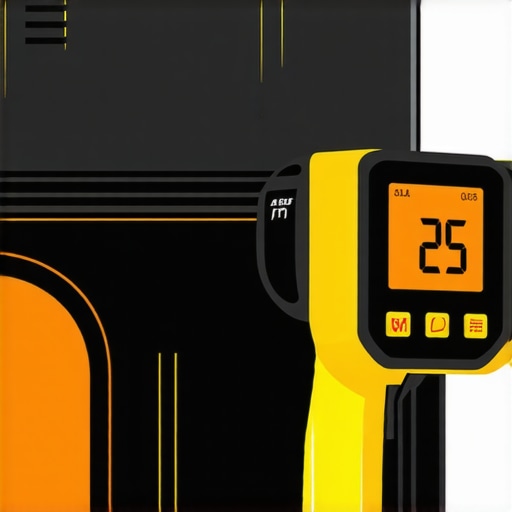 |An infrared thermometer aimed at oven heating element, highlighting temperature testing for appliance maintenance.|A precision infrared thermometer used to monitor temperature variations in oven parts for maintenance.
What the Toughest Fix Taught Me about Appliance Care
One of the most profound lessons I learned was that patience and meticulous attention to detail often trump tool globs and quick fixes. When I first attempted to replace a stubborn dishwasher hinge, rushing led to a small crack in the door panel—a mistake that could’ve been avoided with a calm, deliberate approach. This experience cemented the idea that understanding each component and diagnosing before diving in saves time and prevents costly errors.
Another insight dawned when I ignored recurring error codes on my oven. Initially, I thought resetting would fix everything, but digging into diagnostics guides revealed an intermittent sensor issue. Recognizing that different problems require tailored solutions—beyond surface fixes—has saved me a lot of hassle and money.
Finally, I learned that investing in the right tools, like a reliable multimeter and infrared thermometer, transforms DIY from guesswork into precise troubleshooting. When I replaced my oven’s heating element, these tools pinpointed the exact fault quicker than multiple trial-and-error attempts. Real mastery comes with the combo of practical knowledge and the right equipment, which I encourage everyone to build with resources like this comprehensive guide.
Tools and Guides That Turn DIY Challenges into Wins
My go-to resources include trusted online guides like this repair guide. It’s a treasure trove for identifying the right parts and understanding common fault patterns. Additionally, using a quality multimeter—like the Fluke 117—gives me confidence in testing electrical components without second-guessing the results.
For maintenance, a simple infrared thermometer such as the Etekcity Laser Grip 774 provides instant feedback on heating performance, highlighting issues before they escalate. Pairing these tools with patience and detailed tutorials makes DIY repairs not just feasible but gratifying. Resources like this diagnostic guide offer step-by-step methods that demystify the process and bolster confidence.
Remember, continuous learning through reputable sources transforms what initially feels intimidating into a set of manageable tasks. Whether it’s fixing a leaky inlet valve or troubleshooting error codes, the satisfaction of solving an appliance issue yourself is unmatched—and saves you money too.
Embrace the Challenge and Make It Your Own
Taking on appliance repairs is more than just a chore—it’s a path to independence and empowerment. Each fix teaches you something new, deepening your understanding of how these devices work and sharpening your skills for the future. Don’t hesitate to experiment, ask questions, and celebrate each successful repair as a step toward mastery. The more you dive into troubleshooting and fixing, the more confident you’ll become in keeping your appliances in pristine condition.
What DIY repair have you been hesitant to try but ending up mastering? Drop your story in the comments—your experience might motivate someone else to take their first confident step in appliance care!