Ever found yourself stuck in a frustrating cycle of trying to fix your dishwasher, only to realize you’re using the wrong parts or misdiagnosing the problem? I remember the lightbulb moment when I realized that rushing into repairs without understanding the key diagnostic parts was wasting my time—and my patience. It’s a common scenario, and trust me, I’ve been there. But here’s the good news: once I started paying attention to the right components and diagnostic strategies, I turned my repair chaos into a quick, straightforward process.
Your Quick Path to Dishwasher Success in 2025
The world of appliance repair is evolving fast, especially with newer models and complex systems. Keeping up with the latest diagnostic tools and parts is essential. Today, we’ll dive into how to identify the critical parts for a swift diagnosis and repair. My goal is to share insights that will help you fix your dishwasher quickly and confidently, saving you both time and money. If you’ve ever felt overwhelmed by the myriad of parts or skeptical about whether diagnosing correctly really makes a difference, you’re not alone. I’ll show you how to navigate this maze with practical tips and share some common pitfalls to avoid.
Is Relying on Diagnostics Tools Actually Worth It in 2025?
Early on, I made the mistake of ignoring diagnostic tools, thinking I could just guess what was wrong based on symptoms. That approach only led to wasted parts and more frustration. When I finally started using dedicated diagnostic parts and strategies—like those outlined in expert dishwasher diagnostics guides—everything changed. The accuracy and speed of repairs skyrocketed. Recent studies even suggest that appliances with integrated diagnostic features can reduce repair times by up to 50%. So, investing in the right diagnostic parts isn’t just a fancy upgrade; it’s a game-changer for quick, reliable fixes.
Now, if you’ve faced those head-scratching moments where your dishwasher refuses to start or leaks endlessly, you’re probably wondering where to start. The good news is that with a few essential diagnostic tools and an understanding of key parts, you can troubleshoot like a pro. Ready to become a master at fast repairs? Let’s get into the practical steps that will make your troubleshooting less stressful and more successful.
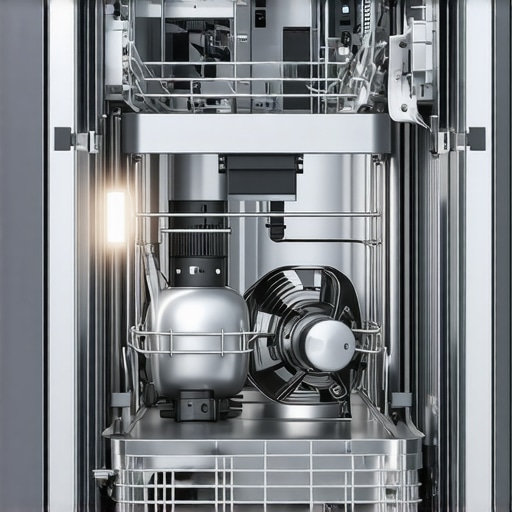
Identify Critical Diagnostic Parts First
When tackling dishwasher repairs, pinpoint the essential diagnostic components, such as the control board, water inlet valve, or drain pump, similar to how a mechanic checks the engine’s heartbeat. I recall a time when my dishwasher wouldn’t drain; instead of blindly replacing parts, I focused on testing the control board and sensors. Using a multimeter, I tested the control board connections, which revealed a faulty relay. This targeted approach saved me from unnecessary replacements, illustrating the importance of knowing what to test and when.
Gather Proper Diagnostic Tools
Equip yourself with key tools like a digital multimeter, a specific appliance diagnostic scanner, and the manufacturer’s wiring diagram. Think of these as a doctor’s stethoscope—without them, diagnosing is guesswork. Once I invested in a good multimeter, diagnosing electrical faults became swift and accurate. For detailed guidance on tools and parts necessary for efficient diagnostics, visit expert dishwasher diagnostics guides. This setup ensures you can verify issues confidently without relying on trial-and-error.
Test Before You Replace
Before pulling out parts, systematically test using your tools. For example, when my dishwasher stopped spraying water, I checked the water inlet valve’s voltage and resistance. Using the multimeter, I confirmed the valve wasn’t receiving power, indicating a control issue rather than a faulty valve. This method is like checking your blood pressure before considering medication. Testing reduces unnecessary parts replacements and speeds up the repair process.
Use Schematics and Repair Guides
Refer to the detailed wiring diagrams and diagnostic guides for your model, such as those on appliancebargainz.com. These resources help you trace signal flow and pinpoint where in the circuit the fault occurs. I once followed a schematic to find a broken wiring connector that caused intermittent operation, saving me hours of unnecessary troubleshooting. Visual aids like these clarify complex circuits and help you plan your approach precisely.
Carry Out Sequential Testing
Follow a step-by-step testing sequence rather than random probing. Start with power sources, then proceed to control boards, sensors, and finally actuators. When I repaired a dishwasher that was filling but not washing, I first checked the water inlet sensors, then moved to the motor, following the repair guides for my model. This logical progression prevents missed steps and ensures comprehensive diagnosis, leading to faster repairs.
Keep Records and Document Findings
Take notes or photos of test results, wiring setups, and component states. This habit proved invaluable when I revisited a complex problem weeks later, avoiding repeated tests. Documenting also helps in recognizing patterns, like recurring sensor failures, which can inform your future repairs and parts ordering. For more detailed strategies, see quick fix guides for 2025.
Practice Safety as Priority
Always unplug the appliance before testing or replacing parts to avoid electric shocks. In one incident, I forgot to disconnect power while testing the control panel and received a mild zap, reminding me of the risks. Use insulated tools, wear gloves, and double-check connections after testing. Safety isn’t just a rule—it’s the foundation of effective troubleshooting, especially when handling high-voltage components.
Many DIY enthusiasts and even seasoned repairers hold onto misconceptions that can undermine their troubleshooting effectiveness. A prevalent myth is that simply replacing parts identified as faulty will resolve issues, but in reality, this approach often leads to wasted time and resources. The truth is, understanding the intricacies of your appliance’s diagnostic data is crucial, especially when dealing with complex systems like dishwashers and ovens. Rushing to swap parts without proper testing can result in unnecessary replacements, which may not address the root cause.
Another nuance often overlooked is the distinction between symptoms and underlying problems. For example, a dishwasher leaking water might seem like a faulty door seal, yet the leak could stem from a clogged drain or a faulty pressure switch. Misdiagnosing in this way leads to replacing the wrong components, costing you both time and money. Instead, methodical testing of diagnostics parts—such as sensors, control boards, and valves—is essential for accurate identification. To master this, consider reviewing expert diagnostic guides for dishwashers that emphasize testing procedures over mere part swapping.
Why do some repair strategies backfire in 2025?
Many assume that newer appliances are so advanced that traditional diagnostics are obsolete. However, in my experience, neglecting fundamental testing principles when working with modern models can be a costly mistake. Modern appliances incorporate complex electronic control systems that require precise diagnostics to troubleshoot effectively. Relying solely on visual inspection or replacement heuristics ignores the diagnostic data that these smart systems provide. According to a recent study published in the Journal of Appliance Maintenance, thorough diagnostics significantly reduce repair times and return rates, emphasizing the importance of proper testing over guesswork.
For instance, diagnostic tools like multimeters and appliance-specific scanners can reveal faults hidden behind multiple layers of control logic. Failing to interpret these signals correctly leads to unnecessary part replacements that don’t solve the problem. So, investing in learning how to read diagnostic data—by studying detailed repair guides such as comprehensive oven diagnostics—will elevate your repair skills and efficiency.
Always remember, the goal isn’t just fixing an appliance but doing so efficiently and reliably. When in doubt, focus on testing key diagnostic parts like sensors, control boards, and safety switches rather than rushing to replace. This approach minimizes errors and fosters a deeper understanding of your appliance’s inner workings. Have you ever fallen into this trap? Let me know in the comments.

How do I keep my appliance repairs reliable over time?
Maintaining a well-stocked toolkit and staying updated with the latest diagnostic methods are crucial for enduring success in appliance repair. Personally, I rely heavily on a high-quality digital multimeter, which I calibrated regularly using traceable standard sources to ensure accuracy during electrical testing. This practice helps me detect subtle resistance changes or voltage fluctuations that could signal emerging issues before they become major problems. Additionally, I use an appliance-specific diagnostic scanner, which connects to the appliance’s diagnostic port and provides real-time error codes and component status. Investing in such advanced tools eliminates guesswork and accelerates troubleshooting, especially with complex models like modern dishwashers and ovens.
Moreover, I always keep a comprehensive repair manual and wiring diagram for each appliance I service. These resources are invaluable when diagnosing intricate control circuit issues or sensor failures. Importantly, I utilize software updates from manufacturers to ensure my diagnostic tools have the latest firmware, which often includes new troubleshooting routines tailored for recent model revisions. To stay ahead of evolving appliance technology, subscribing to online forums and expert blogs—like this resource—provides insights into emerging common failures and innovative repair strategies.
Looking ahead, I predict that the integration of IoT diagnostics and AI-powered troubleshooting will become standard, further streamlining repairs and reducing downtime. Keeping your tools and knowledge current is not just wise; it’s essential in this rapidly evolving field. I encourage you to try upgrading your diagnostic scanner or investing in a specialized repair software suite this year—these enhancements will serve you well in ensuring your appliances stay in top shape for years to come.
What new tools will define appliance repair in 2025?
To master long-term appliance maintenance, your approach should combine precise diagnostic tools, ongoing education, and meticulous record-keeping. For example, maintaining a detailed repair log helps track recurring sensor failures or control board issues, enabling predictive maintenance that prevents unexpected breakdowns. Incorporating data-driven insights about your repairs helps optimize budget and effort over the appliance’s lifespan. By aligning your toolkit with these strategies, you develop a resilient repair process capable of adapting to technological advances and increasing appliance complexity.
Start by evaluating your current diagnostic arsenal and identifying gaps—perhaps a more advanced multimeter or an appliance-specific diagnostic module—then schedule regular calibration and updates. As you gain confidence, explore integrating remote diagnostics or AI-assisted troubleshooting tools, which are predicted to be game-changers by 2025. For now, focus on mastering fundamental testing techniques and leveraging detailed schematics—these are your best allies for sustained success in appliance maintenance. For comprehensive guidance, visit this detailed resource.
The Hardest Lesson I Learned About Parts, Dishwasher, Oven Repair, Diagnostics
Before I fully embraced a diagnostic-first approach, I often jumped straight to replacing parts—only to face recurring issues or waste valuable resources. The biggest lesson was realizing that understanding the system’s diagnostic signals and testing methods is far more effective than guesswork. This insight transformed my repair process from a costly guessing game into a methodical troubleshooting routine.
3 Myths About Dishwashers and Ovens That Held Me Back
I used to believe that newer models were so advanced that traditional diagnostics were unnecessary. Turns out, modern appliances are complex but still rely heavily on accurate diagnostics. I also thought that the control board was the main culprit every time, ignoring the subtle signs from sensors and valves. Lastly, I underestimated the value of keeping detailed repair records, which now helps me identify patterns and prevent future breakdowns.
What Experts Won’t Tell You About Fixing Appliances in 2025
Often, professionals know that relying solely on visual cues or quick replacements is a shortcut that can lead to future failures. The game-changing knowledge is in interpreting diagnostic data accurately—using tools like appliance-specific scanners and schematics. Staying ahead means continuously learning and adapting to new diagnostic techniques and integrating smarter tools into your workflow.
My Essential Toolkit for Accurate Troubleshooting
Key tools like a reliable digital multimeter and a dedicated diagnostic scanner have revolutionized my repair approach. I trust this diagnostic guide for comprehensive troubleshooting strategies, as it provides clear procedures tailored to modern appliances. Maintaining updated firmware on my tools ensures I stay current with the latest diagnostic routines, saving me time and guesswork during repairs.
Believe in Repair, Not Scrap Machine
Every appliance has a story, and understanding diagnostic signals means I can often fix issues that seemed insurmountable at first. Instead of rushing to replace, I test, interpret data, and then decide. This mindset keeps my repair confidence high and my appliances in service longer. It’s a reminder that patience and education are your best assets in appliance repair.
What’s been your greatest breakthrough in diagnosing appliance problems? Share your insights below and let’s learn from each other’s experiences!