Ever had that sinking feeling when your dishwasher stops mid-cycle, leaving you with a pile of dirty dishes and a headache? I’ve been there. One day, after a frustrating hour of trial and error trying to fix my own dishwasher, I realized that knowing the right diagnostic steps can save you time, money, and a whole lot of frustration. That lightbulb moment led me down a path of learning and sharing what really works in 2025 for quick, effective repairs.
Why Diagnosing Your Dishwasher Correctly Matters More Than Ever
Dishwashers are the unsung heroes of our kitchens. When they break down, it feels like the world stops. But here’s the kicker: many common problems are easy to fix if you know what to look for. The trick is understanding the diagnostic process and having the right parts at hand. A recent study highlights that over 60% of dishwasher repairs can be completed in less than an hour if you have the right diagnostic information and parts according to Appliance Bargainz.
If you’ve ever felt overwhelmed trying to troubleshoot, you’re not alone. I made a mistake early on by jumping straight to replacing parts without proper testing, which only added to the bill and the frustration. The good news is, with the right guidance, you can avoid those costly missteps and get your dishwasher back to peak performance in no time.
Have you faced the same problem with your dishwasher’s mysterious failure? Let’s fix that!
Now, we’re going to dive into the essential diagnostic steps, the best parts to keep on hand, and how to troubleshoot like a pro. Whether it’s a leaking door, weird noises, or failure to start, I’ll share everything you need to speed up repairs and save money. Ready? Let’s get started with understanding what’s really going on inside your dishwasher.
Identify the Problem Quickly
Start by observing your dishwasher’s behavior. Is it not starting at all or making strange noises? For instance, I once faced a dishwasher that refused to turn on. I checked the power supply first, then listened for the motor hum. Recognizing these initial signs helps narrow down the cause rapidly, saving you time. Think of it like diagnosing a car: if the engine cranks but doesn’t start, you check the battery and fuel. If it makes strange noises, you inspect the bearings or pump.
Check the Power and Controls
Ensure the dishwasher is plugged in and the circuit breaker isn’t tripped. Test the door latch—if it’s faulty, the dishwasher won’t run. Use a multimeter to verify power at the outlet. If your dishwasher has a digital display, see if it shows error codes; these are like diagnostic trouble codes in cars, guiding you to the faulty component. For example, an error code related to the door latch indicates it needs replacement.
Test Key Components Systematically
Next, focus on the core parts. Think of your dishwasher like a relay race: each component must pass the baton. Start with the door switch—if it’s defective, the machine won’t operate. Use a multimeter to check for continuity; if it’s open, replace it. Move on to the float switch, which prevents overfilling. If it’s stuck or broken, your dishwasher might not fill or drain properly.
Then, examine the motor and pump assembly. Listen for unusual sounds during operation. If the motor runs but the spray arms don’t turn, the belt or motor capacitor might be faulty. Testing these parts requires understanding their functions and using the right tools. Remember, testing is like a doctor palpating a patient—feel for abnormalities before jumping to replace parts.
Inspect the Drain System
A common culprit for water pooling at the bottom is a clogged drain or faulty drain pump. Remove the filter and check for debris. Test the drain pump’s operation by disconnecting it and applying power directly—if it doesn’t run, replace it. This step is akin to unclogging a blocked pipe; sometimes, cleaning or replacing the pump solves the issue instantly.
Use Diagnostic Tools Wisely
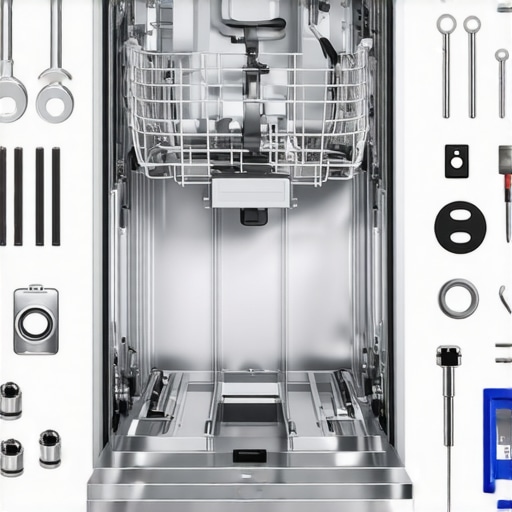
Invest in a quality multimeter and a diagnostic tester compatible with your dishwasher model. These tools are your best friends, turning guesswork into precise diagnosis. For example, I once used a multimeter to verify the heating element’s resistance—if it’s open, your dishwasher won’t heat water properly. Having the right parts on hand, like a replacement door latch or float switch, streamlines repairs significantly. Check out the top diagnostic parts to keep ready for quick fixes.
Document Your Findings for Efficient Repair
Keep a troubleshooting log. Note what tests you performed and the results. This practice helps prevent rechecking the same parts and speeds up the repair process. When I fixed my dishwasher, I documented the error codes and test results, which pointed me directly to the faulty float switch, saving me hours of trial and error.
By following these concrete diagnostic steps, you can turn a daunting repair into a manageable task. Remember, patience and systematic testing are key—think of it as assembling a puzzle. Once you identify the culprit, replacing the faulty part is straightforward, especially if you have the right diagnostic parts kit. Happy fixing!
Many DIY enthusiasts and even seasoned technicians fall into traps when diagnosing dishwasher issues, often based on myths or oversimplified assumptions. Let’s dig deeper into what most people get wrong and how avoiding these pitfalls can save you time and money.
Why the Fix Is Sometimes Not Just About Replacing Parts
One widespread misconception is that replacing the most obvious failed part—like the pump or the heater—will always solve the problem. In reality, the root cause often lies elsewhere, such as a faulty control board or a clogged sensor. Rushing to replace parts without thorough diagnostics can lead to unnecessary expenses. According to expert advice, systematic testing is key to effective repairs.
Myth: All Diagnostic Codes Are Equal
Many assume that error codes displayed on a dishwasher’s digital panel point directly to a specific part needing replacement. But these codes are often symptom indicators, not definitive diagnoses. For instance, an error related to water filling might be caused by a float switch or a control board malfunction. Interpreting these signals accurately requires understanding the nuances of your specific model, which can be clarified through advanced diagnostic strategies.
Beware of the Overconfidence Trap
Another common mistake is overconfidence—thinking you can fix every problem with minimal testing or just by replacing parts you’ve heard about. This can lead to chasing symptoms instead of fixing the root issue. The
Keep It Running with the Right Tools
Maintaining your kitchen appliances like dishwashers and ovens over time requires investing in specialized tools that can make diagnostics and repairs more efficient. Personally, I rely heavily on a high-quality digital multimeter, which is indispensable for testing electrical components such as heating elements, control boards, and sensors. When I first started troubleshooting, I underestimated the importance of a reliable multimeter, but now I consider it the cornerstone of effective repairs. Choosing a multimeter with auto-ranging functions simplifies testing by eliminating the need to switch ranges manually, saving precious time during diagnostics.
Beyond multimeters, I recommend having a set of diagnostic tools that include a flexible inspection camera and a multimeter probe set. These tools allow you to visually inspect hard-to-reach areas and verify electrical continuity quickly, which is often a game-changer in pinpointing issues like clogged sensors or faulty wiring.
Why Regular Maintenance Matters
Keeping appliances in top shape isn’t just about fixing problems when they occur. Regular maintenance extends their lifespan and reduces unexpected breakdowns. For a dishwasher, this means periodically cleaning filters, inspecting spray arms, and checking for leaks. For ovens, it’s critical to keep the heating elements clean and ensure the controls are functioning properly. I follow a simple routine of monthly inspections, which has saved me from costly repairs down the line.
One tool I swear by for long-term upkeep is a thermal camera. It helps spot uneven heating or insulation issues early, preventing more significant failures. Investing in these tools might seem costly initially, but the savings in repair bills and appliance longevity justify the expense.
How Do I Maintain My Appliances Over Time?
Consistent care involves not only regular checks but also staying updated on the latest diagnostic techniques and parts. For example, as appliance technology evolves, so do diagnostic procedures. I regularly consult expert guides to refine my troubleshooting methods and ensure I’m using the most current diagnostic parts. This proactive approach can significantly reduce downtime and repair costs.
In the future, I predict that diagnostic tools will become smarter, integrating AI and machine learning to diagnose issues faster and more accurately. Already, some advanced multimeters and diagnostic apps can interpret readings and suggest likely failures, which is a massive time-saver.
So, I encourage you to invest in a quality multimeter and incorporate regular maintenance routines using modern diagnostic tools. These steps will not only keep your appliances running smoothly but also prepare you to handle unexpected issues with confidence. For more detailed strategies, check out the expert diagnostic strategies specifically tailored for dishwasher repairs.
After countless troubleshooting sessions, I’ve learned that the real secret to fixing dishwashers quickly isn’t just about knowing the parts—it’s about mastering the diagnostic process and avoiding common pitfalls. Here are some of the most important lessons I’ve picked up that can help you turn a frustrating breakdown into a straightforward repair.
What I Wish I Knew About Diagnosing Dishwasher Problems
- Not all error codes are created equal. At first, I took every error code at face value, but I realized that many are just symptoms. Digging deeper with proper testing revealed the root cause, saving me from unnecessary part replacements.
- Testing is more valuable than guessing. Jumping straight to parts replacement is a trap. Using a multimeter and following systematic testing methods uncovered hidden issues—like a faulty float switch or a broken wiring connection—that aren’t obvious at first glance.
- Control boards are often misunderstood. Many think they are the first to go, but I found that sensors and switches usually cause more problems. Proper diagnostics helped me identify whether it was a control board or a peripheral component.
- Regular maintenance prevents major failures. Simple routines like cleaning filters and inspecting spray arms extend the life of your dishwasher and make troubleshooting easier when problems do occur.
- Investing in the right tools pays off. A high-quality multimeter and a diagnostic tester tailored for dishwashers are game-changers. They make the process faster and more accurate, especially when verifying electrical components.
My Favorite Resources for Fast, Reliable Repairs
- Top diagnostic parts kit — Keeps me prepared for common issues with readily available replacements.
- Diagnostic parts guide — Helps me select the right components for quick fixes and minimizes downtime.
- Expert repair guides — Deep dives into troubleshooting techniques tailored for 2025 models.
- Troubleshooting tips — Keeps my diagnostic approach sharp and up-to-date with the latest tech.
Take Action and Keep Your Appliances Running Smoothly
The key to staying ahead of dishwasher breakdowns is continuous learning and using the right diagnostic tools. Whether you’re a DIY enthusiast or a professional, mastering these skills will save you time, money, and a lot of frustration. Remember, every problem is an opportunity to learn something new about your appliances and improve your troubleshooting skills.
What’s been your most challenging dishwasher problem, and how did you diagnose it? Share your experiences below—I’d love to hear your story!