Ever had that sinking feeling when your dishwasher suddenly stops mid-cycle, leaving you staring at a pile of dirty dishes and a sense of helplessness? I’ve been there more times than I can count. I remember the first time my dishwasher refused to cooperate, and I thought I needed a whole new unit. Turns out, a few expert diagnostic tricks and the right parts could have saved me hundreds—and hours of frustration.
The Real Reason Why Quick Repairs Matter
In today’s fast-paced world, nobody has time for a dishwasher that’s out of commission. That’s why I’ve dedicated myself to understanding expert diagnostics and sourcing the best parts for fast fixes. When you know exactly what to check and have the right replacement parts at hand, you can get your appliance back up and running in no time. Plus, it saves money, extends your dishwasher’s lifespan, and keeps your kitchen running smoothly. If you’ve faced similar issues, stick around. I’ll guide you through the essential diagnostics and parts tips that make all the difference. Want a quick way to identify common problems? Check out this ultimate diagnostic guide for dishwasher repairs.
Is Relying on Diagnostics Actually Worth It?
Early in my repair journey, I made a mistake many beginners do: I guessed. I replaced parts without proper testing, only to realize I’d wasted time and money. The truth is, diagnostics are your best friend. They tell you exactly which component is causing the issue, whether it’s a faulty pump, clogged filter, or worn-out door latch. For example, knowing how to quickly test your dishwasher’s motor or control board can save you from unnecessary replacements. Want to learn more about the top diagnostics and parts strategies? Take a look at this expert troubleshooting guide for fast repairs.
So, if you’re tired of throwing parts at your dishwasher and hoping for the best, this post is for you. We’ll explore the key diagnostic steps and must-have parts that will help you fix your dishwasher quickly and confidently. Ready to become a repair whiz? Let’s dive in and turn your frustration into mastery!
.
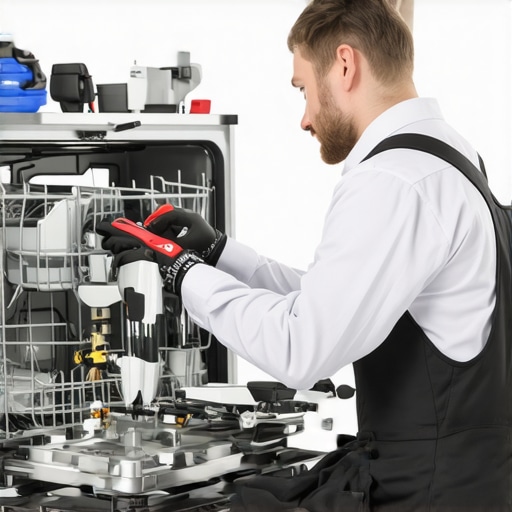
Identify the Root Cause Quickly
Start by observing your dishwasher’s behavior. Is it not draining, leaking, or not cleaning properly? Use a systematic approach: listen for unusual noises, check for error codes, and note when problems occur. For example, last month, my dishwasher stopped mid-cycle. I listened carefully and noticed a buzzing sound, indicating a motor issue. This initial observation saved me hours of random part swapping.
Test Components Methodically
Think of your dishwasher as a complex machine where each part plays a role. Test each one to confirm if it’s functioning. Use a multimeter to check electrical continuity on the door latch, motor, and control board. For instance, I tested the drain pump motor using this method and found it was dead, which was the cause of my draining issue. This precise testing prevented unnecessary replacements and sped up my repair process. For detailed diagnostics, consult this expert troubleshooting guide.
Replace the Right Parts
Once you identify the faulty component, sourcing the correct part is key. Keep a stock of essential parts like door latches, filters, and pumps from reputable suppliers. When my door latch failed, I ordered a matching replacement from a trusted parts dealer, which arrived quickly. Installing it was straightforward, and my dishwasher was back in action. Think of parts like puzzle pieces — matching the right one ensures a smooth repair. For top-rated parts, check this top diagnostic parts list.
Use Diagnostic Tools Effectively
Diagnostic tools are your best allies. A multimeter, a test light, or even a simple visual inspection can reveal hidden faults. Last week, I used a multimeter to test the control board’s voltage outputs. It was a quick check that confirmed the control board was faulty, saving me from replacing a perfectly good motor. Think of diagnostic tools as your detective kit, helping you piece together clues for a quick fix. For more tips, explore this diagnostic tips.
Document Your Findings
Keep a repair log. Note what tests you perform, parts replaced, and outcomes. This habit streamlines future repairs and helps identify patterns. When I fixed my dishwasher last month, documenting each step prevented me from repeating tests and made troubleshooting faster the next time. Think of it as your repair diary — a valuable resource for quick diagnostics. For comprehensive troubleshooting, see this diagnostic guide.
Practice and Patience
Finally, the more you diagnose and repair, the sharper your instincts become. Don’t rush; take your time to analyze each step. Remember, even the pros started as beginners. With practice, troubleshooting becomes second nature, turning frustration into confidence. Keep honing your skills with reliable resources, and soon, expert diagnostics will be second nature. For ongoing learning, review this repair strategies.
Many DIY enthusiasts and homeowners approach dishwasher repairs with a mix of confidence and guesswork. However, there are several nuanced pitfalls that even experienced repairers often overlook, leading to wasted time and unnecessary replacements. Let’s dig deeper into the most common myths and advanced mistakes that can trip you up when diagnosing dishwasher issues.
Why Relying Solely on Visual Inspection Can Be Deceptive
It’s tempting to assume that a visible leak or a burnt smell indicates a faulty part. While visual cues are helpful, they can be misleading if you don’t conduct proper testing. For example, a burnt smell might stem from an overheated motor controller or wiring issue rather than a failed motor itself. Advanced diagnostics, such as using a multimeter to check electrical continuity and voltage, are crucial for accurate diagnosis. This approach is detailed in our essential diagnostic tips.

Beware of the Myths Surrounding Part Replacement
One widespread misconception is that replacing the most obvious failed part will fix the problem. In reality, many issues are interconnected. For instance, a clogged filter might cause poor drainage, but the root cause could be a faulty drain pump or control board. Blindly swapping parts without proper testing can lead to the classic “replace and hope” mistake, which drains your wallet and prolongs the repair. Instead, focus on methodical testing of each component, as explained in our expert troubleshooting guide.
Advanced Diagnostic Strategies That Save Time
For those seeking to go beyond basics, understanding the importance of diagnostic tools is key. Using a multimeter to check voltage levels on the control board or testing the resistance of heating elements helps pinpoint the true failure. Moreover, understanding the typical failure modes of key parts—like the door latch or float switch—can make your diagnosis more precise. This knowledge is reinforced in our diagnostics resource.
Have you ever fallen into this trap? Let me know in the comments. Remember, patience and systematic testing are your best allies in mastering dishwasher diagnostics and avoiding costly mistakes. By understanding these nuances, you’ll approach repairs with confidence and efficiency, saving both time and money.
Invest in Reliable Diagnostic Equipment
Over the years, I’ve found that having the right tools makes all the difference in maintaining and repairing dishwashers efficiently. My go-to device is a high-quality digital multimeter, which allows me to quickly check electrical continuity and voltage levels across various components like the control board, heating element, and motor. I prefer a multimeter with auto-ranging capabilities and a robust build, as it minimizes errors and withstands frequent use, saving me time and money. Additionally, I keep a digital inspection camera, which helps me peer into hard-to-reach areas like the drain pump or filter chambers without dismantling the entire unit. These tools have become indispensable for accurate diagnostics, especially when I suspect wiring issues or subtle component failures. As technology advances, expect smarter diagnostic devices with integrated apps that can analyze data and suggest repairs, streamlining the process even further.
Routine Maintenance to Extend Lifespan
Maintaining your dishwasher proactively is key to long-term performance. I recommend regularly cleaning the spray arms and filters—at least once a month—to prevent clogs that can impair cleaning efficiency. Using a vinegar-based descaling solution every few months helps remove mineral buildup, which can cause overheating or sensor malfunctions. Check the door seals for cracks or debris that could lead to leaks and replace them promptly if needed. Also, inspect the drainage system to ensure no blockages are present, as poor drainage can cause leaks and odors. For more detailed guidance, the essential oven repair tips include maintenance routines applicable to dishwashers, emphasizing the importance of preventative care.
How do I maintain my dishwasher over time?
Consistency is the secret to keeping your dishwasher in top shape. Schedule regular inspections of key components like the float switch, door latch, and control panel, ensuring they operate smoothly. Keep a log of maintenance tasks and any issues you notice, which helps in diagnosing future problems faster. Using manufacturer-recommended detergents and avoiding overloading the racks also reduces strain on parts and prevents premature wear. When replacing parts, always opt for high-quality, OEM-approved components, which tend to last longer and perform better. For sourcing reliable parts and diagnostics, check out the best dishwasher parts and diagnostics list.
Predicting the Future of Dishwasher Maintenance
With the advent of smart home technology, I believe future dishwasher maintenance will become more automated and data-driven. Advanced sensors will monitor component health in real-time, alerting you to issues before they escalate. IoT-enabled repair tools might even diagnose and perform simple fixes remotely, reducing downtime. Staying ahead of these trends by investing in compatible diagnostic tools now will prepare you for seamless maintenance in the years to come. For a glimpse into the future, explore the oven repair and diagnostic essentials, which mirror upcoming innovations applicable across appliances.
One advanced tip I highly recommend trying today is integrating a routine check of your dishwasher’s wiring and control system with a portable diagnostic device. This simple step can reveal hidden faults early, saving you from costly repairs later. Make it a habit to perform these checks quarterly, and you’ll keep your dishwasher running smoothly for years to come!
Over the years, I’ve learned that the real secret to quick dishwasher repairs isn’t just about replacing parts — it’s about mastering the diagnostic process. The hardest lesson I learned was that guessing can lead to wasted time and money. Instead, I focus on systematic testing and understanding how each component works. For example, early on, I replaced a motor without testing it first, only to find out later that the control board was at fault. This experience taught me that reliability in diagnostics is everything.
My Essential Toolkit for Troubleshooting Dishwashers
Having the right tools has been a game changer. I swear by a high-quality digital multimeter because it helps me quickly check voltage and continuity, saving me from unnecessary replacements. An inspection camera is also invaluable for peering into tight spaces like drain pumps or filters. These tools have helped me become more confident and efficient in diagnosing problems. For anyone serious about quick repairs, I recommend exploring the essential diagnostic tools.
Let Your Emotions Drive Action
Repairing dishwashers can be a daunting task, but don’t let fear hold you back. Every successful fix boosts your confidence and skills. Remember, even pros started as beginners. With patience, practice, and the right diagnostic mindset, you’ll soon see repairs not as obstacles but as puzzles waiting to be solved. Keep learning, stay curious, and don’t be afraid to try new techniques. Your dishwasher will thank you — and so will your wallet.