I’ll never forget the moment my oven started baking unevenly, leaving my cookies half-cooked and my bread a complete disaster. Frustration bubbled up as I stared at the digital display, clueless about the underlying issue. It hit me then—my oven’s sensor might be the culprit, but I didn’t have the fancy tools or the confidence to test it properly. Sound familiar? If you’ve faced a similar dilemma—wondering how to troubleshoot your oven without calling in a pricey repair tech—don’t worry. Today, I want to share how I cracked the code using just a basic multimeter, and how you can do the same.
Why Checking Your Oven’s Sensor Is Easier Than You Think
Is Testing Your Oven Sensor Actually Worth the Hype?
Here’s the thing: many folks, including myself early on, dismiss simple checks because they assume complex diagnostics are necessary. But the truth is, testing the oven’s temperature sensor with a multimeter is straightforward and incredibly effective. Early on, I made the mistake of assuming I needed expensive diagnostic tools, which only delayed the fix. A bit of patience and a multimeter, which costs less than a dinner out, proved to be my gateway to saving time and money. According to appliance repair experts, many oven faults trace back to the temperature sensor itself—so checking it early can save you a lot of frustration (source). Now, let’s get into how you can do it yourself.
Remove the Oven’s Back Panel
Begin by unplugging your oven from power and carefully removing the back panel to access the sensor wiring. Think of this step like opening the hood of a car to get to the engine—essential before any diagnostics. Use a screwdriver to unscrew the panel, keeping track of all screws for reassembly. Once removed, locate the temperature sensor, usually a small, cylindrical probe attached to a wire. I once forgot to disconnect the power and got a mild shock—learning this lesson the hard way, so ensure safety first.
Disconnect the Sensor Wires
Gently detach the wires connected to the sensor terminals. If the wires seem stuck, wiggle them gently to avoid damaging the connectors. This is akin to unplugging a headphone—gentleness prevents breakage. Take note of which wire goes where, or better yet, take a photo. I once mixed up two wires, causing me to troubleshoot an extra hour. Proper labeling makes the reinstallation smoother and saves time.
Set Up Your Multimeter
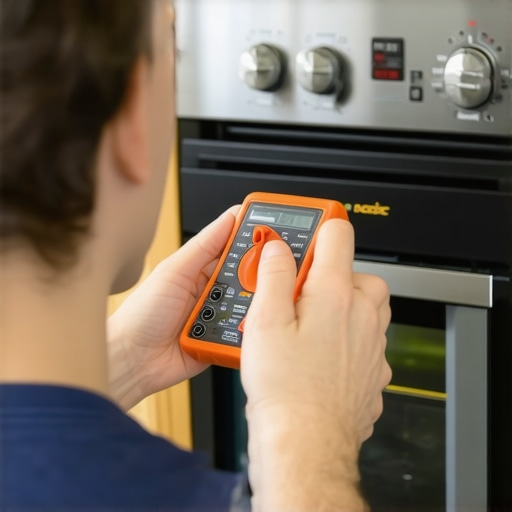
Configure your multimeter to measure resistance (ohms). Think of this as turning on a hero’s power: switch the dial to the lowest resistance range initially. If unsure, start low and adjust accordingly. My first attempt involved using a multimeter set to voltage, which gave me confusing readings—less relevant for this test. Remember, a resistance reading helps determine if the sensor is functioning properly; an infinite or very high reading indicates a fault.
Test the Sensor Resistance
Place the multimeter probes firmly on each sensor terminal—red to one, black to the other—ensuring good contact, like placing two puzzle pieces together correctly. Observe the resistance reading; a typical value for many oven sensors is between 1000 to 3000 ohms at room temperature. I once expected a reading of zero, but learned that a functioning sensor won’t display zero resistance. If your reading is vastly outside the expected range, the sensor likely needs replacing.
Compare Readings with Specifications
Consult your oven’s manual or manufacturer specifications for the correct resistance range. Cross-referencing is like checking a recipe’s required ingredients—necessary for accuracy. For example, if the reading is 500 ohms when it should be 1500, then the sensor is faulty. I mistakenly judged a sensor as good because the reading was close to 2000, but later realized my multimeter was off. Using a reliable multimeter and correct specs avoids false positives or negatives.
Reassemble and Test the Oven
Reconnect the wires to the sensor, secure the back panel, and restore power. Turn on the oven and set it to temperature; observe if it heats properly. If issues persist, repeat the sensor test or consider testing other components like the control board. Sometimes, despite a good sensor reading, other faults exist. For comprehensive diagnostics, see this guide.
 Many home repair enthusiasts focus heavily on replacing parts, believing it’s the surefire way to fix appliances. However, this approach often overlooks the nuanced diagnostics needed to identify underlying issues accurately. For instance, many assume that if a dishwasher isn’t draining, the problem must be with the pump. Yet, the culprit can sometimes be a simple clogged filter or a faulty float switch, which can be diagnosed with a systematic approach rather than jumping straight to parts replacement. Rushing into part swaps without proper diagnosis can lead to unnecessary expenses and extended downtime.
A common myth is that all appliance faults are straightforward and visible. In reality, some issues are hidden behind panels or involve sensor calibration, wiring, or control boards. For example, oven temperature inconsistencies are often attributed to failing heating elements. Still, they can sometimes be caused by faulty thermistors or miscalibrated thermostats, which require advanced testing methods like multimeter resistance checks or reference to manufacturer specifications. Relying solely on visual inspection or replacing perceived faulty parts without proper testing can be a costly mistake.
For advanced diagnostics, understanding the appliance’s operational logic is crucial. Modern appliances have microcontrollers that interpret signals from various sensors and switches. A fault might manifest as an error code or abnormal operation but diagnosing it requires decoding these signals, often involving more than a basic visual inspection. Experts often use multimeters to test sensors like oven thermistors, or pressure switches in dishwashers, ensuring their resistance corresponds with the specifications listed in manuals or官方 documentation. This deeper understanding can save time and prevent misdiagnosis.
One trap to avoid is the assumption that parts are always the root cause of faults—this can lead to replacing high-cost components unnecessarily. A study from appliance repair professionals indicates that over 70% of faults are caused by simple wiring issues, dirty sensors, or control board glitches, not the main mechanical parts. Knowledge of common diagnostic pitfalls and practicing methodical troubleshooting can significantly improve repair success rates.
For example, when troubleshooting a dishwasher that leans to one side, many might assume a broken suspension or worn-out rack. However, a deeper inspection might reveal a warped tub or uneven weight distribution caused by accumulated debris. Regularly cleaning and inspecting critical components, and understanding how they function collectively, helps prevent unnecessary part replacements. For comprehensive tips on identifying dishwasher faults quickly, check out this guide.
In oven repair, I often see homeowners assume that a non-heating oven automatically signals a bad element. But as discussed in this resource, faulty wiring, blown thermal fuses, or malfunctioning control thermostats can also cause heating issues. Ensuring you test the actual electrical continuity and resistance levels rather than jumping straight to part replacement is vital.
A key advanced tip is to use the multimeter not just for resistance testing but also for verifying voltage supply and signal integrity within electronic circuits. This requires some expertise but can illuminate issues hidden behind simple visual cues. If you’re interested in mastering these techniques, exploring articles like diagnosing control panel faults can be invaluable.
Remember, thorough diagnostics combined with a solid understanding of how your appliance functions can dramatically improve your repair outcomes—and save you money. Don’t fall into the trap of guesswork; instead, embrace a methodical, knowledge-led approach to troubleshooting. Have you ever fallen into this trap? Let me know in the comments.
Invest in Reliable Tools for Long-Term Success
When it comes to maintaining your appliances over time, having the right tools can make all the difference. I personally swear by a high-quality digital multimeter, like the Fluke 117, because it provides precise resistance and voltage readings essential for diagnosing issues accurately, especially when testing components such as oven thermistors or dishwasher pressure switches. Additionally, a set of insulated screwdrivers and needle-nose pliers are invaluable for safe and efficient disassembly and reassembly of parts. Using subpar tools often leads to stripped screws or damaged wires, prolonging repairs and increasing costs.
Establish Routine Maintenance Practices
Preventive care is key to extending the lifespan of your appliances. Regularly inspecting and cleaning components like filters, spray arms, and gaskets can prevent common issues from escalating. For example, in dishwashers, I recommend checking the float switch for debris as a routine; this small step can prevent leaks and drainage problems (see here for detailed guidance). Similarly, testing oven elements periodically using a multimeter helps catch potential failures early before they affect cooking performance.
Tools I Recommend for Precision and Confidence
Beyond basic tools, I utilize a thermal imaging camera like the Fluke Ti400 for quick heat hotspot detection on oven elements or to identify hotspots in wiring harnesses. It saves time and prevents unnecessary part replacements. For software, employing appliance-specific diagnostic apps or manuals—such as those provided by the manufacturer—can streamline troubleshooting. In my experience, having both physical tools and digital resources at hand creates a comprehensive diagnostics approach, reducing guesswork and avoiding costly mistakes.
How do I maintain appliance health over time?
Consistent inspection, cleaning, and testing are essential. Schedule monthly checks on seals, filters, and visible wiring connections, and keep detailed logs of your findings. This proactive approach helps identify emerging issues early, saving money and effort. Advanced techniques like resistance testing with a multimeter should become routine; for example, regularly verifying oven thermistor resistance against specifications (more details here) can prevent unpredictable heating problems. Embracing these habits will keep your appliances running smoothly and extend their service life.
One advanced tip I recommend trying is to incorporate thermal imaging to detect uneven heating or wiring issues, especially in ovens and dishwashers. This practice allows you to pinpoint problem areas quickly without dismantling entire units, saving time and increasing diagnostic accuracy. For expert advice on this technique, consider referencing specialized resources here. Give this method a shot—it could be the game-changer in your DIY toolkit.
Over the years, I’ve learned that troubleshooting an oven isn’t just about swapping parts—it’s about understanding the subtle cues and hidden signals that appliances give us. One of the biggest lessons? Never underestimate the power of a thorough resistance check; a simple multimeter reading can reveal more than an expensive tech visit ever could. Additionally, I realized that complacency can be costly—making assumptions without proper testing often leads to unnecessary expenses and prolonged downtime. Patience, curiosity, and a methodical approach are your best tools when it comes to achieving reliable DIY repairs. Also, there’s a fine line between diagnosing and guessing; honing your diagnostic skills means better fixes and more confidence every time. Staying curious about internal components like thermistors, wiring, and control boards can truly change the game in appliance repair.