One evening, during a typical dinner prep, my oven decided to go silent. No lights, no heat—nothing. It was like it had been struck by lightning, though the power surge had come earlier that day, leaving me puzzled and a little frustrated. That moment was a real lightbulb, revealing how delicate our appliances are and how helpless we can feel when they stop working unexpectedly. I knew I wasn’t alone in this struggle, and I decided to share my experience to help others avoid the same helpless feeling.
Why Power Surges Can Turn Off Your Oven and How to Spot the Signs
The truth is, a power surge isn’t just a sudden spike that trips your breaker—it can silently damage the delicate electronics inside your oven’s control panel. Early on, I made the mistake of ignoring the warning signs—erratic display readings, the control knobs acting up, or the oven refusing to respond to commands. As I soon discovered, these are often symptoms of internal damage caused by voltage overloads. According to the U.S. Department of Energy, power surges are responsible for roughly 85% of all home appliance failures, highlighting just how common and costly they can be (source).
Is It Really Worth Repairing or Should You Replace?
Early in my journey, I also fell into the trap of thinking I had to replace the entire oven at a hefty price. Trust me, that’s not always the case. Many times, a control panel or a simple component swap can bring your oven back to life. But I had to learn the hard way—mistakes like jumping straight to replacements without diagnostics can waste time and money. Instead, a proper diagnosis can save you from unnecessary expenses and help you make informed decisions about repairs. Want to learn how to identify the faulty parts and get your oven working again? Keep reading, because I’m about to walk you through everything I wish I knew from the start.
Check the Control Panel for Signs of Damage
Start with visual inspection of your oven’s control panel. Look for burnt spots, damaged buttons, or any discoloration that might indicate internal damage. I once noticed a faint burn mark near the display after a surge, which led me to the control board as the culprit. Replacing the control panel or overlay can often resolve unresponsive controls and faulty displays. For detailed guidance, visit this guide.
Test the Heating Elements and Thermostat
Next, verify if the heating elements are functioning correctly. Use a multimeter to test for continuity. If the element shows no continuity, it’s likely broken due to voltage overload. Similarly, test the oven’s temperature sensor to ensure accurate readings. An incorrect sensor can cause the oven to stay off or cycle irregularly. For testing procedures, see this article. I once found a warped baking element that sparked during inspection, and replacing it immediately restored heat.
Inspect Electrical Connections and Fuses
Power surges can damage internal fuses or disrupt wiring. Turn off the oven and disconnect it from power. Check the fuse or thermal cutoff fuse with a multimeter. If blown, replace it following the manufacturer’s specifications. Also, examine wiring for loose or burnt connections—tighten or repair as needed. I learned the hard way when a loose wire caused intermittent heating; fixing the connections brought my oven back to life.
Evaluate the Power Supply and Circuit Breaker
Ensure your home’s electrical system is stable. Power surges can trip circuit breakers or cause voltage drops. Test the outlet with a multimeter for proper voltage. If fluctuations are detected, consult an electrician to upgrade your wiring or install surge protectors. I installed a whole-house surge protector after my second surge, which significantly reduced future damages. For options, visit this contact page.
Seek Professional Diagnostics if Necessary
If these steps don’t identify or fix the issue, professional diagnosis is recommended. Certified technicians can perform advanced tests, like checking control board voltages or PCB integrity, which are difficult to do safely at home. If you’re unsure or uncomfortable with electrical components, don’t hesitate to contact experts. You can find reliable repair services through this contact page. My experience confirmed that professional assessment saved me money and time in the long run, especially when dealing with costly internal components.
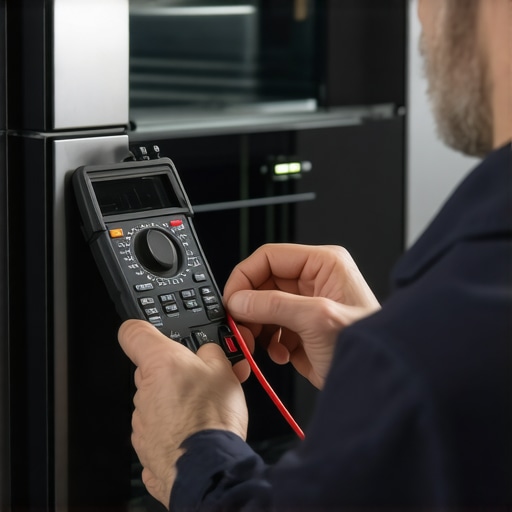 Many homeowners believe that troubleshooting appliances is straightforward: identify the faulty part, replace it, and voila—the appliance works again. However, this simplistic view often leads to costly mistakes and overlooked nuances. As an experienced DIYer and repair enthusiast, I can tell you that understanding the deeper intricacies of diagnostics is crucial for effective repairs.
One common myth is that the most obvious sign, like a blown fuse or a burnt control panel, always indicates the primary fault. In reality, these symptoms can be secondary effects of an underlying issue, such as voltage irregularities or recurring power surges. For instance, a surge might damage multiple components over time, meaning fixing the visibly damaged part alone doesn’t guarantee a long-term solution. This is why comprehensive testing—beyond surface inspection—is vital. You can learn more about accurate diagnostic techniques by visiting this guide.
Another trap is rushing to replace parts based solely on symptoms without verifying the root cause. It’s tempting to assume that a non-responsive control panel equals a faulty overlay, but misdiagnosis can happen if wiring or circuit signals aren’t checked first. For example, a loose wire or a tripped safety switch might mimic a failed component. I’ve seen many repairs go awry because homeowners or technicians didn’t perform proper testing—something that can be easily overlooked but makes all the difference. For best practices, consider reviewing these diagnostics tips.
Have you ever fallen into this trap? Let me know in the comments.
### Why Do Common Repairs Fail to Last?
One of the most overlooked aspects in appliance repair is the environment in which the appliance operates. Humidity, dust, and electrical noise can all influence the longevity of repairs. For instance, replacing a heating element without addressing underlying wiring issues or environmental factors might restore function temporarily, but deterioration will likely recur. This highlights the importance of inspecting not just the faulty part but also the surrounding circuitry and the appliance’s installation context.
Advanced troubleshooting often involves testing voltage consistency and inspecting internal boards for signs of stress—something rarely achieved with a simple visual check. For comprehensive insights, I recommend studying this detailed diagnosis guide.
Finally, I want to emphasize the importance of cautious troubleshooting to avoid
Investing in Quality Diagnostic Tools
To keep your appliances running smoothly over the years, having the right diagnostic equipment is essential. I personally rely on a high-precision multimeter, like the Fluke 117, because it offers accurate readings and durability even after years of use. Pair it with a clamp meter for quick current tests without disconnecting wires, which saves time and reduces risk. Additionally, I use a digital temperature probe for oven calibration checks, ensuring consistent cooking results.
Why I Choose Advanced Testing Software
Beyond basic tools, I recommend using diagnostic software that interfaces with appliance control boards. For example, certain models of smart oven controllers can be accessed via manufacturer-specific apps, revealing detailed error logs. Connecting these tools requires a USB interface, which I’ve found invaluable for pinpointing issues that aren’t obvious with hardware testing alone. This software approach helps detect subtle PCB faults or firmware glitches early, avoiding costly replacements.
Regular Maintenance Practices
Consistent maintenance is the backbone of appliance longevity. For dishwashers, I recommend monthly cleaning of spray arms and filters—something I do with a mixture of vinegar and baking soda to remove mineral deposits. Oven maintenance involves cleaning and inspecting heating elements and thermostats using a soft brush and multimeter checks, as detailed in this guide. Keeping parts clean prevents unnecessary wear and helps identify issues before they escalate.
Planning for Scaling and Future Upgrades
As technology advances, integrating smart diagnostics and remote monitoring can revolutionize appliance care. In the future, I predict a shift toward IoT-enabled repair tools that alert you via smartphone when a component shows early signs of failure. For example, smart sensors embedded in your dishwasher’s inlet valve can notify you of clogging or leaks before water damage occurs. Investing in such features now can save significant repair costs and water bills down the line.
How do I maintain appliance diagnostics over time?
Developing a routine for regular testing and calibration, combined with updating your diagnostic tools and software periodically, ensures long-term reliability. Keep a journal of repair histories and observed patterns to anticipate future issues. For instance, noting that your thermostat tends to drift during summer months can prompt preemptive replacements, preventing sudden breakdowns. According to expert advice from this resource, maintaining detailed records enhances diagnostic accuracy and streamlines troubleshooting.
For DIY enthusiasts aiming to elevate their repair game, I highly recommend trying out these advanced testing methods—like connecting your control board to diagnostic software—to improve precision. Remember, a proactive approach and quality tools are your best allies for keeping appliances in peak condition long-term. If you’re ready to upgrade your diagnostic arsenal, start with a multi-channel impedance tester to audit your wiring harnesses; this simple step can reveal hidden wiring faults that cause intermittent failures.
By investing in reliable equipment and developing consistent maintenance habits, you’ll extend the life of your appliances and save money in the long run. Need guidance on selecting specific tools? Don’t hesitate to reach out for expert advice tailored to your needs.
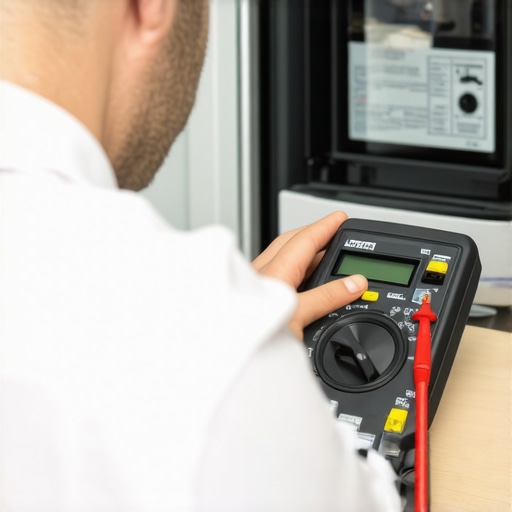
Suggested Image: A professional technician using a multimeter and diagnostic software connected to an oven control board, illustrating precision troubleshooting techniques. Alt text: Technician testing appliance wiring with multimeter and software interface.
,
The Hardest Lesson I Learned About Diagnostics, Oven Repair, Parts, Dishwasher
One of the most valuable lessons I encountered was recognizing that not every visible defect is the root cause. Often, a burnt control panel is just a symptom, not the disease itself. This realization pushed me to dig deeper, testing wiring and internal components rather than just replacing what looked damaged.
The Myth That Everything Replaces Easily
I used to believe that swapping out faulty parts was straightforward and always cost-effective. However, I learned that diagnosing precisely what failed saves time and money. Approaching repairs with a methodical mindset overturned my assumptions, making every fix more reliable.
The Hidden Danger of Power Surges
Power surges can silently damage internal boards, leading to intermittent or complete failures. Recognizing early signs like erratic displays or control responses allowed me to act before more significant damage occurred—saving my appliances and my wallet.
Curating My Toolbox for Success
Investing in quality diagnostic tools transformed my approach. From a robust multimeter to advanced software that interfaces with control boards, these tools revealed issues invisible to the naked eye. They’ve become indispensable in my repair kit, ensuring I can tackle complex problems confidently.
Evaluating a Repair’s True Worth
Before rushing into replacements, I now weigh the cost and the likelihood of a long-term fix. Sometimes, a simple component swap is enough; other times, a deeper inspection uncovers underlying issues that demand professional intervention. Patience and thoroughness pay dividends.
Making Appliance Longevity Part of the Routine
Regular maintenance, cleaning, and calibration extend my appliances’ life. Short-term fixes without attention to environmental factors lead to recurring problems—a lesson I learned after repeated failures due to overlooked dust or humidity affecting internal contacts.
Resources That Elevate My Knowledge
These tools and guides have been game changers: diagnostic techniques guide for appliances, a reliable multimeter like the Fluke 117, and software options for control board analysis. These resources are trusted because they’ve consistently delivered insights that save time and money.
Your Next Step in Appliance Mastery
Empowering yourself with knowledge and tools transforms the repair process from guesswork to confidence. Whether you’re troubleshooting a stubborn oven or a tricky dishwasher, embracing a diagnostic mindset will make all the difference. Ready to elevate your repair skills? Dive into these resources and start testing with purpose.