Ever been in the middle of baking a batch of cookies when suddenly, your oven erupts into a loud, unsettling roar? I remember the first time this happened to me. Everything was going smoothly, and then—BOOM!—a deafening noise from the oven’s fan. I had no idea what was going on, and honestly, I panicked a little at the thought of calling in a repair technician. Sound familiar? If your convection oven’s fan has become a noisy nuisance, you’re not alone. That sharp sound isn’t just annoying—it’s often a sign that your oven’s motor or fan components are struggling, and ignoring it can lead to worse performance or even appliance failure.
Why a Loud Oven Fan Can Worry but Isn’t Always a Disaster
Understanding what’s causing the noise is the first step towards fixing it. Many folks assume the worst—like a complete motor burn-out or an expensive repair. However, in many cases, the issue is more manageable than you might think. What’s reassuring is that, with a little know-how, you can often diagnose and even fix the problem yourself. Early on, I made the mistake of rushing to replace parts blindly, which only added to my frustration and cost. But I learned that proper diagnostics can save you time and money. Want to avoid the costly pitfalls I fell into? Today, I’ll share four proven diagnostics fixes for your convection motor that will make your oven operate whisper-quiet again. Interested? Keep reading, because this guide is packed with tips based on real experience and backed by appliance repair experts.
Will Fixing My Oven Fan Save Money or Just Waste Time?
Some might wonder if tackling the noise themselves is worth the effort, or if calling a professional is the safer route. Trust me, I get it. At first, I was skeptical about whether I could handle these repairs without risking further damage. But I found that many issues—like worn-out fan blades or loose motor mounts—are simple enough to troubleshoot if you know what to look for. Plus, the DIY fixes can be surprisingly affordable compared to replacing an entire oven or paying for a technician. Just make sure, like I did early on, to consult detailed guides and avoid jumping straight into disassembly without understanding the problem. For instance, if your fan wobbling or squealing is caused by a worn motor, replacing specific parts could be the game-changer—like swapping out a damaged fan blade or adjusting the motor tension. If you’re ready to get deep into diagnostics, you might want to check out some related fixes, such as [4 Convection Fan Motor Diagnostic Tests](https://appliancebargainz.com/oven-convection-fan-shrill-3-motor-fixes-for-a-quiet-2026), which can guide you through the process step-by-step.
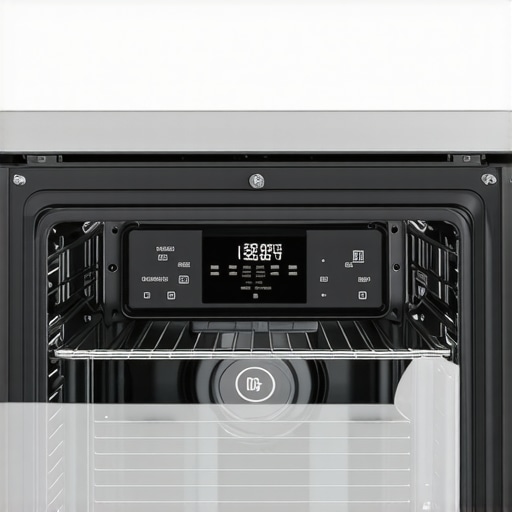
Isolate and Secure the Fan Assembly
Begin by unplugging your oven to ensure safety. Remove the oven’s bottom panel or back cover—using a screwdriver, carefully unscrew the panel to access the fan. Once exposed, inspect the fan blades for debris, dust buildup, or signs of damage. I once found a small piece of food stuck between the blades, causing imbalance and noise. Gently clean the blades with a soft brush or cloth. If blades are bent or cracked, replacing them will be necessary to eliminate the noise and restore efficiency. Remember, secure all fasteners tightly after maintenance to prevent vibrations that cause additional noise.
Test the Fan Motor’s Condition
With the fan free of debris, manually spin the blade to check for free movement. Resistance or wobbly motion indicates a failing motor bearing, which often causes grinding or squealing noises during operation. To confirm, reconnect the oven and turn it on briefly to observe if the noise persists. I recommend applying a lubricant—like a silicone spray—to the motor shaft if it feels stiff; this simple step can often temporarily quieten a squealing fan. If that doesn’t work, replacing the motor might be more cost-effective. For detailed diagnostics, consider running the motor through tests available in guides like this diagnostic guide.When it comes to repairing appliances like ovens and dishwashers, many DIY enthusiasts and even seasoned technicians fall into traps rooted in misconceptions about parts and diagnostic procedures. Contrary to popular belief, not every faulty part is the root cause of your appliance’s issue. For example, replacing a visibly damaged component like a control board might seem intuitive, but sometimes the problem lies elsewhere—such as in sensors or wiring connections—something that experts emphasize as a key nuance.
A common myth is that hearing a noise always signals a specific part failure, like a worn-out motor or belt. However, noises can often be caused by misalignments or debris, which are simple to fix but are often overlooked by inexperienced troubleshooters. This oversight can lead to unnecessary part replacements and increased costs, highlighting the importance of precise diagnostics.
Many get caught in the trap of
Keep Your Appliances Running Smoothly with the Right Tools
Maintaining your appliances over time requires more than just basic attention. Having a set of reliable tools can make all the difference in diagnosing issues early and performing effective repairs. I personally rely on a high-quality digital multimeter, like the Fluke 117, because it provides precise readings for voltage, resistance, and continuity, which are vital when troubleshooting electrical components such as oven sensors or dishwasher control boards. Additionally, a magnetic screwdriver set simplifies working in tight, awkward spaces, especially when dealing with oven heating elements or dishwasher wiring harnesses. An infrared thermometer is also invaluable for checking surface temperatures across your appliances, quickly identifying parts that are overheating or underperforming without intrusive disassembly. These tools have saved me countless hours, and I recommend investing in quality over quantity to ensure durability and accuracy.
Another crucial aspect of appliance maintenance is staying organized with a dedicated repair kit. I keep spare parts like replacement thermal fuses, door switches, and spray arms on hand, sourced from trusted suppliers. This readiness allows me to act swiftly when small issues arise, preventing minor problems from escalating into costly repairs. Remember, regular inspection and cleaning—such as clearing out dishwasher filters or checking oven seals—are part of a proactive maintenance routine that extends an appliance’s lifespan.
Planning for Longevity and Scaling Up
In the future, we can expect advancements like smart diagnostic systems integrated into appliances, enabling real-time health monitoring and remote troubleshooting. This tech evolution will further empower homeowners to maintain their devices efficiently, reducing downtime and repair costs. Until then, mastering the use of essential diagnostic tools remains a practical approach to sustaining long-term appliance performance.
How Do I Keep My Appliances in Top Shape Over Time?
Consistent maintenance, regular cleaning, and using the right diagnostic tools are the pillars of long-lasting appliances. Scheduling routine inspections and staying informed about typical issues—like checking dishwasher inlet screens or oven temperature sensors—can prevent unexpected breakdowns. For example, if your dishwasher cycles are taking too long, consulting guides such as these sensor fixes can help you troubleshoot effectively. Additionally, tracking the wear on parts like door hinges or rack wheels and replacing them before failure ensures smooth operation.
Don’t forget the importance of diagnostics—using tools like multimeters or infrared thermometers can provide crucial insights. I recommend starting with a simple voltage check on heating elements or sensors; once comfortable, you can progress to more advanced diagnostics like testing control boards. This approach not only saves money but also builds confidence in your repair skills. If you’re looking to get more detailed, consider exploring resources such as this guide on control panel issues for precise troubleshooting methods.
To maximize your appliance’s longevity, commit to a maintenance schedule that combines cleaning, inspections, and diagnostic testing. This proactive stance prevents small problems from escalating, saving you time and money in the long run. I highly encourage you to incorporate a multimeter into your toolkit and practice testing basic electrical components—it’s a game-changer. Try out the tip of measuring your oven’s heating element resistance with a multimeter; it’s a simple yet powerful diagnostic step that can reveal potential issues before you notice any performance decline.
< >
>
What the Quietest Tech Taught Me About Appliance Repair
One of the biggest revelations in fixing my oven fan was realizing that most issues stem from overlooked details—like tiny debris or loose screws—that can be fixed with patience and attention. I learned that jumping straight to replacing parts often wastes time; instead, thorough inspection and testing reveal the real culprit. This insight saved me hundreds of dollars and deepened my appreciation for the intricate design of appliances. Don’t underestimate the power of small observations—they often unlock the biggest fixes, turning a frustrating noise into a simple, quiet repair.
My Go-To Arsenal for Troubleshooting
If you’re serious about DIY appliance repair, I recommend investing in tools like a digital multimeter such as the Fluke 117—it’s incredibly reliable for testing sensors and electrical connections. A magnetic screwdriver set simplifies work in tight spaces, while an infrared thermometer helps detect overheating components without invasive disassembly. These tools have helped me confidently diagnose and resolve problems early, preserving the lifespan of my appliances and avoiding costly replacements. If you’re eager to elevate your repair skills, check out these essential resources and start building your toolkit today.
Seize the Moment and Transform Your Approach
Don’t let appliance issues like a noisy oven fan hold you back from gaining independence in maintenance. Embrace the diagnostic journey—each repair is a chance to learn something new, boost your confidence, and save money. Remember, mastery isn’t achieved overnight, but with patience and curiosity, you can turn a seemingly daunting task into a satisfying accomplishment. Your journey into appliance diagnostics begins now—take the leap, and watch your skills grow.