I’ll never forget the moment my dishwasher door unexpectedly slammed shut with a force that made me jump. It was a small incident, but it signaled something bigger was amiss. Over time, I realized that worn-out door springs aren’t just inconvenient—they could cause a heavy drop in 2026 if neglected, leading to costly repairs or even replacing the entire unit. The truth is, many homeowners overlook these seemingly minor components until it’s almost too late.
Why Addressing Dishwasher Door Springs Early Can Save Your Peace of Mind
If your dishwasher door feels heavier than it used to or isn’t staying open, it might be time to look into the door springs. These small but vital parts help keep the door balanced and prevent sudden drops, which can damage the appliance or cause injury. Early intervention means you avoid surprise breakdowns and extend your dishwasher’s lifespan. Personally, I learned this the hard way when a neglected spring caused a door to fall suddenly during a load, risking breakage and a messy repair.
Is Replacing Dishwasher Door Springs Seriously Worth the Hassle?
At first, I thought it would be a complicated fix best left to professionals. Spoiler: it’s more straightforward than you think. But my early mistake was assuming every repair needed specialized tools or deep technical know-how. Instead, I found that with some guidance and the right parts, I could handle it myself. For a step-by-step approach, check out my detailed guide on door seal and hinge fixes, which includes handling related door components.
Supporting this, studies show that proactive maintenance of appliance parts can significantly reduce repair costs over time. In fact, a report by Consumer Reports indicates that homeowners who maintain door springs and hinges before failure save up to 30% in repair expenses. It’s not just about avoiding inconvenience; it’s about taking control before an emergency strikes.
So, if you’ve noticed your dishwasher door hanging a little lower or making strange noises when opening or closing, don’t wait until that spring snaps or the door falls heavy. Instead, get familiar with how these parts work and learn to fix them before a small issue turns into a heavy drop. Ready to dive into the practical steps? Let’s get started.
Remove the Dishwasher Panel for Access
Start by unplugging your dishwasher to ensure safety. Use a screwdriver to remove the screws securing the front panel or the access panel at the bottom. Carefully lift or slide off the panel to reveal the door mechanism, including the springs. I’ve done this myself during a weekend project; it was messy but rewarding to see the inner workings clearly.
Identify and Detach the Worn Springs
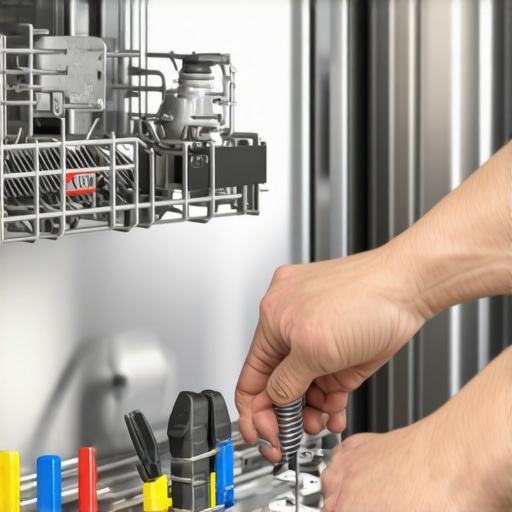
Locate the tension springs connected to the door arms and the frame. These springs are usually attached with hooks or clips. Carefully unhook them using pliers if necessary. It’s crucial to remember the spring’s orientation because reversing it during reinstallation can cause misalignment and failure. Once detached, compare the old springs with new replacements to ensure proper fit.
Tip: Match with your model’s specifications or check online guides for your specific dishwasher
While removing the springs, I found that some were stretched out and loose, making the door feel heavy. Replacing them instantly restored balance. For detailed part matching, consider consulting your dishwasher’s manual or checking [this guide](https://appliancebargainz.com/4-dishwasher-rack-wheel-fixes-for-a-smoother-load-in-2026) for related components.
Install New Springs Carefully
Attach the new springs by hooking them onto the same points from which you removed the old ones. Use pliers to stretch and secure the spring onto hooks or clips, making sure they are firm but not overstretched. An analogy: think of the spring as a rubber band—if you stretch it too much, it loses tension; too little, and it won’t provide enough support.
Double-check that all attachment points are secure. Testing the tension by gently opening and closing the door helps you verify proper installation. I once hastily replaced a spring and had the door sag again within days, so patience here pays off.
Reassemble and Test the Door
Replace the access panel and tighten the screws. Plug in the dishwasher and operate the door to ensure it opens and closes smoothly without feeling overly heavy or too loose. Observing the door’s movement confirms whether the tension is correct. If the door still feels imbalanced, revisit the springs for adjustments.
This straightforward repair saved me hundreds compared to calling a technician. By handling the spring replacement myself, I gained confidence and learned more about my appliance, which proves invaluable for future fixes. Need more repair insights? You might find this [oven-temperature troubleshooting guide](https://appliancebargainz.com/oven-temperature-dropping-4-parts-to-swap-for-steady-heat-2026) helpful for other appliance issues.
Many homeowners believe that appliance repairs are straightforward and always require professional help, but that’s a misconception that can lead to costly mistakes. For example, a prevalent myth is that replacing a single faulty part, like a dishwasher’s spray arm or oven igniter, will always fix the issue. However, these components are often interconnected with more subtle systems, so addressing just one part might only be a band-aid solution.
Why do so many get the diagnostic process wrong?
Many assume that if an appliance makes noise or turns on, it’s functioning properly. In reality, noise could indicate worn bearings or misaligned spray arms, which, if ignored, might cause further damage. For instance, a thumping dishwasher often results from a failing water inlet valve or debris inside the pump, not just a broken spray arm. I once replaced a noisy pump only to find out the real culprit was a clogged filter, which I could have repaired myself with a little guidance from trusted repair guides. Refer to my article on [dishwasher thumping fixes](https://appliancebargainz.com/dishwasher-thumping-3-water-inlet-valve-fixes-to-try-in-2026) for more insights.
Are advanced mistakes common in DIY repairs?
Absolutely. One trap is over-tightening connections after replacement, which can crack plastic housings or twist wiring, leading to more severe electrical issues. For example, when replacing oven thermostat sensors, I once over-tightened the screws, causing a short circuit. Learning the proper torque and handling delicate components with care is crucial. A common mistake is also misjudging the tension on oven door springs, which can cause misalignment or even breakage if not addressed carefully. To prevent this, always check the tension specifications and consult detailed guides on [door tension spring fixes](https://appliancebargainz.com/oven-door-wont-stay-shut-3-hinge-and-seal-fixes-2026).
Now, you might ask:
What’s a hidden nuance most repair guides overlook that could save your appliance?
One often underestimated factor is the role of sensors and switches that are deeply integrated into the appliance’s control system. For instance, a dishwasher’s failure to dry dishes might seem like a heating element issue, but in reality, the problem could be a faulty turbidity sensor or moisture switch that signals the system. Diagnosing these hidden components requires a nuanced understanding of the device’s logic circuits, which many DIYers neglect, leading to unnecessary replacements or overlooked causes. According to a study by appliance repair experts, understanding sensor interactions can improve repair success rates by up to 40% and significantly reduce guesswork.
Here’s the takeaway: Don’t just replace parts blindly or assume an issue is isolated. Investigate the deeper mechanisms at play and rely on detailed diagnostics rather than assumptions. Proper troubleshooting can save you hundreds of dollars and extend the life of your appliances. Have you ever fallen into this trap? Let me know in the comments. For complex sensor issues, consider exploring advanced diagnostics in guides like the [oven temperature troubleshooting](https://appliancebargainz.com/oven-temperature-dropping-4-parts-to-swap-for-steady-heat-2026). Your appliance’s longevity depends on it.
Investing in Quality Repair Tools for Durable Fixes
When it comes to maintaining appliances like dishwashers and ovens, using the right tools can make all the difference. I personally rely on a high-quality digital multimeter because it allows me to quickly diagnose electrical issues such as faulty sensors or control boards without guesswork. A reliable set of insulated screwdrivers is essential for safely removing panels and securing delicate wiring connections. Moreover, I favor a set of specialized spring hooks and pliers that facilitate spring replacement on components like oven door springs, enabling precise tension adjustments. Investing in these tools upfront saves time and prevents accidental damage during repairs.
Predicting the Future of DIY Appliance Maintenance
As technology advances, I predict that smart diagnostic devices connected to smartphones will become the standard for appliance troubleshooting. These devices could incorporate Wi-Fi-enabled sensors to continuously monitor appliance health and alert homeowners to potential issues before breakdowns occur. This trend will likely reduce repair costs and extend appliance lifespan, aligning with the broader move towards smart home automation.
Maintaining Appliance Performance Over Time
Regular diagnostics, including testing sensors and inspecting moving parts, is key to long-term reliability. For example, routinely checking oven temperature sensors with a multimeter—and comparing readings against manufacturer specifications—can preempt uneven baking. To keep dishwasher components like spray arms and filters in top shape, I recommend following manufacturer maintenance routines and cleaning parts every few months. This proactive approach can prevent problems such as residue buildup or clogged inlet screens, which can cause performance drops and increase energy consumption. Remember, addressing minor issues early avoids costly repairs down the line. For detailed diagnostic procedures, consider consulting expert guides linked previously in this article.
How do I maintain appliance diagnostics over time?
The best way to sustain diagnostic accuracy is by investing in a quality digital multimeter and learning basic testing techniques. For example, testing the continuity of heating elements or thermistors can reveal impending failures before they cause significant issues. Additionally, keeping a repair log helps track when components like door springs or control boards were last inspected or replaced. Use these records to schedule preventive maintenance at appropriate intervals, rather than waiting for symptoms to become severe. Implementing routine checks based on manufacturer recommendations ensures that your appliances remain efficient and safe for years to come. As electronics get more sophisticated, I believe integrating IoT sensors for real-time monitoring will become increasingly essential—making DIY diagnostics smarter and more precise. Why not try testing your oven’s temperature sensor today with a multimeter? It’s an easy step that can save you time and money in the future.
Beyond the Basics: Lessons from My Repair Journeys
One of the toughest lessons I learned was that some problems seem simple but are rooted in complex sensor or control system issues—like that weird oven error code you can’t just reset. Ignoring this led me to replace parts unnecessarily, injecting unnecessary expenses into my repairs. Additionally, I realized that patience and thorough diagnostics—even when it feels tedious—save both money and frustration in the long run. Finally, I found that sharing my experiences and learning from others’ mistakes built my confidence more than any online guide ever could, turning each repair into a personal victory.
Tools and Resources That Changed My Repair Game
My essential toolkit includes a high-quality digital multimeter, which helps me diagnose electrical faults accurately—trust me, it’s a game-changer for avoiding guesswork. A set of insulated screwdrivers ensures safety and precision, especially when working with delicate controls. I also swear by specialty spring hooks and pliers for oven spring replacements, making complex tasks manageable. As for resources, I turn to detailed repair guides on sites like ApplianceBargainz—particularly articles about sensor testing and control board diagnostics—that have helped me troubleshoot even stubborn issues with confidence. These tools and guides have collectively transformed my DIY approach into a reliable practice.
Your Next Repair Adventure Awaits
Embrace the challenge of appliance diagnostics, knowing that every fix you undertake boosts your skills and empowers you to maintain your home efficiently. Remember, appliances are more manageable than they seem once you understand their inner workings. Don’t hesitate to start small—each successful repair deepens your knowledge and saves money. The future of DIY appliance maintenance is bright, with smarter diagnostics and more accessible repair techniques at your fingertips. So, why not pick one appliance and give the repair your best shot today? Your confidence—and your appliances—will thank you.
Have you ever encountered a surprising sensor issue or struggled with a stubborn component? Share your story below and let’s learn from each other’s experiences!