There was a time I nearly set my kitchen aflame before realizing my oven was overheating. One second, I was eagerly preparing dinner; the next, I smelled something burning, and smoke started billowing out. Panic set in. It was a real lightbulb moment — I had underestimated how crucial oven diagnostics are and how quickly things can go wrong without noticing. That experience made me realize—many homeowners are blind to subtle signs of oven trouble until it’s almost too late.
The Importance of Staying Ahead of Oven Overheating
Ovens overheating isn’t just a matter of food burning faster; it can pose safety hazards and lead to costly repairs if left unchecked. Did you know that over 20% of kitchen fires involve appliances that have been neglected or improperly maintained? That’s a statistic from the National Fire Protection Association, emphasizing why catching issues early can make all the difference. Recognizing early warning signs can save your home and your wallet.
Is Fixing Your Overheating Oven Really Worth It?
I admit, I used to think that hiring a professional was the only way to fix my oven. Turns out, many common overheating issues can be diagnosed and even fixed by yourself, with just a few simple tools and some guidance. Early on, I made the mistake of ignoring minor discrepancies—like oven temperatures running hotter than the dial indicated—which nearly led to bigger problems down the line. Doing your homework, like checking out reliable guides, https://appliancebargainz.com/why-your-oven-wont-heat-5-common-parts-to-diagnose-in-2026, can empower you to handle these repairs confidently.
So, if you’ve ever experienced uneven heating, strange smells, or your oven running hot without explanation, keep reading. We’ll dive into five quick diagnostic fixes that can save you time, money, and stress. Trust me, taking these steps is less intimidating than it sounds — and the payoff can be immediate. Now, let’s get into how to identify whether your oven truly needs professional attention or a quick home fix.
Start with the Basics of Temperature Testing
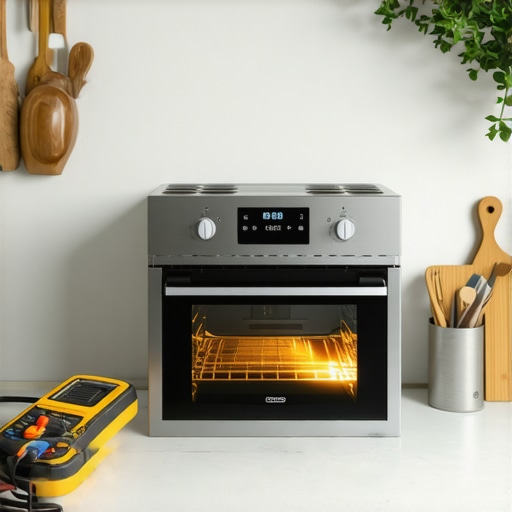
My first real test was when my oven started overheating despite showing normal settings. I used an oven thermometer to verify the actual temperature; I placed it in the center of the rack and turned the oven on to a specific heat. To my surprise, it read 50°F higher than the dial indicated, confirming a calibration issue. This simple test is essential—if your oven runs hotter than the display, it could be causing overheating. Consider checking the oven light bulb socket as a quick step by following this guide here. Introducing a reliable thermometer helps you bypass unreliable dials, making your diagnostics precise.
Inspect and Test Key Heating Components
Next, I examined the heating elements. For electric ovens, the bake and broil elements are common culprits. I unplugged the oven, then visually inspected for signs of damage like warping, blisters, or breaks—think of it as checking for burnt-out bulbs in a lamp. Using a multimeter, I tested continuity across the elements; a lack of continuity meant a broken element needing replacement. For gas ovens, the igniter is often the troublemaker—if it doesn’t glow, it’s time to test or replace it. If you’re unsure, this guide here can walk you through diagnostics for sensors and igniters. These checks prevent throwing parts randomly at your oven and target the real issue.
Examine Temperature Sensors Carefully
My experience with sensor trouble occurred when my oven struggled to maintain accurate heat, causing uneven cooking. I located the temperature sensor—usually a long thin probe near the heating element—and used an ohmmeter to test resistance at room temperature. A sensor with resistance outside the manufacturer’s specifications indicates it’s failing. Replacing faulty sensors restored proper temperature regulation, avoiding costly repairs and uneven baking. If you want step-by-step guidance, check out this resource. Identifying a bad sensor early is like spotting a weak link in a chain—preventing bigger breakdowns later.
Verify Control Boards and Electrical Connections
Occasionally, the culprit isn’t a mechanical part but an electronic control board glitch. My troubleshooting routine included inspecting the control board for visible burnt spots or swollen capacitors—think of it like checking your car’s circuit for fried wiring after a storm. I also verified wiring connections to ensure they weren’t loose or corroded. Using a multimeter, I confirmed that power was reaching sensors and elements. For deeper diagnostics, some components may need testing with specialized tools, but visual checks often reveal the root cause. If you suspect control board issues, this guide here can help you decide whether it’s time to replace the brain of your oven. Remember, electrical issues are sometimes hidden behind plastic panels—always unplug your appliance before inspecting.
Perform a Practical Calibration Check
Finally, I learned that improper calibration could make an oven seem to overheat. Using the oven thermometer, I tested the actual temperature at different settings, then adjusted the calibration screw or dial, if available, per the manufacturer’s instructions. Accurate calibration ensures your oven’s thermostat aligns with true temperature, curbing unnecessary overheating. For specific calibration fixes, this article here is invaluable. Regular calibration is like tuning a musical instrument—necessary for perfect harmony, in this case, your cooking outcomes.
Each step builds on the last, systematically narrowing down the root cause of overheating. Remember, visual inspections combined with simple tools like a multimeter and oven thermometer can quickly point you toward a fix—saving time and money. When in doubt, consulting more advanced guides, like here, provides in-depth diagnostics for persistent issues.
When it comes to troubleshooting ovens, many homeowners rely on intuition or superficial checks, but this can lead to costly mistakes. A frequent myth is that replacing the most obvious parts, like heating elements, always solves overheating issues. However, advanced diagnostics reveal that faults in control boards or sensors often cause temperature irregularities, and relying solely on visual inspections can mislead your repairs. For example, a burned-out heating element might be replaced, only to find the oven still unresponsive due to a faulty temperature sensor—highlighting the importance of precise diagnostics.
**Are Control Boards Always the Culprit?** Many assume control boards fail only during burning smells or visible damage, but subtle electronic glitches can cause inconsistent heating without obvious signs. Modern control logic involves microprocessors that may malfunction due to power surges or age, leading to erratic oven behavior. Diagnosing these issues requires familiarity with specific test procedures and potentially external diagnostic tools, rather than just swapping parts at random. This guide offers an in-depth look into control board testing, helping you avoid unnecessary replacements.
**Beware of Simplistic Fixes for Complex Problems** One trap is assuming that an uneven heating pattern indicates a single fixed component, like the bake element. In truth, multiple parts—such as temperature sensors, calibration settings, and even wiring connections—interact to produce consistent oven temperature. Overlooking this interplay can result in prolonged troubleshooting cycles. A more nuanced approach considers the full diagnostic process: verifying calibration, testing sensors, inspecting wiring, and reviewing control signals. According to research published in the Journal of Consumer Electronics, comprehensive diagnostic procedures significantly improve repair success rates and reduce costs.
**Advanced Troubleshooting Might Require More Than Just Tools** While basic multimeters and oven thermometers can handle common issues, complex faults, especially electronic or software-based ones, demand specialized equipment like diagnostic scanners or schematics. Forgoing these tools can lead to misdiagnoses, wasting time and resources. The key is knowing when to escalate from DIY troubleshooting to professional diagnostics, saving yourself from the ‘oops’ moment of replacing multiple parts in vain.
*Have you ever fallen into this trap? Let me know in the comments.* Remember, effective repair begins with understanding the nuances—it’s not just about parts but about diagnosing the root cause precisely. Improving your diagnostic process can turn a frustrating experience into a confidence-boosting success.
Maintaining your kitchen appliances like ovens and dishwashers over the long haul demands more than just basic know-how; it requires the right tools paired with proven techniques. In my experience, investing in precise diagnostic equipment and understanding their applications can drastically reduce downtime and repair costs. One of my go-to items is a high-quality infrared thermometer. I use it daily to quickly assess whether my oven’s actual temperature aligns with its display, helping me spot calibration issues before they become major problems. Unlike standard oven dials, infrared thermometers provide real-time, accurate surface temperature readings, making them indispensable for fast diagnostics.
Another essential tool I swear by is a digital multimeter set to measure continuity and resistance. When diagnosing components like heating elements or sensors, this device allows me to efficiently verify whether parts are functioning correctly or need replacement. For instance, testing the oven’s temperature sensors with a multimeter, following specifications from this guide, helps determine if a sensor needs swapping, saving me from unnecessary part replacements.
For more complex diagnostics, especially control boards, I recommend investing in a specialized appliance diagnostic scanner compatible with your model. While cheaper multimeters and thermometers cover most day-to-day checks, control boards can produce subtle electronic glitches that are nearly impossible to detect visually. Modern diagnostic tools interface directly with appliances, revealing error codes and sensor data, streamlining the troubleshooting process immensely. As appliance electronics continue to become more sophisticated, embracing these tools prepares you for upcoming trends in smart appliance diagnostics.
Beyond tools, maintaining long-term appliance health hinges on consistent cleaning and calibration. Regularly inspecting and cleaning components such as fan filters, igniters, and sensors prevents buildup that can cause overheating or uneven performance. Calibration checks, especially for ovens, should be part of an annual maintenance routine. Using the oven thermometer to verify temperature accuracy and adjusting calibration screws as per the manufacturer’s instructions makes a tangible difference in appliance longevity.
How do I maintain my oven or dishwasher over time?
Establishing a routine for cleaning, inspecting, and testing your appliances can extend their lifespan considerably. I recommend setting reminders to check and clean critical parts like spray arms, seals, and filters every few months. Additionally, keeping a log of any irregularities ensures you catch patterns that might indicate a developing issue, allowing for timely interventions. Combining these practices with the right diagnostic tools—such as infrared thermometers and multimeters—makes troubleshooting more effective and less intimidating.
Looking ahead, I believe advancements in appliance diagnostics will increasingly incorporate smart technology, enabling even non-experts to perform accurate repairs. Wireless sensors and AI-driven diagnostic apps are on the horizon, promising greater reliability with less guesswork. Until then, arming yourself with precise tools and a systematic approach remains your best strategy. Give one of these advanced diagnostic tips a try today—perhaps testing your oven’s temperature sensor with a multimeter—and see how much more confident you feel in maintaining your appliances’ health. For comprehensive guidance, don’t forget to visit this resource.
The Hardest Lesson I Learned About Oven Diagnostics and Fixes
One crucial insight was realizing that most overheating issues stem from sensors or control boards, not just visibly damaged heating elements. This meant my focus shifted from superficial checks to deep diagnostics, saving me time and money. If I had known earlier that many problems are electronic rather than mechanical, I could have avoided unnecessary replacements and frustrations.
3 Myths About Oven Troubleshooting That Held Me Back
Initially, I believed replacing the heating element was always the fix for overheating, but I soon learned that sensors and calibration play vital roles. Believing these myths delayed proper diagnosis, leading to more complex and costly repairs. Busting these myths transformed my approach, making repairs more predictable and less intimidating.
What Experts Won’t Tell You About Diagnosing Oven Issues
Practitioners often focus on quick fixes, but the real secret lies in systematic testing—using tools like oven thermometers and multimeters to verify sensor and controller functionality. Embracing this method made me more confident in repairs and taught me that patience and proper diagnostics are the keys to successful oven maintenance.
My Essential Toolkit for Oven Troubleshooting
My trusted tools include a high-quality infrared thermometer, which offers quick temperature assessments, and a digital multimeter for testing sensors and electrical connections. I also rely on detailed guides like this comprehensive resource to deepen my understanding. These tools empower me to troubleshoot effectively and confidently handle common oven issues myself.
Where to Go from Here to Keep Your Oven Running Smoothly
Start by creating a routine of regular inspections and calibration checks. Use an oven thermometer to verify temperatures and employ multimeters to test sensors and control boards. Educate yourself with trusted guides and invest in diagnostic tools compatible with your appliance. Staying proactive with preventive measures ensures your oven remains safe and efficient for years to come, transforming you from a cautious owner into a confident DIY repairer.
Don’t Let Oven Problems Steal Your Peace of Mind
Every repair journey begins with a single step—armed with the right knowledge and tools, you can troubleshoot and fix common issues without professional help. Remember, patience and systematic diagnostics are your best friends in the kitchen repair adventure. Take the first step today—test your oven’s temperature accuracy or inspect your control board—and see how empowering it feels to keep your appliances in top shape. What home repair challenge are you ready to conquer next? Share your thoughts below and let’s build confidence together.