One evening, as I grabbed a quick snack from the kitchen, I reached for my oven controls and recoiled. The knobs, usually shiny and clean, felt sticky and grimy. It was the kind of moment that makes you realize how much overlooked mess can impact your daily routine. After a quick assessment, I knew I wasn’t alone—many homeowners face this greasy dilemma that seems almost impossible to tackle.
Dealing with That Ugly, Sticky Residue on Your Oven Knobs
If you’ve ever scrubbed and scrubbed only to find the grease stubbornly clinging, you’re not imagining things. Over time, cooking splatters, grease, and grime can really build up, leading to a sticky, dirty mess that’s more than just unsightly—it’s unhygienic too. I learned early on that ignoring this problem only made it worse, and I definitely don’t want you to fall into that trap.
Is This Fix Worth the Effort? My Honest Take
Admittedly, I made a mistake when I first approached this task. I thought a quick wipe with just plain water would do the trick. Spoiler alert: it didn’t. That led me to discover that specialized cleaning solutions and a bit of patience were essential for truly banishing the grease. Trust me, putting in the effort is well worth it—clean knobs not only look better but also boost your oven’s hygiene and functionality.
Now, if you’re wondering how to get your control knobs looking brand new without risking damage, stay tuned. I’ll walk you through simple yet effective methods that will turn your greasy disaster into a thing of the past. After all, a clean oven makes cooking more enjoyable—and who doesn’t want that? For more detailed troubleshooting tips, you might find this [oven repair essentials guide](https://appliancebargainz.com/oven-repair-essentials-troubleshooting-common-issues-with-parts) helpful.
Why Grease Keeps Clinging to Your Control Knobs
The reason those stubborn residues hang around is that grease and grime tend to embed into the tiny crevices and porous surfaces of knobs. Regular cleaning often isn’t enough; you need the right techniques to break down and lift away the buildup. Think of it like peeling away layers of grime—a process that requires a bit of insight and the right tools.
Before diving into the cleaning steps, it’s crucial to understand what makes the grease so clingy and how a small mistake can render your efforts useless. For instance, using harsh abrasives might scratch or damage the surface, leading to more problems down the line. That’s why I recommend gentle, targeted solutions that are effective but safe for your appliance. If you’re interested in diagnostics, you might want to check out this [comprehensive dishwasher diagnostics guide](https://appliancebargainz.com/dishwasher-parts-a-comprehensive-guide-to-diy-diagnostics) to complement your repair knowledge.
Next, we’ll explore practical methods to restore those knobs to their former glory, ensuring your kitchen stays sparkling clean and hygienic. Ready to turn your greasy nightmare into a shining success? Let’s get started.
,
Disconnect the Power and Remove the Knobs
Before starting, unplug your oven or turn off the power supply to avoid electrical hazards. Carefully detach the control knobs, usually by pulling them straight off or unscrewing them if secured with screws. This step makes the cleaning process safer and more thorough. I once tried cleaning the knobs still attached to the oven—which led to messy drips and half-cleaned surfaces—so I learned to always remove them first for best results.
Prepare a Baking Soda and Vinegar Solution
Mix a paste of baking soda and water or prepare a solution of white vinegar and warm water. The baking soda acts as a gentle abrasive, breaking down grease, while vinegar dissolves mineral deposits and grime. In my experience, spraying a vinegar solution onto stubborn residues helped loosen the grime without scratching the surface. For tougher buildup, I let the solution sit for 10-15 minutes to penetrate deeply.
Apply the Cleaner and Let It Sit
Use a soft cloth or sponge to apply the cleaning mixture to each knob. For crevices and textured areas, a soft-bristled toothbrush works wonders. I once used an old toothbrush to scrub away grease in small cracks, leading to significantly cleaner knobs. Allow the solution to sit for 5-10 minutes. This step loosens stubborn grease and prevents excessive scrubbing, which can cause surface damage.
Scrub Gently to Lift Grease
Gently scrub the knobs with a cloth or toothbrush to lift away dissolved grease. Avoid abrasive scrubbers that may scratch plastic or coated surfaces. After scrubbing, wipe off the residues with a damp cloth. I found that patience here yields better results; rushing often smears grease or pushes it into crevices. Repeating this step as needed ensures comprehensive cleaning.
Rinse and Dry Thoroughly
Use a clean, damp cloth to wipe the knobs, removing any residual cleaner. Rinsing prevents buildup of cleaning agents that can cause further grime. Dry the knobs completely with a soft towel to prevent water spots or corrosion. During my first attempt, skipping this drying step left moisture that attracted dust, so now I always dry thoroughly.
Reattach the Knobs and Test
Once dry, reattach the control knobs securely onto the oven. Turn the oven back on and verify the controls function properly. This method restored my knobs’ appearance and improved hygiene. For detailed repair tips, you might want to explore this oven repair guide.
Additional Tips for Long-Term Maintenance
Regularly wipe down your oven knobs with a damp cloth to prevent grease buildup. Consider applying a silicone-based protectant designed for plastics to help repel future grime. If knobs are heavily damaged or cracked, replacing them with new parts from parts and diagnostics site ensures optimal safety and function. This routine not only keeps your kitchen looking fresh but also prolongs the lifespan of your appliances.
Many DIY enthusiasts and even some professionals often fall into a trap of oversimplifying appliance diagnostics, leading to costly mistakes. One widespread myth is that a quick visual inspection can reveal all faults, but in reality, appliances like ovens and dishwashers often have hidden issues that require nuanced testing techniques. For instance, assuming that replacing a thermostat will automatically fix uneven heating neglects the importance of calibrating sensors and testing control boards, which can be overlooked by even experienced repairers. Delving deeper, many believe that parts like heating elements or fill valves are straightforward replacements, but without proper diagnostic procedures—such as resistance testing with a multimeter—they might be replacing components unnecessarily, thus wasting time and money.
Are Fault Codes Always Reliable Indicators of the Problem?
It’s tempting to rely solely on error codes displayed by modern appliances, but these codes can sometimes be vague or misleading, pointing to a symptom rather than the root cause. Experts emphasize that codes should be used as a starting point for a comprehensive diagnostic process, including visual inspections, resistance checks, and understanding appliance-specific nuances. For example, a dishwasher showing a ‘drain error’ might be caused by a faulty drain pump, a clogged filter, or even a control board malfunction—correctly diagnosing these issues requires deeper technical knowledge rather than just reading the error code. According to appliance repair specialists, skipping these critical steps increases the risk of misdiagnosis and repeat repairs. For more advanced troubleshooting techniques, visit this guide on dishwasher diagnostics.
Many overlook the importance of inspecting wiring connections and testing for electrical continuity, which are often the cause of intermittent faults. Misdiagnosis is especially common when repair attempts focus only on visible parts, neglecting internal components that can’t be seen without dismantling. The common trap here is assuming that all faults are mechanical or visible, but energy pathways and control circuitry are equally critical. Experts warn that careless testing—like using excessive force on sensitive connectors—can cause further damage. Remember, appliance diagnostics demand a systematic approach: testing, ruling out, and confirming before replacing parts.
Have you ever fallen into this trap? Let me know in the comments and share your experience with troubleshooting appliance issues. Remember, mastering the nuances of diagnostics not only saves money but also ensures your repairs stand the test of time.
Keep It Running: Tools and Techniques for Effective Maintenance
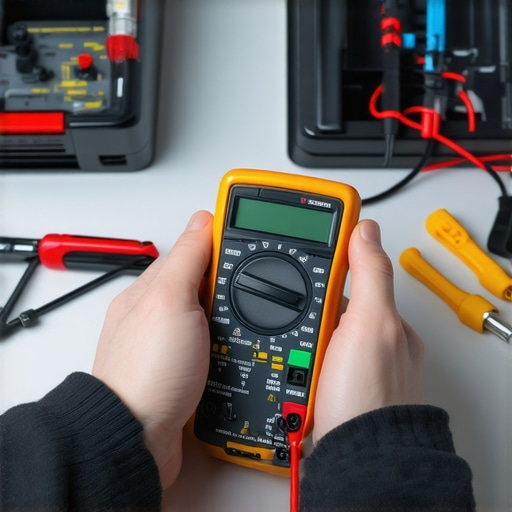
Maintaining your appliances over the long term ensures they operate efficiently and helps you avoid costly repairs. A well-stocked toolkit tailored for diagnostics and minor repairs is crucial. I personally rely on a high-quality digital multimeter — specifically, the Fluke 117 — because it offers precise readings and durability, which are vital when testing controls, sensors, or heating elements. Additionally, a good set of small screwdrivers and torx bits allows me to disassemble components safely without damaging delicate parts.
Beyond physical tools, having diagnostic software is becoming increasingly important. For ovens and dishwashers, some manufacturers provide proprietary apps that connect via Wi-Fi or Bluetooth, enabling you to read error codes and firmware statuses. But for general troubleshooting, resistance testers and continuity testers remain indispensable. They’re essential for spotting faulty wiring or open circuits—issues that often go unnoticed but lead to performance degradation over time.
Embrace Systematic Diagnostics for Long-Term Success
I recommend approaching repairs methodically. For example, when diagnosing an oven that heats unevenly, I start by testing the bake and broil elements using a resistance meter, then check temperature sensors linked to the control board. If needed, I examine wiring connections with the multimeter set to continuity mode. This thorough approach prevents unnecessary part replacements. For detailed wiring and diagnostics, check out this troubleshooting guide.
Looking ahead, AI-powered diagnostic tools may soon offer even smarter, real-time insights, reducing guesswork. Manufacturers are developing self-monitoring systems that can alert you to part degradation before a failure occurs, much like modern cars. This trend will make appliance maintenance more proactive and less reactive, saving time and money.
How do I maintain appliance diagnostics over time?
Regularly checking connections, cleaning sensors, and updating firmware when available are vital. Incorporating preventive checks into your routine ensures minor issues don’t escalate. For instance, periodically testing heating elements with a resistance meter can catch deterioration early. Keeping a detailed repair log helps track recurring issues and guides when professional intervention is needed. By staying proactive, you extend the lifespan of your appliances and maintain peak performance.
If you’re tackling a dishwasher or oven, remember that parts like control boards and sensors can be tested with resistance or capacitance measurements. And for those interested in honing their diagnostic skills, I suggest practicing resistance tests with a multimeter on different components and consulting detailed guides such as this resource to boost your confidence.
Try applying a systematic, resistance-based testing method on your next repair. It’s a small investment that pays off by preventing misdiagnosis and unnecessary part replacements. Remember, meticulous maintenance and tool familiarity significantly extend appliance lifespan, keeping your kitchen humming smoothly and efficiently.
Lessons That Changed My Approach to Appliance Fixes
- One of the toughest lessons I learned was that quick fixes rarely solve stubborn grime—patience and proper technique are your best allies.
- Trusting my instincts over instructions sometimes led me to better solutions, especially when dealing with delicate surfaces.
- Understanding the root causes of grease buildup prevented recurring issues, saving time and money in the long run.
- Documenting my repairs made troubleshooting future problems easier and boosted my confidence as a DIY enthusiast.
My Go-To Arsenal for Appliance Troubleshooting
- Fluke 117 Multimeter: Precision and durability help me diagnose electrical issues with confidence.
- Soft-Bristled Toothbrushes: Gentle enough to clean crevices without scratching surfaces, yet effective against grime.
- Natural Cleaning Solutions: Baking soda and vinegar are my trusted companions for breaking down grease safely.
- Diagnostic Guides from ApplianceBargainz: In-depth resources like this troubleshooting guide keep me sharp and informed.
Keep the Momentum Going and Stay Empowered
Take the knowledge you’ve gained here and turn it into your own appliance restoration adventure. Armed with the right tools, patience, and curiosity, you’re capable of tackling grime and glitches alike. Remember, every successful repair bolsters your confidence and prolongs the lifespan of your appliances. Don’t hesitate to experiment safely and consult trusted resources. Have you faced a tricky control knob cleaning? Share your experience below and let’s learn together—the journey to appliance mastery is ongoing!