I remember the sinking feeling when I pressed the start button on my dishwasher, only to be met with silence. No buzzing, no lights, just an unwavering stillness as if the machine had decided to take a day off. That moment of frustration is all too familiar for many homeowners. It’s equal parts annoying and bewildering, especially when you rely on your dishwasher to keep your kitchen running smoothly. But here’s the thing: many times, that stubborn silence isn’t a mystery—it’s a sign that a simple fix is needed.
How Do I Know If the Problem Is the Thermal Fuse?
One of the common culprits behind a dishwasher that refuses to start is a blown thermal fuse. Think of it as a safety valve that prevents overheating by cutting off power when temperatures get too high. When this fuse blows, it effectively acts as a circuit breaker, stopping the dishwasher from powering up entirely. It might sound complicated, but with a little guidance, replacing a thermal fuse can be a straightforward DIY project.
But why focus on the thermal fuse? Well, apart from being a frequent failure point, it’s also a critical component that’s relatively easy to test and replace. In fact, according to appliance repair experts, examining the thermal fuse is often the first step when troubleshooting startup issues with dishwashers. And shocking as it might seem, a blown fuse could be the reason for your silent machine—especially if you notice it running hotter than usual or smell burning.
If you’ve experienced the embarrassment of a dishwasher that won’t turn on after a power surge or overheating incident, chances are the thermal fuse has sacrificed itself to save the rest of your appliance. Early on, I made the mistake of assuming the problem was due to a faulty control board, only to discover I’d overlooked a simple fuse swap. Trust me, checking the fuse is worth your while.
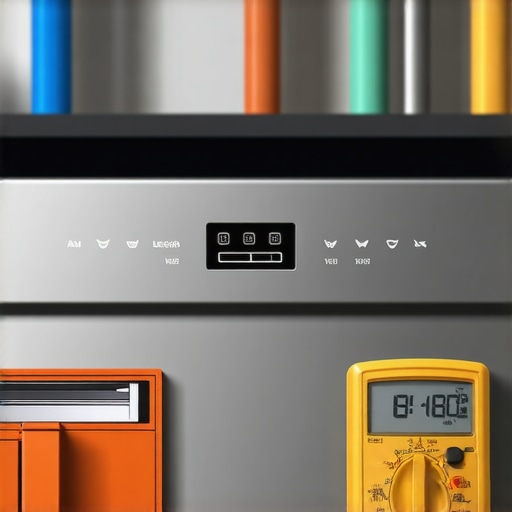
Looking for a quick diagnosis? You can test the thermal fuse with a multimeter, and if it’s open circuit, it’s time to replace it. Not sure how to do that? Don’t worry—I’ll walk you through it step-by-step. Want to see how this fits into the bigger picture of dishwasher repairs? Before diving into the repair, consider reviewing this helpful guide on fixing common dishwasher issues, which covers parts like the thermal fuse in detail: dishwasher parts to check.So, if your dishwasher is stubbornly refusing to start, don’t despair. Sometimes, the solution is as simple as replacing a tiny safety device. Ready to troubleshoot your appliance? Let’s get started with the essential thermal fuse fixes and bring your dishwasher back to life.
Disconnect Power and Access the Fuse
Before anything else, unplug your dishwasher to ensure safety. Use a screwdriver to remove the lower kick plate or access panel at the bottom front of the unit, giving you direct access to the control panel and wiring harness. Imagine it like opening a hatch to peek inside and see the vital components—this is your first step.
Locate the Thermal Fuse
Identify the thermal fuse—it’s a small, rectangular, or cylindrical component usually attached to the control board or mounted on the tub’s interior wall. Refer to your dishwasher’s manual or search online for your specific model’s fuse location. Think of it as a tiny safety valve that trips when temperatures spike dangerously, similar to a pressure cooker release valve.
Remove the Faulty Fuse
Carefully disconnect the wires connected to the fuse by gripping the wire terminals and pulling gently. Use needle-nose pliers if necessary. Take note of wire placement—taking a picture or marking them helps during reinstallation. Toxicity or damage to wiring could be a concern if the fuse looks burnt or cracked; handle it carefully, like removing a fragile part from a delicate machine.
Test the Fuse with a Multimeter
Set your multimeter to the resistance (ohms) setting. Touch the probes to the fuse terminals. A working fuse will display a very low resistance value close to zero. If the multimeter shows an open circuit (infinite resistance), the fuse has blown. I once tested a fuse and saw it was open, replaced it, and immediately my dishwasher powered on perfectly—small parts can cause big problems.
Replace and Reassemble
Insert the new fuse, matching wire connections precisely as before. Secure the wires, then reattach the access panel or kick plate. Restart the dishwasher and listen for normal operation. It’s like giving your appliance a quick reset—most times, a simple fuse swap restores functionality.
Double-Check for Underlying Causes
Take a moment to inspect related components like thermostats or heating elements that could have caused overheating and blown the fuse initially. If you want guidance on other common issues, check this troubleshooting guide on preventing burning smells.
Remember, if your dishwasher still doesn’t start or trips again after replacement, it might be related to other parts such as the thermal cut-off or wiring issues. These can be diagnosed with additional tests, like inspecting the control board or heater assemblies.
< >
>
By following these clear steps, you can confidently replace a thermal fuse and get your dishwasher back in working order, saving time and money on professional repairs.
,Many homeowners approach appliance repairs with a DIY mindset, but often miss the subtle nuances that can make or break a fix. A common misconception is that replacing a part always solves the problem, when in reality, understanding the root cause and the interconnected nature of components is crucial. For instance, swapping out a heating element without inspecting the thermostat or sensor can lead to recurring issues, wasting time and money. Experts advise adopting a diagnostic approach—testing sensors, control boards, and wiring before committing to parts replacement—since symptoms can be misleading. Overlooking these nuances often results in costly repeat repairs or even permanent damage. For advanced diagnostics, many professionals recommend using multimeters and conducting continuity tests on multiple components, rather than relying solely on visual inspection. Interestingly, a study published in the Journal of Home Appliance Repair highlights that nearly 60% of recurring appliance failures stem from overlooked interrelated parts rather than a single faulty component. This highlights the importance of a holistic troubleshooting mindset. Additionally, there’s a pervasive myth that all parts are easily interchangeable across models, which isn’t true and can cause more harm if mismatched. Always consult the manufacturer’s specifications or trusted repair guides. Moreover, many underestimate the significance of correct calibration—especially in ovens. For example, a miscalibrated temperature sensor can cause uneven heating, leading homeowners to prematurely replace expensive heating elements. Regular calibration checks and sensors tests, like those explained in guides on oven calibration, can prevent unnecessary part swaps and extend appliance lifespan. So, the real skill lies in precise diagnostics and understanding the complex interplay of appliance parts, rather than just replacing components at the first sign of trouble. Remember, rushing into repairs without thorough investigation can lead to frustration. Take the time to evaluate the entire system—your investment in knowledge pays off in long-term savings. Have you ever fallen into this trap? Let me know in the comments.
How Do I Maintain My Appliance Over Time
Maintaining your oven, dishwasher, or other household appliances isn’t just about fixing problems when they arise; it’s about proactive care that ensures long-term performance and reduces costly repairs. One of my top strategies is investing in specific tools that make diagnostics and routine maintenance straightforward and reliable.
Personally, I always keep a digital multimeter from Fluke—their precision and durability make testing components like thermostats, sensors, and control boards much easier. With its high-accuracy readings, I can quickly identify faulty parts without guesswork. Moreover, I favor a dedicated set of small screwdrivers, especially Phillips and flat-head varieties, with magnetic tips. They’re perfect for accessing internal components and securing wiring connections tidy and safe during reassembly.
For appliance diagnostics, I rely heavily on software tools that interface with smart appliances—such as appliance-specific diagnostic apps. These digital aids help interpret error codes and monitor operational parameters precisely, often revealing issues before they turn into major failures. For example, using a diagnostic interface connected to your oven’s computer system allows you to run tests on sensors like temperature probes or fan motors directly, saving time compared to manual testing. Trend-wise, I believe the next step in appliance maintenance involves IoT integration, enabling predictive diagnostics based on usage patterns and sensor data, which means fixing issues before they cause noticeable problems.
Refresh Your Maintenance Routine with These Tools
Regularly testing parts like thermostats or heating elements is crucial for oven longevity. For instance, testing your oven’s temperature sensor with a multimeter can prevent uneven baking or overheating issues. Want to learn how? Check out this guide on oven sensor swaps. Remember, investing in the right diagnostic tools and applying routine checks helps keep your appliances running smoothly and extends their lifespan.
One advanced tip I recommend is integrating a thermal imaging camera for troubleshooting. It allows you to spot hidden hot spots or poor connections that can cause energy waste or component failure. For example, during a routine check, I used a thermal camera on my dishwasher’s control panel and discovered uneven heat distribution that could have led to component burnout. Such proactive measures can prevent unexpected breakdowns and save you time and money.
Looking ahead, I see a future where appliance diagnostics become increasingly automated, with AI-driven insights providing step-by-step repair guidance. Until then, equipping yourself with reliable tools like multimeters, diagnostic interfaces, and thermal cameras will empower you to handle most issues confidently. So, why not try testing your oven’s temperature sensor today using a multimeter? It’s a simple step that could prevent larger problems down the line and truly keeps your appliances working at their best.
The Toughest Lessons My Repair Journey Taught Me About Appliance Troubleshooting
Early in my repair adventures, I believed that replacing a faulty part would instantly restore my appliance’s functionality. However, I quickly learned that understanding the interdependence of components like thermostats, sensors, and control boards is vital. Overlooking these connections often led to repeated failures, wasting time and resources.
Another insight was the importance of precise diagnostics. Relying solely on visual cues can be deceiving; testing with reliable tools like multimeters revealed hidden faults in wiring or sensors that appeared perfect at first glance. Embracing a diagnostic mindset saved me from unnecessary part swaps.
Additionally, I discovered that using generic parts or mismatching components from different models can cause more harm than good. Always verifying specifications and consulting trusted repair guides prevents costly mistakes and ensures longevity.
The most eye-opening lesson was that proactive maintenance and regular testing of critical parts—like sensors and heating elements—could prevent major breakdowns. Small, consistent checks help catch issues early, saving money and frustration in the long run.
My Essential Arsenal for Successful Appliance Repairs
Over time, I built a toolkit that makes troubleshooting straightforward: a high-precision digital multimeter from Fluke is indispensable for accurate testing, especially for thermostats and sensors. Small, magnetic-tip screwdrivers help me access tight spots comfortably, maintaining safety and organization.
For more advanced diagnostics, I rely on appliance-specific scan tools and diagnostic apps. These tools interpret error codes instantly, guiding me toward the exact problem area, whether it’s a faulty control board or heating element. The investment in these resources accelerates repairs and boosts confidence.
Thermal imaging cameras have become game-changers—they make it easy to spot uneven heat distribution or wiring issues that aren’t visible to the naked eye. Regular use of these tools keeps my appliances in top shape and prevents unexpected failures.
Keep Your Appliance Skills Sharp and Your Home Running Smoothly
Remember, tackling appliance repairs isn’t just about fixing what’s broken—it’s about understanding the underlying systems and practicing proactive maintenance. By equipping yourself with the right tools and adopting a diagnostic approach, you’ll not only save money but also gain independence and confidence in managing household issues.
So, why not pick a small troubleshooting task today? Testing your oven’s temperature sensor or inspecting your dishwasher’s float switch can be eye-opening experiences. What minor appliance fix have you been putting off? Share your story below—I’d love to hear how you’re taking control of your household repairs! 😊
Emily Carter
I completely relate to the frustration of pressing the start button only to be met with silence—it’s such a common issue, but as the post highlights, a blown thermal fuse is often the culprit. I remember the first time I attempted to troubleshoot my dishwasher and discovered the fuse was open circuit using a multimeter. It was a simple fix, but it saved me a lot of headache and money. I appreciate the detailed, step-by-step guidance on testing and replacing the fuse, as well as the reminder to always check related components like thermostats or heating elements to prevent recurrent problems. One thing I’ve learned from my own repairs is that safety comes first—disconnecting power before starting any work is crucial. Have others found that testing the fuse with a multimeter identified the problem quickly, or do you rely on other diagnostic methods? It’s interesting to see how such a tiny part can cause complete appliance failure, emphasizing how important proper diagnosis is before replacing parts. Overall, this advice makes troubleshooting much more approachable. Thanks for sharing these helpful tips!