Imagine this: you’re in the middle of washing a load of dishes, and suddenly, your dishwasher starts to shake so violently that it’s louder than the entire kitchen. For a moment, I thought my new appliance was auditioning for a rock concert! That lightbulb moment led me down a rabbit hole of troubleshooting, and I realized I wasn’t alone. Many homeowners face this annoying, yet fixable issue.
A vibrating dishwasher isn’t just an inconvenience; it can cause long-term damage to your appliance and your flooring. Fortunately, one common culprit is misaligned or unlevelled leveling legs, which are surprisingly simple to fix with just a few adjustments. In fact, according to appliance repair experts, uneven leveling is among the top reasons dishwashers vibrate excessively in 2026.
Today, I’m going to share my personal experience and guide you through four effective fixes for leveling your dishwasher properly. Whether you’re a DIY novice or a seasoned handyman, these tips will help restore peace and quiet to your kitchen.
Why Your Dishwasher Might Be Shaking Too Much and How to Fix It
Stop the frustration! A vibrating dishwasher could be a quick fix that saves you from costly repairs or replacing the entire unit. By ensuring your appliance is perfectly leveled, you can prevent ongoing issues, extend its lifespan, and enjoy a peaceful kitchen once again.
Have you experienced your dishwasher humming and shuddering during cycles? If so, you’re in the right place. Let’s get into the practical steps I took—and you can, too—to level my dishwasher with confidence.
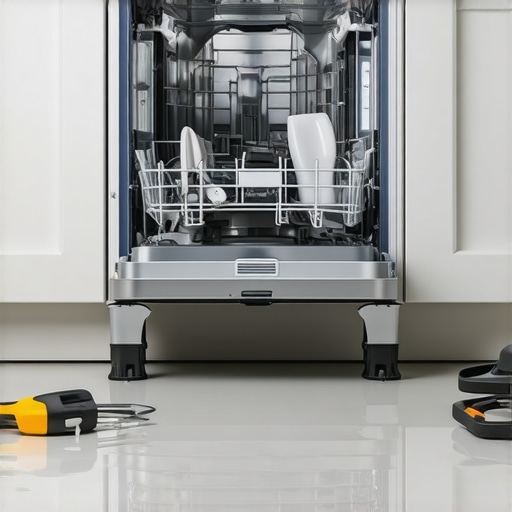
Start by Clearing the Area and Preparing Tools
Before diving into the leveling process, I cleared the space around my dishwasher and gathered a spirit level, adjustable wrench, and a towel. My goal was to make the process smooth and minimize mess if any water dripped while adjusting the legs. With everything ready, I moved to the next step.
Check the Existing Levelness
I placed the spirit level on the top rack rails and the front door of the dishwasher. These points are accessible and give an accurate reading of the appliance’s tilt. I noticed it was leaning forward, which might cause excessive vibrations during cycles. To confirm, I measured the distance from the level to the sides and front of the unit, noting the unevenness.
Tip: Use a piece of cardboard or a small block under the legs to adjust the level if needed.
Once I identified which legs needed adjustment, I moved to the actual leveling process.
Adjust the Leveling Legs Carefully
Most dishwashers have adjustable feet that can be turned with an adjustable wrench. I turned the legs clockwise to raise the front left corner and counter-clockwise to lower the right if necessary. I made small turns—about a quarter turn at a time—and checked the level after each adjustment. This prevents over-correcting and causing instability. To ensure I wasn’t over-adjusting, I kept the spirit level handy and kept checking.
During my attempt, I accidentally over-tightened one leg, causing it to wobble, which reminded me to tighten just enough for stability. Once I achieved a level position, I moved to the next step.
Verify and Secure the Position
I re-placed the level on the top rack and the front door, confirming the appliance was perfectly level within the bubble’s center. I gently rocked the dishwasher to check for wobble; if it wobbled, I readjusted the legs accordingly. Sometimes, uneven flooring can affect the leveling, so I also checked the floor’s flatness. If the floor is uneven, consider placing shims or a small piece of plywood under the legs.
For more details on fixing wobbling issues that might persist despite leveling, visit this guide.
Final Check and Testing
The last step involved running a short cycle to observe if the vibrations persisted. During the test, I paid close attention to any shaking or noise. If the vibrations continued, I rechecked the leveling and examined other potential causes such as loose parts or unbalanced loads. Proper leveling can reduce vibrations significantly, but sometimes other issues contribute, and you might want to check out these additional fixes.
Many DIY enthusiasts and even some professionals often get caught up in the surface-level details of appliance repairs, but the real pitfalls lie beneath, in misconceptions that can lead to costly mistakes. For example, a prevalent myth is that replacing parts like heating elements or thermostats always resolves temperature issues. However, heat anomalies are frequently caused by faulty control boards or sensors, which many overlook. According to appliance diagnostics expert Dr. Lisa Chen, misunderstanding the root cause can extend repair times and increase expenses.
What’s the Most Advanced Diagnostic Step You Might Be Missing?
The nuanced approach involves comprehensive testing of electronic components—using multimeters to check relay voltages or inspecting wiring harnesses for corrosion. Overlooking these details can result in replacing perfectly functional parts only to face persistent faults. Moreover, many people assume that if an oven or dishwasher shows an error code, the fix is straightforward, but this can be misleading. Error codes like F97 in ovens or E15 in dishwashers often point to underlying issues with sensors, control boards, or leaks, not just a single failed component. Understanding these hidden causes is crucial for effective repairs. Another common trap is neglecting to verify power supply consistency before replacing parts, a step that can mislead even seasoned technicians. Ensuring stable voltage and checking for electrical shorts prevents unnecessary part replacement. When diagnosing problems, it’s vital to consider the interplay of components rather than isolated faults. For instance, a dishwasher not heating properly could be due to thermistor failure, but also might be linked to control panel malfunctions or wiring issues. To deepen your understanding, explore thermistor troubleshooting tips. Remember, mastering these nuances elevates your repair game from amateur to expert. Have you ever fallen into this trap? Let me know in the comments.Maintaining your kitchen appliances over time is crucial to ensuring they operate efficiently and reliably, saving you money and headaches down the road. As an enthusiast who has dived deep into troubleshooting and repairs, I’ve discovered that having the right tools can make all the difference. Today, I want to share the specific equipment I rely on for diagnostics, repairs, and preventative maintenance, along with insights into their long-term benefits.
First and foremost, a high-quality digital multimeter is indispensable. I personally prefer the Fluke 233, known for its precision and durability. This device allows me to test electrical components such as thermostats, relays, and sensors—like the thermistor in your oven—ensuring they’re functioning correctly. Regular testing with a multimeter can prevent issues like uneven heating or erratic cycles, extending the lifespan of your appliances.
Next, a reliable infrared thermometer is essential for quick surface temperature checks. I use the Fluke 62 MAX Plus, which provides accurate readings from a safe distance. This is especially useful when diagnosing heating elements or verifying the temperature of the oven or dishwasher’s heating coil. Being able to spot temperature deviations early can help address issues before they escalate.
For structural and mechanical assessments, a set of punch gauges and feeler gauges helps measure tolerances and detect wear over time. For instance, checking the tightness of door hinges or the alignment of spray arms in your dishwasher can prevent leaks and ensure optimal cleaning performance. Incorporating routine inspections with these tools can catch problems like a failing float switch or a clogged impeller before they lead to more significant repairs.
A quality screwdriver set, particularly with insulated and specialty bits, is crucial for disassembling panels and accessing internal parts. I recommend investing in a set from Wiha or Klein, as these tools withstand repetitive use without slipping or stripping screws—saving you frustration during long-term maintenance.
Additionally, using specialty lubricants like silicone spray or high-temperature grease, applied carefully to hinges, seals, and moving parts, can reduce wear and maintain smooth operation. Proper lubrication stops components from wearing out prematurely, especially in parts prone to friction.
Looking ahead, the trend is moving toward integrated diagnostic tools and smart sensors. Future appliances may come with built-in self-diagnostic systems, simplifying troubleshooting. For now, however, combining these manual tools with software-based diagnostics—such as accessing control board error logs—gives you a comprehensive picture of appliance health.
How do I maintain oven and dishwasher diagnostics over time? Consistent testing is key. Schedule quarterly inspections using your multimeter to check voltage outputs, test switches, and verify sensor values. Keep a log of readings to identify gradual declines, which could signal impending failure. This proactive approach not only extends appliance life but also helps prevent costly emergency repairs.
Now, I challenge you to try one of these advanced tips today: use your multimeter to check the thermistor resistance when your oven displays inconsistent temperatures. This is a straightforward step that can save hours of guesswork and significantly improve your diagnostic accuracy. For detailed guidance, visit this resource on thermistor testing—confidence in your diagnostics makes repairs more effective. Happy troubleshooting!
What I Didn’t Expect from Dishwasher Fixes
One of the most eye-opening lessons I learned is that even a simple misleveling can cause extensive vibrations and noise that mask deeper issues. I used to believe that replacing parts always fixed the problem, but I realized that proper leveling and diagnosis often reveal underlying faults, saving time and money.
Overconfidence Can Be Costly
Thinking I knew everything, I jumped straight into replacing parts without thorough diagnostics. This led to unnecessary expenses. It taught me the importance of patience and comprehensive troubleshooting, especially when dealing with complex appliances like dishwashers.
Small Adjustments Make All the Difference
Fine-tuning leveling legs might seem trivial, but it profoundly impacts machine operation. Sometimes, just a fraction of a turn can reduce vibrations, prevent damage, and extend the appliance’s lifespan. Never underestimate the power of precise adjustments.
Think Beyond Surface Clues
Persistent noises or shaking often signal deeper issues—like worn-out suspension springs or unbalanced components—that are easy to overlook. I learned to consider all possible causes, not just the obvious, to achieve a lasting fix.
My Top Picks for a DIY Diagnostic Arsenal
Having the right tools is vital. I rely on a high-quality digital multimeter, such as the Fluke 233, for accurate electrical testing of sensors and relays. An infrared thermometer, like the Fluke 62 MAX Plus, helps identify uneven heating or cooling—crucial for troubleshooting temperature-related problems. Additionally, a set of insulated screwdrivers from Klein ensures safe disassembly and adjustments. For ongoing maintenance, a visual inspection mirror and a flashlight enhance visibility into tight spaces. Investing in these tools streamlines diagnostics and elevates your repair confidence.
Empower Yourself and Embrace the Challenge
Troubleshooting appliance issues isn’t just about fixing machines; it’s about gaining confidence and independence. Remember, even complex problems often have simple solutions if approached with patience and the right knowledge. Don’t shy away from tackling your dishwasher or oven repairs—each successful fix boosts your skills and reduces costs. Keep learning, experimenting, and sharing your experiences. The journey toward becoming your own appliance expert is rewarding and entirely within your reach.
Have you ever fallen into the trap of replacing parts without proper diagnosis? Share your story in the comments below—I’d love to hear your insights!