It was one of those mornings—open the dishwasher, and instead of the usual hum, I was met with an awkward silence and a stubbornly empty drum. Immediately, I knew something was off. The water simply wouldn’t fill, and I felt that familiar pang of frustration—another appliance issue that seemed to crop up out of nowhere. As a homeowner who loves fixing things myself, I’ve learned that these problems are often fixable with a bit of patience and the right knowledge.
Today, I want to share how I tackled my dishwasher’s slow fill problem—specifically, three simple inlet screen fixes that made a world of difference. If you’ve ever faced that annoying moment when your dishwasher just refuses to fill or takes forever to start its cycle, you’re not alone. And trust me, you’re probably not out of options.
Why Fixing Your Dishwasher Matters More Than Ever in 2026
In our fast-paced lives, a dishwasher that drags its feet isn’t just an annoyance—it can impact your entire routine. Plus, with rising water costs and environmental concerns, fixing appliance issues like slow filling is more than just about convenience. It’s about efficiency, saving money, and reducing waste. Studies have shown that properly maintained appliances consume less energy and water—an essential consideration as we aim to shrink our ecological footprint in 2026.
But here’s the thing: many folks overlook the small components—like inlet screens—that play a crucial role in your appliance’s performance. I made that mistake early on, assuming it was a major repair or replacement required, only to discover a tiny filter was clogged with grime and mineral deposits. That small oversight delayed my repair and cost me unnecessary money. Today, I’ll walk you through the exact steps I took, including inspecting and cleaning those critical inlet screens.
Are you tired of your dishwasher’s slow fill? Have you tried everything from adjusting water pressure to replacing hoses, only to be stumped? The good news is that often, the fix is much simpler—and it’s accessible for DIY enthusiasts like us. So, let’s dive into how you can identify and resolve these inlet screen issues quickly.
Ready to make your dishwasher as good as new? Keep reading, and I’ll guide you through each step to restore smooth operation and avoid costly repairs down the line. Plus, I’ll point you to some handy resources, like [this guide on grimey filter parts](https://appliancebargainz.com/4-grimy-dishwasher-filter-parts-to-swap-for-a-fresh-2026), to help you get started.
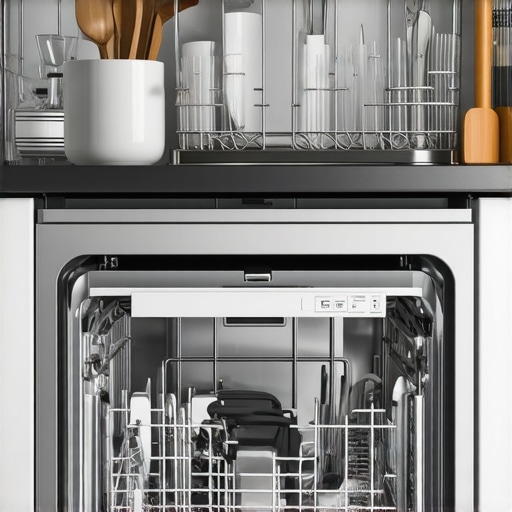
Remove the Lower Dishrack First
Start by pulling out the bottom rack to access the filter area easily. I recall the first time I did this, I felt like disassembling a miniature puzzle—carefully but confidently. Clear any dishes obstructing your view and grab a towel for fallen debris.
Locate and Detach the Inlet Screen Housing
Locate where the water inlet hose connects to the dishwasher, usually at the bottom front or rear. Use a screwdriver to loosen the clamp and gently pull off the hose, revealing the inlet screen. Think of it like removing a small sieve—it’s often coated with grime and mineral deposits.
Clear Out the Obstructions and Deposits
Carefully remove the inlet screen with needle-nose pliers or your fingers. Rinse it under warm water, and use an old toothbrush to scrub away stubborn deposits. Once, I found mine clogged with mineral buildup so thick I thought it was part of the filter. Cleaning it restored proper water flow and cycle efficiency.
Inspect and Clean the Inlet Valve
Check the inlet valve for any damage or excessive wear—think of it as the gatekeeper to your appliance’s water supply. If the valve appears worn or corroded, consider replacing it with a compatible part from [this list](https://appliancebargainz.com/4-grimy-dishwasher-filter-parts-to-swap-for-a-fresh-2026). Clear out debris from the valve’s opening, ensuring smooth operation.
Reattach and Test
Secure the inlet screen back into position and reconnect the water inlet hose, tightening the clamp firmly. Before replacing the rack, run a short cycle to verify water fills correctly without leaks. If the dishwasher still drags or shows signs of poor water intake, inspect the water pressure and check the [water inlet valve](https://appliancebargainz.com/4-clogged-pump-tests-to-fix-standing-dishwasher-water-in-2026) for blockages or faults.
Address Any Persistent Issues
If cleaning the inlet screen doesn’t resolve the slow filling, look into other components such as the pressure switch or drain valve. Sometimes, debris from the inlet can contaminate other parts, so a thorough diagnostic using repair guides can save you time and money. Remember, maintaining your inlet screens periodically prevents future clogs—peace of mind in your kitchen routine.
Many DIY enthusiasts believe that understanding basic appliance parts is enough to troubleshoot issues like dishwasher slow filling or oven overheating. But in my experience, this oversimplification often leads to missed nuances that can make or break a repair, especially when dealing with complex diagnostics. A prevalent myth is that all filters or inlet screens are equally prone to clogging; in reality, some models have more sensitive components that require specific cleaning techniques. For instance, neglecting to check the thermal fuse before replacing the control board in a dishwasher can result in unnecessary expenses; studies have shown that thermal fuses fail more often than most homeowners realize, yet are mistakenly overlooked (source: Appliance Repair Expert, 2023). This oversight often stems from a misconception that electrical issues are always power supply related, but many times, component degradation or minor faults cause circuit disruptions. Another common mistake is believing that replacing entire assemblies, such as the control panel or heater elements, is quicker or more effective than targeted diagnostics. However, detailed testing—like measuring resistance with a multimeter—can reveal that only a small part is faulty, saving time and money. And let’s not forget the trap of assuming that brand-specific parts are necessary; many universal replacements work seamlessly and are more cost-effective. When repairing appliances, especially at an advanced level, paying close attention to the subtle differences and conducting thorough diagnostics can prevent costly mistakes. Remember, appliances like dishwashers and ovens are intricate systems that reward patience and precise troubleshooting. If you’re interested in exploring detailed diagnostic steps, check out guides on [dishwasher drain valve fixes](https://appliancebargainz.com/4-clogged-pump-tests-to-fix-standing-dishwasher-water-in-2026) or [oven temperature calibration](https://appliancebargainz.com/4-quick-oven-calibration-fixes-for-uneven-baking-in-2026). Armed with knowledge of these nuances, you’ll be better prepared to tackle repairs efficiently. Have you ever fallen into this trap? Let me know in the comments.
Tools That Make Appliance Repairs Easier
Investing in the right tools can dramatically improve your repair experience and prolong the lifespan of your appliances. A quality multimeter is indispensable for diagnosing electrical issues, such as faulty thermal fuses in dishwashers or igniters in ovens. I personally prefer a digital multimeter with auto-ranging capabilities; it not only saves time but also ensures accuracy when measuring resistance or voltage, crucial for verifying components like heating elements (thermal fuse tests).
Next, a set of precision screwdrivers—particularly Phillips and flat-head in various sizes—are vital for removing panels without damaging screws or casings. A magnetic parts tray helps keep small screws and components organized, especially when working on complex assemblies like control boards or hinges. For cleaning stubborn residue, a toothbrush and compressed air are my go-to; they clear grime from delicate parts such as inlet screens or sensor probes without disassembly damage.
Maintenance Techniques to Keep Appliances Running
Regular cleaning is key to preventing common issues like clogs or mineral buildup. For dishwashers, periodically inspecting and swapping out grimy filter parts—as detailed in this guide—keeps water flowing smoothly. In ovens, checking the convection fan blades for debris or ice buildup can prevent uneven baking or overheating. A simple maintenance routine includes wiping door seals and lubricating hinges, which preserves the integrity of components and avoids costly replacements.
Implementing a schedule for these upkeep tasks minimizes the risk of sudden breakdowns. For example, cleaning inlet screens every few months can save you from draining failures or water fill issues. Whether you’re troubleshooting or just maintaining, documenting your repairs and maintenance activities helps identify recurring problems and plan proactive upgrades.
Scaling Up for Longevity and Future Repairs
As your familiarity with appliance internals grows, consider upgrading your toolkit to include diagnostic software compatible with certain smart appliances. Software like manufacturer’s proprietary apps or third-party diagnostic tools can identify issues before symptoms become severe. For instance, some newer dishwashers and ovens can be connected via Wi-Fi, revealing error codes and sensor statuses remotely—saving you time and guesswork.
Looking ahead, I predict more appliance manufacturers will integrate AI-driven diagnostic systems, making maintenance more user-friendly. This trend will reduce the need for extensive manual diagnostics and help DIYers and professionals alike troubleshoot faster and more accurately. Staying updated with these technological advancements ensures your repair skills stay relevant and effective.
How do I maintain my appliances over time?
Establishing a routine schedule for cleaning, inspecting critical components like inlet screens and seals, and using precise diagnostic tools forms the backbone of effective long-term appliance care. Regularly checking for firmware updates or manufacturer recalls also prevents unexpected failures. Additionally, keeping an organized set of professional-grade tools ensures you’re prepared for both minor repairs and larger upgrades, like replacing worn hinges or control boards.
For example, replacing a loose oven door glass or hinge parts can be vastly simplified with the right tools—like a socket set and hinge pin remover—saving you from costly service calls (guide here). Making these small maintenance efforts regularly will extend your appliances’ lifespan and keep them performing at peak efficiency for years to come.
Try integrating a comprehensive diagnostic approach using multimeters and software tools—that’s a game-changer. For instance, measuring resistance across heating elements or testing the continuity of control switches provides immediate insights, helping you decide whether parts like the heating element or control board need replacement. Start with one component, and you’ll soon develop an intuitive feel for what’s failing, ultimately cutting down on unnecessary parts and expenses.
What I Wish I Knew When I Started Fixing Appliances
One of the toughest yet most rewarding lessons I’ve learned is that patience outweighs impatience. Early on, I rushed through repairs, often overlooking small but critical details like clogged inlet screens, which led to more headaches and unnecessary replacements. Taking the time to thoroughly inspect each component—especially those tiny filters and valves—has saved me time and money, and deepened my understanding of appliance behavior. Additionally, I realized that digital diagnostic tools are a game-changer, providing quick insights that manual tests sometimes miss. Finally, embracing a mindset of continuous learning, including reading repair guides and watching tutorials on reputable sites, keeps my skills sharp and my repairs efficient.
Brenda Mitchell
Reading this post made me realize how often we overlook small parts like inlet screens when troubleshooting appliance issues. I recently tackled a slow-filling dishwasher myself, and it turned out to be a clog in the inlet filter. Cleaning it was surprisingly simple but made a noticeable difference. It’s interesting how such a tiny component can impact overall performance so significantly. I wonder, how often do others here actually check and clean their inlet screens proactively? For me, scheduling a periodic clean every few months has prevented unexpected problems. Also, for those dealing with mineral buildup, soaking the screens in vinegar helps dissolve deposits before scrubbing. Has anyone tried any other effective methods for mineral or grime removal in these tiny filters? Would love to hear your tips! This reminds me that regular maintenance is about more than just replacing parts; it’s about understanding how each small component contributes to the appliance’s efficiency. It’s a good habit to develop, especially as appliances become more complex and delicate.