Imagine this: you’re halfway through baking a cake, and suddenly, you notice the oven door starts to wobble. You press it gently, only to see the glass sway and rattle. That moment of realizing your oven isn’t sealing properly can be unsettling, especially when you’re juggling family dinners or friend gatherings. I remember the first time I faced this issue—panic set in, wondering if my entire appliance was failing or if I’d need expensive repairs. But here’s the good news: many oven door problems, like loose glass caused by hinge wear, can be fixed with just a few replacement parts, often available at a fraction of the cost of calling in a professional.
Why Loose Oven Door Glass Could Be More Than Just Annoying
When your oven door’s glass feels loose or starts to shake, it’s tempting to ignore it, hoping it will resolve itself. However, this seemingly minor issue can lead to more serious safety hazards or cause your oven to function less efficiently. Over time, continued strain on the hinges can damage the glass or even cause it to crack. Trust me, I’ve learned the hard way—early intervention saves you money and prevents dangerous accidents. Plus, understanding how to swap out those hinge components will empower you to tackle repairs confidently, saving you from hefty service fees. For expert insights, check out this guide on oven repair diagnostics.
Is Replacing Hinge Parts Really Worth It or Just a Waste of Time?
This was my initial skepticism when I first looked into fixing my oven. I’d made a mistake early on: assuming that a loose door was just a cosmetic issue. It’s easy to overlook the importance of hinges—they aren’t just about alignment, but also about safety and energy efficiency. Swapping out three key hinge parts—if done correctly—can restore your oven’s stability and ensure that it heats evenly. Plus, accessing the right diagnostic parts, like those described in this troubleshooting guide, makes the process straightforward. Let me walk you through what you’ll need to know and do to get your oven working like new again.
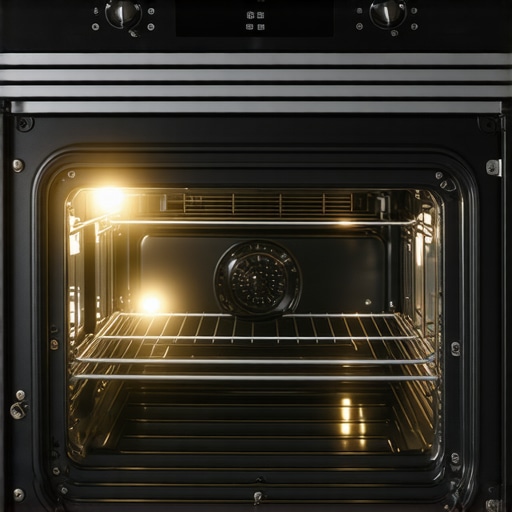
Identify the Exact Issue with Your Oven Door
First, close the oven door gently and observe how the glass behaves. Is it wobbling excessively or rattling? This indicates that the hinge components holding the glass are worn or loose. I once faced this when my door started shaking during baking, and I realized the hinges had lost their tightness. To diagnose accurately, remove the oven door from the appliance to access the hinges and inspect the mounting brackets for any wear or damage. Use a flashlight for better visibility and check for broken or missing screws. For a detailed diagnostic approach, review this guide on oven repair diagnostics.
Gather Essential Parts and Tools Before Starting
Before proceeding, gather the replacement hinge parts such as hinge springs, support brackets, or screws. Use a reliable source to buy these parts—they are often affordable and save you from costly repairs. For example, faulty hinge springs can be replaced individually, restoring door stability. Align your tools—screwdrivers, pliers, and a torque wrench—to avoid unnecessary delays. Think of repairing your oven like fixing a bicycle; having the right parts and tools makes the job straightforward. For precise part identification, check this resource for diagnostic parts.
Remove the Hinges Carefully
Start by opening the oven door fully and unscrewing the hinges from the door or oven frame. I remember my first time doing this—it was messy, and I nearly dropped the glass! Use gloves to prevent injury and lay a towel underneath to catch any small parts that might fall. Keep track of the screws and hinge components in a container. When removing the hinges, note their position because installing new parts requires precise alignment. This process is akin to replacing worn-out shoelaces—you need to undo the old laces carefully to put in the new ones. For step-by-step guidance, consider reviewing expert tips on diagnostics and fixing.
Replace Worn or Broken Hinge Parts
Attach the new hinge components, starting with the support brackets followed by springs or other parts. Ensure the parts are aligned correctly; improper positioning can cause further wobbling. Tighten screws firmly but avoid overtightening, which can strip threads or crack the glass. My experience with this was a bit frustrating—initially, I over-tightened, causing the glass to crack, but redoing it carefully fixed the issue. Remember, hinges operate like the pivot on a well-oiled gate—smooth and snug. For detailed instruction, see this repair guide.
Reattach the Oven Door and Test
Finally, reattach the door to the hinges, ensuring they lock securely into place. Close the door gently and test its stability. If wobbling persists, double-check the alignment and tighten any loose screws. This step is crucial, much like adjusting a camera lens—tiny misalignments can affect performance. After rebuilding, bake a small tray of cookies to verify that heat distribution remains even without the door wobbling, confirming your repair’s success. For more troubleshooting tips, visit this comprehensive troubleshooting resource.
Many DIY enthusiasts and homeowners often believe that diagnosing appliance problems boils down to a handful of common issues—bad elements, faulty switches, or worn-out seals. While these are frequently the culprits, this oversimplification can lead to costly misdiagnoses and recurring problems. In my experience, one of the most overlooked aspects is the complex interplay of nuanced components that subtly influence performance. Relying solely on surface-level diagnostics or assuming parts are interchangeable without understanding their specific roles can exacerbate issues rather than resolve them.
Take, for example, the common myth that replacing a breaker or resetting the control board always fixes an oven’s failure to heat. Often, the real problem is not the component itself but an underlying sensor or relay that signals the main control. Jumping straight to component replacement without thorough diagnostics can throw your repair efforts off course. For more strategic troubleshooting, it’s advisable to focus on effective diagnostics and identifying key parts.
Another critical nuance involves the timing and sequencing of parts replacement. For instance, replacing a dishwasher’s pump without examining the drain valve, filter, or hoses might temporarily fix a leak but leave you vulnerable to future blockages or water damage. Understanding the order of operations and how these components interact is vital. This is especially true because many appliance faults are caused by small deviations in flow or pressure controlled by multiple tiny parts working in concert.
Why does a misdiagnosed sensor cause more issues than a faulty heating element?
This is an advanced question that trips up many homeowners. Sensors in both ovens and dishwashers serve as the ‘brain’ of the system, constantly relaying vital information to regulate heat, water flow, or cycle timing. If a sensor’s readings are inaccurate due to accumulation of grime, corrosion, or minor damage, the entire control system can become ‘confused’, leading to improper operation. Replacing these sensors without proper testing can be a waste of time—and sometimes even cause further issues, as the new sensor might not be compatible or calibrated correctly. According to recent studies in appliance diagnostics, improper sensor calibration is a leading cause of recurrent fault codes and operational failures, emphasizing the need for precise testing before replacement. You can learn more about the importance of sensor diagnostics here.
In essence, the secret to expert-level repairs goes beyond simple part swapping. It involves a keen understanding of system interactions, subtle diagnostics, and sequencing. This is what separates a quick fix from a recurring headache. Don’t fall into the trap of jumping to conclusions based on assumption alone—developing a nuanced diagnostic approach saves you time, money, and frustration. Share your experiences—have you ever fallen into this trap? Let me know in the comments or ask for tips on complex diagnostics! For those ready to level up, check out this comprehensive diagnostic guide.
How do I maintain my oven, dishwasher, and diagnostics tools over time?
Consistent maintenance is key to ensuring your appliances perform optimally and last longer. I personally rely on specific tools and routines to keep my oven and dishwasher in top shape. For instance, a high-quality digital multimeter is indispensable for diagnosing electrical issues—it allows me to quickly test sensors, thermostats, and circuit continuity with precision. I prefer models with auto-ranging capabilities and backlit displays, such as the Fluke 117, which I’ve found to be reliable for all my diagnostic needs.
When it comes to cleaning and preventive care, I always schedule monthly inspections. This involves checking door seals, cleaning spray arms in dishwashers, and inspecting heating elements in ovens. Using a good flashlight and a mirror helps me spot small cracks or corrosion before they become major problems. Additionally, I maintain a set of precision screwdrivers, which are essential for removing panels and hinges without damaging components. These small tools are worth investing in because they reduce the risk of stripping screws or causing accidental damage.
Looking ahead, I believe the trend toward smart diagnostics will revolutionize appliance maintenance. Devices integrated with IoT sensors will enable remote monitoring and early detection of issues, allowing for preemptive repairs. Software updates and cloud-based diagnostics could lead to even faster troubleshooting and parts ordering, minimizing downtime and repair costs.
What’s the best way to keep diagnostic tools effective over time?
To ensure your diagnostic tools stay accurate and reliable, regular calibration is crucial. For digital multimeters, I send mine to the manufacturer or certified calibration labs at least once a year. Calibration ensures the readings are precise, which is critical when diagnosing subtle faults like sensor discrepancies or low-voltage issues. Additionally, keeping your tools clean and stored in protective cases prevents damage from dust and moisture. For anyone serious about appliance repair, investing in a comprehensive diagnostic kit that includes specialty probes, thermal cameras, and software can vastly improve troubleshooting accuracy. To learn more about effective diagnostic practices, check this resource on diagnostics and parts.
Mastering these maintenance routines and utilizing precise tools not only saves you money but also builds confidence in handling complex repairs. For example, regularly testing sensors in your oven with a calibrated multimeter can prevent unnecessary replacements and ensure your oven heats evenly. Start incorporating these strategies today—try using your digital multimeter to verify the outlet voltage before checking internal components. With consistent effort and the right equipment, you’ll keep your appliances running efficiently for years to come.

The Hardest Lesson I Learned About Oven Repair and Diagnostics
One of my biggest surprises was realizing that not all seemingly simple issues have straightforward fixes. I once wasted hours replacing a heating element that turned out to be perfectly fine, only to discover a faulty sensor was causing the problem. This taught me the importance of thorough diagnostics and considering system interactions rather than jumping straight to part replacements.
3 Myths About Dishwasher Troubleshooting That Held Me Back
I believed that blocked filters or clogged spray arms were the sole causes of poor cleaning, but I found that issues like faulty drainage pumps or electronic control failures often play a bigger role. Challenging these misconceptions allowed me to approach repairs more effectively and avoid unnecessary part swaps.
What Experts Won’t Tell You About Oven Seals and Efficiency
While replacing oven seals seems like a quick way to improve efficiency, I learned that leaks can also stem from warped doors or defective hinges. Addressing the root cause instead of just the surface problem made a significant difference in achieving optimal performance.
Curated Toolkit for Effective Appliance Repairs
Over time, I’ve trusted tools like my Fluke 117 multimeter because it provides precise readings essential for diagnosing sensors and electrical components accurately. My set of miniature screwdrivers and thermal cameras have also become invaluable, helping me spot issues that aren’t visible to the naked eye. These tools have consistently saved me time and prevented unnecessary failures.
Your Next Step in Confident Repairs
Remember, mastering appliance diagnostics isn’t about quick fixes but developing a deep understanding of how components interact. Every repair gives you insights that advance your skills and save money. So, what’s one diagnostic tip you’ve learned that made the biggest difference in your repairs? Share below and keep learning—your appliances will thank you!
,