Have you ever peeked into your oven after baking something sweet and found a dark, stubborn patch of caramelized sugar stuck to the bottom? I remember the moment—my heart sank when I saw that sticky, burnt mess. It was late at night, and all I wanted was to enjoy my freshly baked cake, not spend hours chiseling away at hardened sugar. Does that feeling sound familiar?
Why Burnt Sugar Sticks Around and Why It Pains Us So Much
When sugar melts and caramelizes, it creates a beautiful golden hue—until it inevitably burns and hardens on the oven floor. This isn’t just a cosmetic issue; burnt sugar can produce smoke, fumes, and even damage the oven surface if left unattended. Plus, trying to clean it with harsh chemicals often feels intimidating and risky, especially when you’re concerned about messing up your appliance or breathing in fumes.
But here’s the thing: that stubborn crust is a common problem many homeowners face, and you’re not alone in feeling frustrated. I used to think only commercial oven cleaners could handle it—until I discovered there are simple, natural ways that work remarkably well. The key is understanding what causes burnt sugar to cling so tenaciously and what safe, effective methods we can use to remove it without turning to chemical cleaners.
Have You Faced This Problem Before?
If you’ve struggled with cleaning the bottom of your oven after a particularly sugary baking session, keep reading. I’ll share tried-and-true tips that saved me hours of scrubbing and kept my oven in pristine condition—safely and naturally. And if you’ve ever thought, “Is this even possible without toxic cleaners?”—you’re not alone. Early on, I made the mistake of using aggressive sprays that left a chemical residue, which I later regretted. Now I know better, and I want to help you skip that mistake.
Let’s dive into some practical, chemistry-free strategies that will make your oven look brand new—no harsh chemicals required. Ready to reclaim your oven’s cleanliness and avoid the dreaded burnt sugar buildup? Good, because your solution starts now.
Removing Burnt Sugar Naturally: Practical Tips You Can Trust
Start by Applying a Baking Soda Paste
Mix half a cup of baking soda with enough water to create a thick paste. I remember the first time I tried this—my kitchen smelled like a bakery. Spread this paste generously over the burnt sugar spots, ensuring full coverage. Let it sit for at least 30 minutes; I left mine overnight for stubborn stains. The baking soda acts like a gentle abrasive, loosening the hardened sugar without damaging the oven surface. After the waiting period, take a damp cloth or sponge and scrub the area—buffing away the softened residue with minimal effort.
Use Vinegar for a Fizzing Reaction
Once you’ve scrubbed the surface, spray white vinegar over the area. The vinegar reacts with any remaining baking soda, bubbling up and lifting stubborn bits. This reaction helps break down caramelized sugar further and sanitizes the surface. I often hear people worry about vinegar’s smell, but it disappears quickly, leaving your oven clean without chemical residues. For really tough patches, repeat the process or add a sprinkle of baking soda before vinegar for extra power.
Steam Cleaning to Loosen the Debris
Another effective method is using the power of steam. Fill a heatproof bowl with water and add a few drops of lemon juice or essential oil for a fresh scent. Place it inside the oven and heat to 250°F (120°C) for 20 minutes. During this process, the steam softens burnt sugar and any grime, making it easier to wipe away. When I did this, I grabbed a microfiber cloth and easily wiped off residues—saving me hours of scrubbing. Remember to turn off the oven and let it cool slightly before opening to avoid burns.
Manual Removal with Cutting Tools
If stubborn burnt patches remain, use a plastic scraper or a rubber spatula—metal tools may scratch your oven. Carefully peel off the hardened spots without excessive force. I learned this tip after accidentally gouging my oven’s surface with a metal spoon; the plastic scraper works wonders. After scraping, use a damp cloth to wipe away any loose debris. This step ensures no debris is left behind, which could interfere with oven performance or future cleaning.
Prevent Future Buildups with Regular Maintenance
Once you’ve removed the burnt sugar, consider regular cleaning routines. Wiping down the oven after baking sugary items prevents hardening. For a more thorough clean, periodically run a self-clean cycle, but always check your oven’s manual—some models respond better to manual cleaning methods. If you’re unsure about diagnosing potential faults causing uneven heating or residue buildup, visit this guide on oven diagnostics for detailed steps.
Know When to Call a Professional
While these natural methods work for most cases, some stubborn patches might need expert attention. If you notice persistent issues or suspect damage, don’t hesitate to seek professional help. Visit our contact page for trusted repair services. Regular maintenance, combined with these cleaning techniques, will keep your oven in top shape and prolong its lifespan.
Many homeowners and even seasoned DIY enthusiasts assume that parts, dishwashers, diagnostics, and oven repairs are straightforward processes, but this overlooks the subtle complexities that often lead to costly mistakes. One common misconception is believing that all replacement parts are created equal; in reality, OEM parts tend to offer better compatibility and longevity than generic alternatives, which can cause further issues if not chosen carefully. For example, installing a counterfeit thermal fuse might seem like a quick fix, but it can compromise safety and functionality, leading to recurring failures. To avoid such pitfalls, it’s crucial to understand how to accurately diagnose faults before rushing to replace parts—an area where many amateurs falter. A detailed diagnostic approach, aided by tools like multimeters, can distinguish between faulty thermostats, sensors, or control boards, ensuring that you address the root cause rather than just the symptom. For advanced users, recognizing patterns, such as recurring error codes or unusual noises like whining or grinding, can narrow down the specific faulty component—saving time and money. Interestingly, many people overlook that seemingly minor issues, such as a slight misalignment of dishwasher spray arms or oven door hinges, can cascade into larger problems over time, highlighting the importance of paying attention to details during repairs. Moreover, a common trap is relying solely on online guides without cross-referencing with your appliance’s manual or diagnostic data—this can lead to incompatible repairs or overlooking critical safety steps. For example, attempting to fix an oven’s ignition system without checking the gas supply pressure or the spark module can be ineffective or dangerous. Referencing trusted resources like detailed diagnostic guides ensures you’re equipped with the right knowledge. Did you know that improper testing of high-limit thermostats or thermal fuses could trigger false alarms, leading you to replace parts unnecessarily? This highlights the necessity of understanding the correct testing procedures, such as using a multimeter to verify continuity or resistance, instead of guesswork. If you’ve ever fallen into this trap, let me know in the comments. Mastering these nuances not only extends the lifespan of your appliances but also enhances your troubleshooting confidence, making repairs safer and more effective. To deepen your understanding, check out comprehensive guides on diagnosing dishwasher faults or oven issues—these resources delve into critical nuances that can make all the difference in your repair journey.
Tools That Keep Your Appliances Running Smoothly
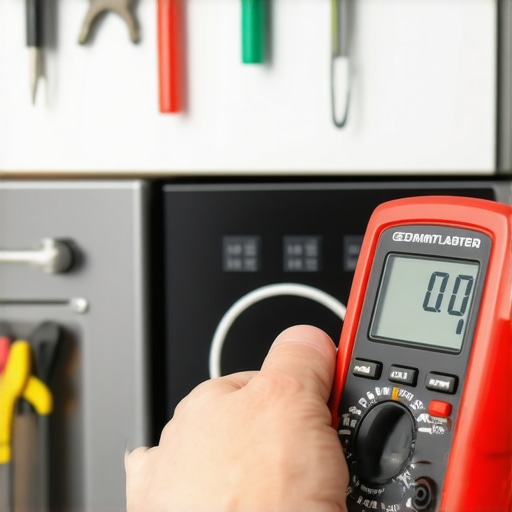
Investing in the right tools is crucial for DIY repair and ongoing maintenance of your kitchen appliances. One must-have is a high-quality digital multimeter, like the Fluke 115, which I personally use to diagnose electrical issues accurately. It allows me to test thermostats, control boards, and wiring with confidence, preventing unnecessary part replacements. A reliable multi-tool, such as the Leatherman Wave Plus, is invaluable for quick disassembly or reassembly, especially when dealing with tight spaces or stubborn screws. For oven-specific troubleshooting, a thermal imaging camera can help detect uneven heating or hotspots—an investment that saves time and reveals issues that are invisible to the naked eye. Additionally, a specialty oven thermometer is essential for verifying actual temperature versus the oven’s display, ensuring your cooking and baking are precise. For dishwashers, a dedicated spray arm brush and a multimeter equipped with suitable test leads streamline diagnostics, especially when checking sensors like turbidity or pressure switches. I recommend the Klein Tools multimeter for its durability and range of functions tailored to appliance diagnostics.
Future of Appliance Maintenance Tools
Looking ahead, smart diagnostic tools integrated with apps are poised to revolutionize appliance repairs. Imagine using a Bluetooth-enabled multimeter that transmits real-time data to your smartphone, guiding you step-by-step through troubleshooting. Augmented reality glasses could overlay diagnostic diagrams directly onto the appliance, making complex repairs accessible for enthusiasts at all levels. As technology advances, expect an uptick in AI-assisted diagnostics, reducing guesswork and shortening repair times.
How do I keep my appliances functioning over the long term?
The key is consistent care and early intervention. Regularly inspecting door seals, hinges, and gaskets prevents problems from escalating. For instance, replacing a worn oven door gasket promptly with high-quality parts ensures energy efficiency and safety. Scheduling annual checks of electrical components using your multimeter can catch issues before they cause appliance failure. Also, remember that certain diagnostics, like testing the oven temperature sensor or dishwasher turbidity switch, require precise procedures outlined in resources like this guide on oven diagnostics. Maintaining your tools—keeping multimeters calibrated and batteries fresh—maximizes their effectiveness and accuracy.
Ready to elevate your repair game? Try calibrating your oven’s temperature sensor with an accurate oven thermometer and use your multimeter to verify its resistance—this simple step can save you from costly inaccuracies in future baking. Proper maintenance with the right tools not only extends appliance lifespan but also keeps your kitchen running flawlessly for years to come.
Lessons That Came From Messy Mistakes
One of my biggest wake-up calls was realizing that rushing into repairs without proper diagnosis often led me down expensive rabbit holes, especially with parts that didn’t fit or fix the problem. I once replaced a control board, only to find the oven still misbehaving—turns out, I hadn’t checked the wiring continuity first. That taught me to always test components with a multimeter before swapping parts, saving me time and money. Another insight was the importance of patience—allowing cleaning solutions like baking soda and vinegar adequate time to work, rather than scrubbing frantically, yields much better results. I also learned that documenting my repair processes, including taking photos before disassembly, prevents mistakes and increases confidence when reassembling. These lessons have made me a more effective DIYer, and I hope sharing them helps you avoid common pitfalls in parts, diagnostics, and oven or dishwasher repairs.