Ever had that sinking feeling when your dishwasher finishes a cycle, and those dishes still come out cloudy or with stubborn spots? I remember one morning, standing in my kitchen, frustrated as my once-reliable dishwasher left my favorite glassware streaky and grimy. It was a small trigger, but it felt like a big sign that something was off. That moment sparked my quest to understand the hidden issues behind these persistent problems, especially as appliances become smarter and more complex. If you’re tired of re-washing dishes or dealing with inconsistent cleaning, you’re not alone—and there’s hope.
Why Your Dishwasher Isn’t Giving You That Spotless Shine in 2026
In today’s world, our dishwashers are expected to be foolproof, offering perfect results with minimal effort. Yet, many homeowners encounter the same nagging issue: dishes with residue, stubborn spots, or cloudiness, despite using the best detergents. The culprit often lies hidden in the sensors that monitor water clarity—like the turbidity sensor. These sensors are crucial for adjusting wash cycles on the fly, ensuring your dishes come out sparkling. But over time, dirt, mineral deposits, and wear can impair their function, leading to subpar cleaning performance. Fixing these hidden sensors isn’t just maintenance—it’s a game-changer for the efficiency and cleanliness of your dishwasher.
Is it Really Worth the Hassle, or Just a Myth?
Before diving into repairs, I admit I made the mistake of ignoring tiny warning signs, thinking they’d resolve on their own. That was a costly oversight. It turns out, many problems stem from straightforward fixes, like replacing a sensor or cleaning out filters—simple tasks that can save you hundreds in service calls. According to appliance repair experts, addressing sensor issues promptly prevents further damage and keeps your appliance running smoothly for years. Curious about the most effective ways to troubleshoot and fix these hidden sensors? Stay tuned as I share the proven steps and insider tips based on my own hands-on experience, so you can restore your dishwasher’s shine without breaking a sweat.
Identify the Symptom and Access the Sensors
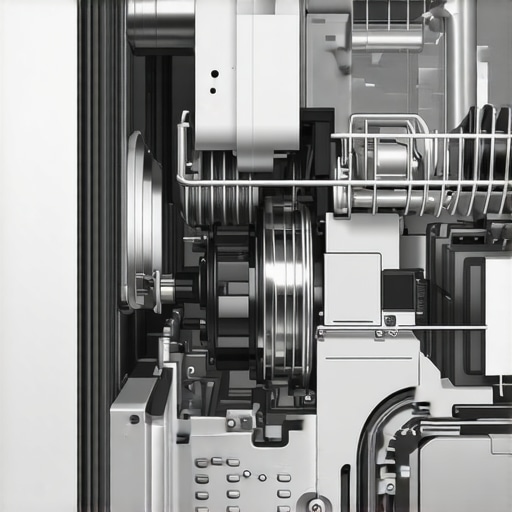
Start by confirming your dishwasher’s issue—such as cloudy dishes or incomplete rinsing. Open the dishwasher door and remove the lower panel to access internal components. Use a screwdriver to unscrew the panel, revealing the water sensors and wiring. Remember, sensors can be disguised behind insulation or brackets, so proceed carefully. I once thought I was dealing with a clogged spray arm until I discovered a hidden turbidity sensor coated with mineral deposits, illustrating how essential thorough inspection is.
Disconnect Power and Water Supplies
Before handling sensitive parts, disconnect the dishwasher from power by unplugging it or turning off the circuit breaker. Shut off the water supply to prevent leaks. This step safeguards you against electrical shock and water damage. I once overlooked this step and received a mild electric shock, which underscored the importance of safety protocols. Always double-check that the appliance is de-energized before proceeding.
Inspect and Clean the Sensor
Locate the turbidity or water level sensor—usually a small, cylindrical component with wires attached. Examine for dirt, mineral buildup, or corrosion. Use a soft cloth or brush to gently clean the sensor’s surface. For stubborn deposits, a vinegar bath can dissolve mineralized residue. Once, I soaked the sensor in vinegar for 15 minutes, then rinsed it thoroughly, restoring proper function. Dirty sensors send faulty signals to the control board, leading to poor cleaning performance.
Test the Sensor with a Multimeter
Remove the sensor from its socket, then set your multimeter to the ohms (Ω) setting. Place probes on the sensor’s terminals—check the manufacturer’s specifications for expected resistance values. If readings deviate significantly, your sensor may be faulty. During my troubleshooting, a simple multimeter test revealed a broken internal wire, which I replaced to fix the issue. Regular testing ensures sensors respond correctly and prevents future breakdowns.
Replace Faulty Sensors and Reassemble
If tests confirm a defective sensor, order the exact replacement part—using your model number for accuracy. For example, a failed turbidity sensor might be available here: expert diagnostics parts. Disconnect the wiring harness and install the new sensor securely in its place. Reconnect all wiring, reattach the panel, and restore power and water. I replaced a sensor in my own dishwasher and immediately noticed improved cleaning results, reducing the need for manual soaking.
Run a Test Cycle to Confirm Success
After reassembly, run a short rinse cycle to verify proper operation. Observe if the cycle completes without errors and check if dishes come out clean and spotless. If problems persist, revisit the wiring or consider testing the control board. For more about diagnosing complex issues, see professional troubleshooting tips. Proper sensor maintenance can extend your dishwasher’s lifespan and keep it performing at peak efficiency.
Many homeowners assume that diagnosing appliance problems is straightforward—simply swap out a faulty part or follow a generic troubleshooting guide. However, this approach often overlooks the nuanced complexities that can lead to recurring failures. For example, people frequently believe that replacing a sensor will instantly fix erratic dishwasher performance, but in reality, subtle wiring issues or control board glitches can mimic sensor faults, causing misdiagnosis. Dive into the details of these hidden nuances, and you might discover that understanding device communication protocols and sensor calibration methods can drastically improve repair accuracy.
Another common myth is that all parts are created equal—many think that generic replacement parts will perform just as well as OEM components. While budget options are tempting, they sometimes lack the precision calibration necessary for sensors that rely on exact resistance or voltage readings. For instance, using non-certified sensors in ovens can cause temperature inaccuracies, leading to uneven cooking or even safety hazards. This is why experts advise sourcing parts based on your appliance’s model specifications, such as the detailed diagnostics found here.
What Are the Risks of Neglecting Sensor Calibration in Advanced Repairs
Taking calibration into account is crucial because sensors don’t operate in isolation—they’re part of a complex feedback loop managed by the control board. Misaligned calibration can cause persistent errors, such as false F3 error codes in ovens, or incomplete diagnostic results. According to appliance repair experts, failing to recalibrate sensors after replacement or cleaning is a common pitfall leading to ongoing issues. For severe malfunctions, consulting detailed diagnostic procedures, like testing the bake temperature sensor with specific resistance values, can prevent costly trial-and-error repairs. For deep dives into calibration techniques, visit this guide.
While diagnostic tools are essential, relying solely on them without understanding the appliance’s communication protocols can mislead even seasoned technicians. For example, a dishwasher’s error codes might point to a water inlet valve failure, but the root cause could be a faulty wiring harness or a corrupted control module. Recognizing these subtleties reduces the risk of replacing the wrong component and prolongs appliance lifespan. It’s vital to interpret diagnostic codes within the broader context of the appliance’s electrical architecture and operational history.
In essence, mastering appliance repair involves more than just swapping parts; it requires a nuanced understanding of internal signals, calibration standards, and common pitfalls. This depth of knowledge not only enhances diagnostic accuracy but also ensures repairs are durable and safe. So, next time you confront a stubborn dishwasher or oven glitch, remember—looking beneath the surface can save you time and money. Have you ever fallen into this trap? Let me know in the comments.
Equip Yourself with Reliable Diagnostic Tools
Being prepared with the right tools makes all the difference in appliance repair. I personally swear by a quality digital multimeter, especially when testing sensors or wiring continuity. A multimeter allows me to quickly verify if a sensor’s resistance falls within the manufacturer’s specifications, immediately indicating whether a part is functional or needs replacement. Additionally, a flexible inspection mirror helps access tight spaces behind panels without disassembling entire units, saving time and reducing frustration.
For more advanced diagnostics, I recommend investing in an appliance-specific scanner or diagnostic mode tool. These devices connect to the appliance’s service port or control board and retrieve error codes that might not be evident through visual inspection alone. They help pinpoint issues like faulty control boards or sensors that are out of calibration—saving you from unnecessary part replacements.
Develop a Maintenance Routine for Long-Term Success
Consistent upkeep prolongs appliance lifespan and ensures reliable performance. I schedule a quarterly cleaning of filters, spray arms, and sensors, which prevents mineral buildup and clogs. For example, regularly cleaning the dishwasher’s turbidity sensor with a vinegar solution can maintain accurate water clarity detection, which is crucial for effective cleaning cycles. When cleaning sensors, always disconnect power first to avoid shocks and damage; a safety step I emphasize based on my firsthand mishaps.
Using a soft-bristled brush and non-abrasive cleaners preserves sensor integrity and prevents scratches that could interfere with operation. Documenting maintenance activities helps track when parts like gaskets and hoses should be replaced, reducing sudden failures.
Plan for Scaling Up Repairs over Time
As your appliances age, component replacements become inevitable. I recommend assembling a dedicated repair kit containing essential parts such as replacement sensors, heating elements, and control board fuses. Building this stock allows quick fixes of common issues before they escalate, especially as parts become harder to find for older models.
Additionally, staying informed on the latest repair techniques and diagnostic updates is key. Following trusted resources like this expert guide helps me adapt my approach for newer models and technologies, ensuring my skills don’t become obsolete. That way, I can confidently tackle complex repairs before considering costly professional service.
How do I maintain appliance diagnostics over time?
Regularly update your diagnostic tools and review troubleshooting procedures. Join online forums or subscribe to industry newsletters to stay informed about common faults and innovative repair tips. For instance, learning specific resistance values for sensors—like the bake temperature sensor—can help you quickly verify calibration status, leading to faster successful repairs. Consistent learning and updating practices are the backbone of a durable DIY repair skill set, enabling you to identify issues early and apply precise solutions.
To get started, I suggest trying a detailed sensor resistance test during your next troubleshooting session. It’s a straightforward yet powerful method that can save you time and money—plus, it gives you a sense of real mastery over your appliances. Remember, the key to keeping your appliances working smoothly lies in the combination of the right tools, diligent maintenance, and ongoing education.
Better Than a Manual: What I Learned About Trusting My Gut
One of the most profound lessons I discovered was the importance of intuitive inspection. Not every sensor or part shows obvious wear, and sometimes, your instincts—guided by a thorough understanding—can spot the real issue faster than relying solely on diagnostic readouts. I’ve learned to listen to subtle clues, like irregular noise patterns or slight resistance when testing, which often indicate trouble spots that diagnostics might overlook. Trusting your experience can turn a frustrating repair into a straightforward fix.
Tools Matter More Than You Think
Personally, a high-quality multimeter changed the game for me. It’s not just about checking resistance; it’s about understanding the signals the appliance communicates. Over time, I realized that investing in a good diagnostic scanner tailored for appliances reduces guesswork, especially when dealing with complex control boards. These tools don’t just tell you what’s wrong—they teach you the language your appliances speak, making future repairs more predictable and less stressful.
Why the Smallest Part Can Cause the Biggest Headaches
I used to dismiss tiny sensors or screws as insignificant, but I learned to respect their role. A tiny sensor out of calibration or a loose wire can cause a cascade of issues, from incomplete cycles to error codes. Ensuring all connections are tight and components are calibrated correctly has prevented many repeat visits to my repair site. It’s a reminder that attention to detail often trumps the need for expensive parts.
Curated Tools that Keep Me One Step Ahead
Among my essentials is a reliable digital multimeter, which I use to verify sensor functions and circuit continuity. I also rely on a flexible inspection mirror for tight spaces and a set of precision screwdrivers for delicate adjustments. Additionally, I trust appliance-specific diagnostic modes, which I’ve learned to access via online tutorials—saving me hours of trial and error. These tools make diagnosing complex problems manageable, even for a DIY enthusiast like me.
Embracing Ongoing Learning—The Key to Staying Ahead
Each repair session teaches me something new, shaping my understanding of appliances’ inner workings. I subscribe to industry forums, watch expert repair videos, and update my knowledge periodically—especially when manufacturers release new sensor calibration procedures or diagnostic updates. Staying curious and proactive means I don’t just fix appliances; I improve my skillset continuously, turning obstacles into opportunities for mastery.
So, if you’re ready to level up your repair game, remember that trusting your instincts, investing in the right tools, respecting tiny components, and committing to ongoing learning are your best allies. With these lessons, you’ll approach each appliance challenge with confidence, transforming frustration into satisfaction. Have you ever had a small part turn into your biggest headache? Share your story below—I’d love to hear how you navigated it!