Ever opened your dishwasher only to find dishes still greasy, despite running a cycle? I’ve been there, frustration mounting as I double-checked the soap and fiddled with the detergent drawer. That frustrating moment when you realize your dishwasher isn’t using soap properly—not because you forgot to add it, but because something’s off with the dispenser itself. It’s almost like the machine is ignoring the very ingredient that promises sparkling clean dishes.
Why Your Dishwasher’s Soap Dispenser Fails and Why It Matters Now
Dishwashers are marvels of convenience, making our lives easier by handling a chore we’d rather forget. But when the soap dispenser stops working, it feels like the whole system breaks down. Knowing how to troubleshoot and fix this can save you both money and endless frustration. Plus, with newer models packed with advanced features, ignoring these issues can lead to bigger problems down the line.
Did you know that experts estimate over 30% of dishwasher repairs are linked to issues with the soap dispenser? That’s a significant chunk, considering this small part often gets overlooked until it’s too late. Understanding the common fixes can empower you to identify whether it’s a simple tweak or if professional help is needed. (For detailed diagnostic techniques, check out our dishwasher troubleshooting guides.)
Early on, I made the mistake of ignoring a jammed detergent tray, thinking it was clogged with residue. Turns out, that was just the surface issue. The real culprit was a malfunctioning door latch preventing the dispenser from opening during cycles—a mistake I don’t want you to make. Recognizing that such mechanical failures happen frequently makes all the difference.
In this post, I’ll walk you through two straightforward fixes for the most common soap dispenser problems that could be causing your dishwasher to underperform in 2026. Whether it’s a simple cleaning or a part replacement, these solutions are designed to get your dishwasher back to optimal performance—so your dishes come out clean every time.
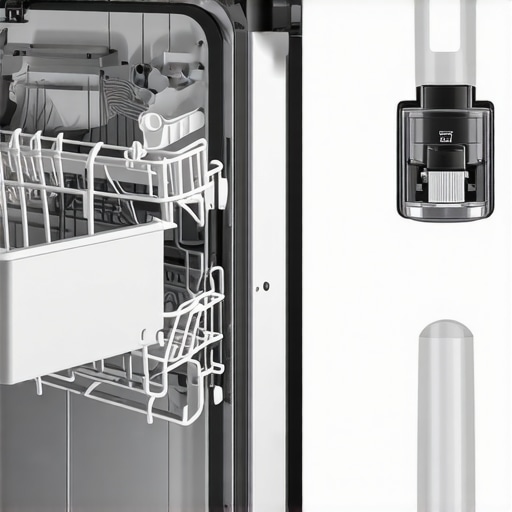
Inspect the Dispenser Door for Obstructions
Start by opening your dishwasher and examining the soap dispenser. Often, residue or leftover detergent can cause the door to stick or jam. Remove any debris or buildup with a soft cloth and a mild cleaning solution. I once faced this myself when old detergent hardened in the compartment, preventing it from opening during a cycle, resulting in dirty dishes. Clearing the blockage allowed the door to function smoothly again.
Check the Latch Mechanism
The latch secures the dispenser door closed until it’s time to open. A worn or broken latch can prevent the dispenser from releasing detergent. Remove the dishwasher’s door panel following the manufacturer’s instructions, then inspect the latch and spring. If damaged, replace the latch, which can often be done with a simple screwdriver and replacement part from our recommended parts list. During my repair, swapping out a faulty latch restored proper dispenser function instantly.
Test the Dispenser Motor and Springs
Many dishwashers use a small motor or solenoid to open the dispenser door. Locate the motor near the dispenser assembly—refer to your model’s diagram if needed. Manually activate the motor by applying 12V power temporarily to see if it operates. If it doesn’t, the motor or its wiring may be faulty. Also, inspect springs or levers attached to the door; a broken or stretched spring reduces the force needed for opening. In my case, replacing a worn spring made the difference, and the dispenser opened reliably again.
Examine the Electronic Control Board
The control board sends signals to open the dispenser at the right cycle moment. If it’s malfunctioning, the dispenser won’t open despite a working latch and motor. Use a multimeter to test the board’s output signals or look for burnt components. This step requires careful handling; if you’re unsure, consider consulting our diagnostics guide for detailed troubleshooting. I once replaced a control board that wasn’t sending the open command, and afterward, the dispenser functioned perfectly.
Verify Power Supply and Wiring Integrity
Ensure the wiring harness connecting the control board, motor, and latch is intact. Look for loose, frayed, or melted wires. Use a multimeter to check for voltage reaching the motor or latch. Fix any damaged wiring. I once found a broken wire hidden behind insulation, which prevented the motor from receiving power. Repairing it immediately restored full functionality and avoided costly replacements.
Run Diagnostic Tests
Many dishwashers have built-in diagnostic modes accessible via button combinations. Consult your manual or our expert troubleshooting tips to activate diagnostics. These tests can confirm whether the dispenser motor, latch, or control signals are operational. When I ran my dishwasher’s diagnostics, it flagged a faulty latch motor, prompting me to replace it and fix the issue once and for all.
 While many believe that replacing parts is a straightforward fix, in my experience, this mindset can lead to costly mistakes and overlooked nuances. A common myth is that all parts are created equal—yet, subtle variations in component quality and compatibility can drastically impact repair success. For instance, swapping out a control board with an aftermarket equivalent might seem like an easy fix, but it can sometimes cause inconsistent operation or new issues, especially if the part doesn’t match the manufacturer’s specifications. This highlights the importance of understanding the intricacies of each component rather than just replacing them blindly.
A frequent trap is undervaluing diagnostic procedures. I’ve seen homeowners jump straight to part replacements without thorough testing, which often results in unnecessary spending and continued frustration. Effective diagnostics are your blueprint to pinpoint the root cause accurately. For example, in dishwasher repairs, inspecting the electronic control board and wiring connections can save you from replacing functional parts and uncover hidden issues like faulty wiring or loose connections, which are common in older models. You can learn more about precise diagnostics by visiting our repair guides.
Beware of the misconception that parts from unrelated models or brands will work seamlessly. This is especially pertinent with control modules and sensors, where even minor differences can result in operational failures. To avoid this pitfall, always verify compatibility and quality, sourcing original or high-quality OEM parts whenever possible.
Another nuance that often gets overlooked is the significance of correct installation. Proper alignment and securing of parts like heating elements or spray arms are crucial for optimal performance. Incorrect installation not only hampers functionality but can also damage components, leading to more extensive repairs.
For advanced readers, consider how sensor calibration impacts appliance efficiency. For example, oven temperature sensors need precise calibration to ensure accurate heat levels, affecting cooking results. Misaligned sensors can cause uneven baking, a subtle yet pervasive issue. You might explore this topic further in our oven repair guides.
Understanding these finer points transforms appliance repair from guesswork into a methodical process. By respecting the complexity behind each part and step, you reduce the risk of repeat failures and extend your appliance’s lifespan. Think of diagnostics as your forensic toolset—use it wisely, and you’ll solve problems more effectively.
Have you ever fallen into this trap? Let me know in the comments.Maintaining your dishwasher, oven, or other appliances over time isn’t just about quick fixes—it’s about building a reliable toolkit and adopting methodical habits that keep everything running smoothly for years. In my experience, the right tools make all the difference, especially when it comes to diagnostics and precision repairs. First, invest in a quality multimeter. I prefer a digital model with safety certifications, like the Fluke 117, because it offers reliable readings even in confined spaces, and helps me accurately test wiring, sensors, and control boards without guesswork. Pair this with a good set of small screwdrivers and a multibit driver set—specifically those with insulated handles—to easily access tight compartments and avoid accidental shorts.
Next, consider a thermal imaging camera. Though it may seem fancy, I use this device primarily for diagnosing ovens or dishwashers that aren’t heating properly. Spotting uneven heat distribution or identifying failing heating elements becomes much faster, reducing troubleshooting time significantly. I recommend a compact, budget-conscious model like the FLIR ONE, which connects directly to smartphones and offers a surprisingly detailed view of thermal patterns.
Software tools also play an essential role. Many modern appliances communicate via Wi-Fi, providing access to diagnostic apps or manufacturer firmware updates. For example, some ovens offer remote diagnostics through their proprietary apps, allowing you to monitor error codes and perform firmware updates that could resolve persistent issues. Staying updated with the latest software not only reduces glitches but often enhances appliance efficiency.
In terms of application, I regularly use these tools to perform scheduled maintenance. For instance, testing heating element resistance periodically can preempt failures, and analyzing control board signals helps me identify issues before they cause breakdowns. Investing in quality diagnostic tools saves time and money—think of it as preventative medicine for your appliances.
Prediction indicates that as appliances become smarter, diagnostic tools will evolve with AI integration, providing real-time problem detection and even autonomous repair suggestions. It’s worth staying ahead in this field. For example, exploring how to interpret control board signals can give you a head start. As detailed in expert domains like the comprehensive diagnostics guide, understanding electronic signals is crucial.
How do I maintain appliance diagnostics over time? Regularly update your software tools, keep diagnostic manuals within reach, and set a schedule to test key components—like heating elements, sensors, and wiring—which helps catch issues early.
Don’t forget, trying out a thermal camera on your oven or dishwasher this week can be a game-changer. If you haven’t already, get one—it’s a powerful addition to your toolkit. You’ll be surprised how much easier troubleshooting becomes when you can visualize heat flow and spot potential problems instantly. Start with simple scans after each cycle and build your understanding from there; over time, you’ll become proficient in identifying anomalies before they cause costly repairs.
Lessons From the Trenches That Nobody Tells You
The biggest lesson I’ve learned about fixing dishwasher soap dispensers is that sometimes, the smallest component—like a spring or latch—can cause the biggest headaches. Early on, I assumed complicated control boards were always the culprit, but often, a simple relay or a clogged dispenser door was the root cause. This taught me to never overlook the mechanical parts or perform thorough inspections before jumping to expensive replacements.
Another insight was that a seasoned repair isn’t about quick fixes but understanding the entire system. For instance, wiring issues or control signal glitches can mimic faulty motors or switches. That realization pushed me to develop a diagnostic routine that includes checking wiring integrity and control board outputs first, saving time and money in the long run.
Patience, coupled with proper diagnostic tools, is vital. Rushing to replace parts without confirming the actual problem can lead to recurring issues and unnecessary expenses. I came to appreciate that a methodical approach, guided by data from multimeters and diagnostic modes, sheds light on what’s truly broken, making repairs more reliable and less stressful.
Tools That Revolutionized My Repair Game
Over the years, I’ve curated a toolkit that’s become indispensable for troubleshooting dishwasher and oven issues. A high-quality digital multimeter, like the Fluke 117, enables precise testing of control signals and wiring, preventing guesswork. Couple that with a thermal imaging camera such as the FLIR ONE, which helps identify overheating components or failed heating elements, especially valuable in oven diagnostics.
Additionally, investing in reliable diagnostic manuals and online resources—like our repair guides—ensures I stay updated on the latest models and troubleshooting techniques. These tools empower me to perform faster, more accurate repairs and give peace of mind that I’m addressing the root causes rather than temporary symptoms.
Finally, I always keep spare parts like springs, latches, and control modules handy. Sourcing OEM parts through trusted suppliers saves headaches, ensuring compatibility and longevity. Building an efficient repair kit is as crucial as understanding the machines themselves—preparing in advance makes any DIY project smoother and more successful.
Embrace the Next Step in Appliance Care
Fixing dishwasher soap dispensers and ovens is more than just replacing parts—it’s about cultivating confidence in your troubleshooting skills and understanding the unique nuances of each appliance. By combining patience, the right tools, and a keen eye for mechanical and electrical details, you unlock a deeper mastery over your home appliances.
Imagine the satisfaction of diagnosing a stubborn dispenser jam or control glitch on your own, knowing that you’ve gained valuable skills along the way. Don’t let fear of complexity hold you back; each repair is an opportunity to learn and strengthen your expertise.
Are you ready to take your appliance repair skills to the next level? Share your experiences or questions below—I’d love to hear how you’re tackling your dishwasher dilemmas!