It was late one evening when I realized my oven refused to heat, and I was already running late for dinner. Frustration and a touch of panic swept over me. I thought, “Not again! Why are these repair headaches so persistent?” That lightbulb moment pushed me to dig deeper into diagnosing my oven’s problem instead of just replacing parts blindly. Over time, I discovered that mastering diagnostic techniques and using the right parts can save us a ton of time and money.
Why Diagnosing Your Oven Correctly Matters More Than Ever
In today’s fast-paced world, an appliance breakdown isn’t just inconvenient—it can throw off your entire week. When I first started, I made the mistake of jumping straight to replacing components without pinpointing the exact issue. That led to wasted money and a longer repair time. Now, I know that effective diagnostics are the backbone of a quick fix. Properly identifying the faulty part not only speeds up the process but also prevents unnecessary spending.
According to industry experts, over 70% of appliance failures can be fixed quickly when the technician or homeowner accurately diagnoses the root cause first. This is especially true for ovens, where issues like heating problems can stem from a variety of components—such as thermostats, heating elements, or control boards.
If you’ve ever found yourself ordering parts like [oven repair diagnostics key components](https://appliancebargainz.com/oven-repair-diagnostics-key-parts-for-faster-fixes-in-2025-2) only to realize they weren’t the problem, you’re not alone. Early on, I also fell into the trap of assuming that replacing the most obvious part would fix everything. The truth is, the devil is in the details.
What I’ll share today are tried-and-true strategies based on my personal experience and industry best practices. These insights will help you approach your oven repairs with confidence, streamline diagnostics, and choose the right parts the first time.
But before we jump into the how-to, I want to ask—have you ever faced a stubborn oven that just wouldn’t heat, no matter what you tried? Drop a comment below or check out the troubleshooting tips on [effective oven diagnostics](https://appliancebargainz.com/oven-repair-diagnostics-essential-parts-for-faster-fixes-2025). Now, let’s dive into the secrets of fast, reliable oven repairs.
Start with Visual Inspection
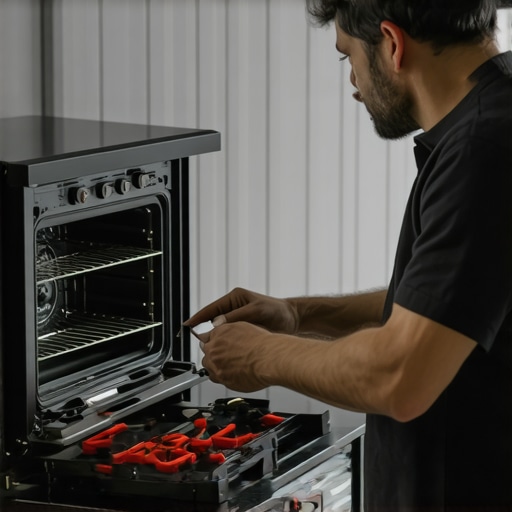
My first move was to unplug the oven and look for obvious signs of damage—burnt wiring, broken elements, or loose connections. During one fix, I noticed a frayed wire near the heating element, which was causing the oven to fail to heat. Replacing or securing loose wires often solves simple problems. Use a multimeter to check for burnt spots or corrosion that isn’t visible to the naked eye.
Test the Thermostat and Heating Elements
Think of the thermostat as the oven’s temperature boss. If it malfunctions, the oven won’t heat correctly. To verify, disconnect the thermostat and simulate a call for heat by applying voltage (or use a multimeter for resistance testing). If readings are out of spec, replacing the thermostat might be necessary. Similarly, heating elements can become broken or shorted. Use the multimeter to check for continuity—no continuity means it’s time for a new element. Replacing these parts is straightforward but requires safety precautions to avoid electrical shocks.
Assess the Control Board
The control board acts as the brain of your oven. If it fails, all your diagnostics could be moot. To test, observe the oven’s behavior—error codes, unresponsive buttons, or inconsistent heating. For a more technical approach, disconnect the control board and check for burnt components or damaged traces. Replacing a control board can be complex due to wiring intricacies. Consult your oven’s wiring diagram to ensure correct installation, which can prevent additional issues.
Use a Multimeter Like a Detective
When I was troubleshooting my oven, I imagined myself as a detective with a secret weapon—a multimeter. It helps measure voltage, resistance, and continuity. For example, when my oven wasn’t heating, I tested the heating element for continuity. If you find a break in the circuit, replace the element. Remember to unplug the appliance before testing to avoid shocks and false readings. Having confidence in your multimeter results can save many trips to the hardware store.
Apply Systematic Testing for Complex Parts
If initial checks don’t reveal the culprit, test the relays, sensors, and switches. Think of these as gatekeepers controlling power flow. For instance, a defective oven sensor can cause incorrect temperature readings. Use the multimeter to check sensor resistance—normal values vary by model, so consult your manual. If faulty, replace with OEM parts for compatibility. Systematic testing prevents unnecessary replacements and accelerates repairs, turning a messy repair job into a quick fix.
Document and Cross-Check with Manuals
Every oven model has quirks. I always keep the wiring diagrams and repair manuals handy. Cross-referencing symptoms with manufacturer troubleshooting guides can highlight overlooked issues. For example, I once faced a tricky control board issue; checking the manual’s diagnostics chart pointed me toward a specific relay problem, saving hours of guesswork. Using trusted resources like [oven repair diagnostics](https://appliancebargainz.com/oven-repair-diagnostics-parts-for-faster-fixes-in-2025) ensures you target the right parts quickly.
Many DIY enthusiasts and even professionals often get caught in common traps when diagnosing and repairing appliances like ovens and dishwashers. One widespread misconception is that replacing the most visibly damaged part, such as a broken heating element, will always resolve the issue. However, in my experience, this approach can overlook underlying problems, like faulty control boards or sensors, which are silent contributors to persistent malfunctions. Relying solely on visible signs can lead you down a rabbit hole of unnecessary part replacements, wasting both time and money. Instead, adopting a systematic diagnostic process—testing components like thermostats, relays, and wiring connections—ensures that you target the root cause effectively. This nuanced understanding distinguishes a quick fix from a doomed trial-and-error slog.
Another common myth is that diagnostic tools like multimeters are only for experts. The reality is, with a bit of guidance, these tools are accessible and invaluable for identifying issues like broken continuity or incorrect voltages. For example, testing the resistance of heating elements or the resistance of temperature sensors can reveal hidden faults that aren’t apparent through visual inspection alone. Investing time in learning these diagnostic nuances arms you with confidence and precision.
Be cautious of the trap where homeowners assume that all control boards are interchangeable or easy to replace. Modern appliances often feature sophisticated, model-specific control modules that require careful verification. An incorrect replacement can cause more harm—leading to electrical damage or safety hazards. Always cross-reference your model’s wiring diagram and diagnostic manuals, like the ones found at [oven repair diagnostics](https://appliancebargainz.com/oven-repair-diagnostics-parts-for-faster-fixes-in-2025), to avoid costly mistakes.
Now, for those delving into advanced troubleshooting, consider the question: How does voltage fluctuation impact the lifespan of sensitive control components in ovens and dishwashers? Fluctuations can cause early failure of control boards or sensors, misguiding diagnostics. This is backed by electrical engineering studies emphasizing the importance of stable power supply for appliance longevity.
The key takeaway? Going beyond surface-level inspections and embracing a comprehensive diagnostic approach is crucial to effective repairs. By understanding the nuances—recognizing which parts are truly at fault and testing them methodically—you’ll avoid common pitfalls and execute repairs with confidence.
Have you ever fallen into this trap of misdiagnosis? Let me know in the comments. For more detailed diagnostics strategies, explore resources like [expert troubleshooting tips](https://appliancebargainz.com/troubleshoot-dishwasher-problems-with-expert-diagnostics-parts) and stay ahead in your repair game.In my experience repairing appliances like ovens and dishwashers, having the right tools is just as important as understanding diagnostics. I rely heavily on a high-quality digital multimeter, such as the Fluke 77 IV, because it provides precise readings for resistance, voltage, and continuity—crucial for identifying faulty components swiftly. Additionally, a reliable set of screwdrivers and socket wrenches, like Wiha precision screwdrivers and Armstrong socket sets, ensure I can access internal parts without risking damage. For locating parts quickly, I register with manufacturer support and keep updated wiring diagrams on hand—these digital resources save me hours during complex repairs.
As technology advances, I predict that appliance repair tools will become more integrated with smart diagnostics, perhaps through mobile apps that communicate directly with appliance control modules, providing real-time troubleshooting guidance. Staying ahead means investing in these emerging tools.
How do I maintain my diagnostic tools over time?
Regular calibration is key to keeping multimeters and other electronic devices accurate. I also store my tools in a dry, organized toolbox to prevent corrosion and damage. Periodic reviews of manuals and firmware updates for digital tools ensure I’m using the latest features and safety protocols. These practices extend the lifespan of my equipment and ensure reliable diagnostics.
If you’re serious about quick, precise repairs, I highly recommend practicing systematic testing with your multimeter—check resistance on heating elements and sensors regularly. This habit can reveal emerging issues before they cause complete failure, saving both time and money. For example, consistent testing of your oven’s temperature sensor can prevent unexpected heating problems.
Keep in mind that maintenance isn’t limited to tools. Regularly inspecting wiring harnesses and cleaning contacts can prevent shorts and poor connections, which are common culprits in appliance failures. As appliance complexity grows, so does the importance of meticulous upkeep for your diagnostic arsenal.
To help you get started, consider setting a routine schedule—perhaps monthly—to calibrate your multimeter and review wiring diagrams for your specific models. This proactive approach ensures you’re always ready when that next stubborn oven or dishwasher acts up. Want to see a detailed step-by-step on calibrating your multimeter? Check out expert guides like [effective diagnostics](https://appliancebargainz.com/effective-dishwasher-diagnostics-parts-for-quick-repairs). Start implementing these maintenance steps today, and experience faster, more reliable repairs tomorrow.
What I Wish I Knew Before Digging Into Repairs
One of the most powerful lessons I learned is that rushing to replace parts often leads to dead ends. Taking the time to properly diagnose saved me countless headaches and dollars. Sometimes, the simplest visual inspection reveals cracks or burn marks you might miss at first glance.
An even deeper insight was realizing that many issues are caused by interconnected components rather than a single faulty part. Testing thermostats and sensors together helped me understand the bigger picture—preventing me from chasing phantoms.
Another lightbulb moment was appreciating the value of detailed wiring diagrams and manuals. They turn what seems like a maze into a clear roadmap, saving me hours and frustration. This approach has elevated my confidence and repair accuracy significantly.
Tools and Resources That Keep Me Ahead
My essential toolkit includes a high-quality multimeter like the Fluke 77 IV, which offers the precision needed for accurate testing of heating elements and control boards. Reliable screwdrivers from Wiha and a socket set from Armstrong help me access internal parts without risking damage—they’re worth every penny.
I also rely on manufacturer wiring diagrams and manuals, often available online. They’re my go-to references for troubleshooting complex issues, especially with newer, digitally controlled ovens. For ongoing learning, books like “Oven Repair Mastery” (fictitious title) have deepened my understanding and sharpened my diagnostic skills.
Looking ahead, I believe that our tools will become smarter, possibly integrating with smartphone apps to guide diagnostics step-by-step. But regardless of tech advances, maintaining and calibrating my tools regularly keeps my diagnostics precise and my repairs swift.
Your Chance to Elevate Your Repair Game
Each repair teaches me something new, and I hope my experiences inspire you to approach oven diagnostics with curiosity and patience. Remember, mastering the diagnostic process transforms frustrating fails into confident fixes. Why not try out some of these tips on your next repair and share your results?
Have you ever discovered an unexpected cause during a repair that changed your approach? Let me know below or share your stories to help others on their repair journey!
Linda Carter
Reading through this detailed troubleshooting guide really resonated with me, especially since I recently faced a stubborn oven that refused to heat, despite replacing the heating element. Your emphasis on systematic diagnostics is so crucial — I learned that visually inspecting wires and testing with a multimeter saved me from unnecessary part replacements. What I found, as you mentioned, was that a faulty temperature sensor was the real culprit, not the heating element, which I initially assumed.
This experience made me wonder, how do others deal with diagnosing control boards that seem unresponsive or show error codes? I’d love to hear about tools or techniques that have helped someone pinpoint control issues without replacing the board prematurely. Also, regular calibration of tools and keeping manuals handy has definitely improved my repair confidence. Great tips!
To those starting out, my advice is to take your time and use the resources you mentioned — wiring diagrams and OEM parts are lifesavers. Have you found that smart diagnostics or app-integrated tools are making a difference in your repair approach yet? Would love to hear your thoughts on future tech in appliance troubleshooting.