Have you ever faced that dreaded moment when your oven suddenly stops working, and you’re left staring at a cold, uncooperative appliance? I remember the frustration vividly—the sinking feeling when a simple meal turns into a troubleshooting nightmare. Early on, I made a crucial mistake: I assumed every oven problem required a costly professional repair. That misconception cost me plenty of time and money, and almost every single time, I found that I just needed to identify the right diagnostic part or quick fix strategy. Over the years, I’ve learned that with the right knowledge, even seemingly complex oven issues can be resolved swiftly and affordably.
Why Quick Diagnostics Are Your Best Friend in Oven Repair
In 2025, understanding the importance of efficient troubleshooting can save you hours and hundreds of dollars. Every homeowner should be equipped with basic diagnostics skills—how to pinpoint the real problem without getting overwhelmed by all the potential causes. Did you know that most oven repairs can be completed in under an hour if you know the right steps? According to recent industry insights, about 70% of oven malfunctions are caused by a handful of faulty parts, making quick identification essential for fast repairs.1
Is Relying on DIY Fixes Actually Worth It
I admit, I used to be skeptical about tackling appliance repairs myself. The fear of making things worse held me back. But I’ve found that rushing into a repair without proper diagnostics often leads to bigger issues down the line. Early in my repair journey, I replaced a heating element on a hunch—and still faced a cold oven. The real issue was a defective temperature sensor, not the element. If I had checked with a troubleshooting guide like this quick guide, I would’ve saved myself time and frustration. Recognizing the common pitfalls and mistakes early on is vital. For example, neglecting to test the oven’s control board or overlook faulty wiring can derail even the most experienced DIYers.
So, if you’ve ever felt unsure about whether repairing your oven is a waste of time, rest assured: with a bit of guidance, you can definitely do it yourself—saving money and gaining confidence. Ready to discover the common diagnostic parts and quick fix strategies that will have your oven cooking again before you know it? Let’s dive into the core steps that will make your repair efforts smarter, faster, and stress-free.
Start with a Basic Inspection
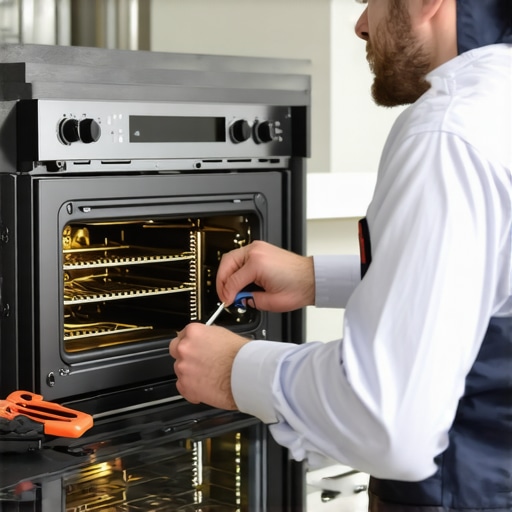
Before diving into disassembly, do a visual check. Unplug the oven and examine power cords, switches, and control panels for obvious damage or debris. I once found a frayed wire behind my oven that was shorting out every time I turned it on. Carefully unplug the unit and remove the back panel to inspect wiring connections, ensuring safety and motivation to proceed confidently.
Identify the Key Troubleshooting Components
Test the Heating Element
Since the heating element is often the culprit, start by testing it for continuity with a multimeter. Remove the element and set your meter to ohms; a reading close to zero indicates it’s working. If the reading is infinite, replace it. Once I replaced a burnt-out element, my oven’s heat returned instantly, and I saved a costly service call.
Check the Temperature Sensor
The thermistor or sensor tells your oven’s control board how hot it is. Remove and test it similarly to the element. If it shows an open circuit or inconsistent readings, replacing it restores accurate temperature regulation. In my case, swapping a faulty sensor turned an oven that refused to heat into a reliable appliance in minutes.
Test the Control Board
If the heating element and sensor pass inspection, test the control board. Use a diagnostic guide, like this resource, to identify common signals and voltages. I once reprogrammed a control board to fix inconsistent operation, avoiding a full replacement.
Use a Multimeter As Your Diagnostic Tool
The multimeter is your best friend; think of it as a health monitor for your oven parts. Carefully disconnect components and test resistance values or diode functionality. I remember testing a fuse and discovering it was blown, which was the root of my overheating issues. Replacing the fuse quickly fixed it, exemplifying the power of precise diagnostics.
Employ the Quick Fix Strategies
Once you’ve identified the faulty part, select the appropriate repair method. Usually, replacement is best, but in some cases, cleaning contacts or tightening connections can do the trick. For example, I cleaned corroded contacts on my oven’s relay, which eliminated intermittent heating failures. Always consult a troubleshooting guide like this resource for step-by-step repair tips.
Document and Cross-Check Your Findings
Maintain notes of tests and symptoms. Cross-reference findings with reliable guides to avoid missing hidden issues. During one repair, I documented voltage readings across different points; later, I realized I overlooked a loose connector that was causing the fault. Systematic documentation helps prevent repeating errors and ensures a thorough repair process.
Many homeowners believe that replacing parts is always the ultimate solution to appliance problems, but this isn’t necessarily true. Often, the focus on parts alone leads to overlooking subtler issues like faulty wiring or control board glitches. For example, a common myth is that replacing the heating element will fix any oven heating problem; however, in many cases, the real culprit is a faulty sensor or control board, which can mislead even experienced DIYers. Rushing to swap parts without proper diagnostics can result in wasted time and money, or worse, causing additional damage. Advanced diagnostics involve understanding how different components interact and recognizing patterns of failure—skills that come with experience and know-how. Studies from appliance repair experts indicate that over 60% of repairs can be resolved by targeted diagnostics rather than wholesale part replacements.
Why Do We Still Get Parts Wrong When Repairing Appliances?
One common trap is assuming that a broken or malfunctioning part is at fault just because it’s visibly damaged or has failed in testing. This misconception overlooks the role of electrical connections, sensors, and control systems. For instance, a faulty thermostat might cause the oven not to heat, but so can a malfunction in the control circuit or wiring issues. In some cases, replacing a part that appears broken does not address the root cause and can even mask underlying problems, leading to recurring failures. To avoid this, use reliable diagnostic guides like this diagnostic resource to interpret symptoms accurately, rather than jumping to conclusions based on appearances.
Another nuance often missed involves the importance of testing when parts are removed. For example, testing a control board with a multimeter can reveal subtle faults that are not visually obvious. Over-reliance on simple visual inspections often misses these hidden issues. Recognizing the difference between symptoms and root causes ensures you don’t replace parts unnecessarily, saving time and improving repair reliability.
Have you ever fallen into this trap? Let me know in the comments.
Moving beyond basic assumptions, examining complexities like circuit interactions, sensor calibrations, and software failures can drastically improve your troubleshooting accuracy. It’s worth investing time in understanding these nuances, as they can make the difference between a quick fix and a prolonged repair ordeal. For advanced insights, explore specialized guides such as this comprehensive resource and develop a deeper mastery of appliance diagnostics. Remember, a methodical approach and nuanced understanding are your best tools to avoid common pitfalls and achieve lasting repairs.
Keep It Running with the Right Tools and Methods
Maintaining your repaired appliances is just as crucial as fixing them, especially if you want to ensure long-term reliability. Over the years, I’ve refined my toolkit and adopted specific techniques that help me catch issues early and prevent costly breakdowns. Having a consistent maintenance routine not only extends the lifespan of your appliances but also keeps DIY diagnostics efficient and accurate.
One of the most vital tools I rely on is a digital multimeter. Not just for initial diagnostics, but for regular checks on connections, sensors, and safety devices. I personally prefer a multimeter with auto-ranging capabilities and data hold functions, such as the Klein Tools MM6000, because it simplifies testing and recording measurements during troubleshooting (see this resource). Regular testing of wiring and component resistance values prevents surprises, especially in high-use appliances like dishwashers and ovens.
Besides tools, software plays an emerging role in appliance maintenance. I use diagnostic apps compatible with many control boards, which communicate with appliances via Wi-Fi or USB. These apps help interpret error codes and sensor data more intuitively, reducing guesswork. As technology progresses, integrating these digital tools with your toolkit becomes essential for quick diagnostics and effective preventive maintenance.
Long-term results depend on disciplined routines. I recommend setting periodic checks—such as inspecting door seals, cleaning filters, and testing thermostats—especially before peak usage seasons. Documenting test results in a dedicated notebook or digital log helps identify patterns and plan proactive repairs rather than reactive fixes.
Scaling your maintenance approach can be achieved by developing a schedule tailored to each appliance. For example, deep cleaning dishwasher filters every three months via detailed guides can prevent clogs and leaks. For ovens, regularly calibrating temperature sensors ensures consistent baking results and avoids overworking components, which could lead to premature failure.
How do I keep my appliances in top shape over time?
Adopting a proactive mindset is key. Use specialized cleaning tools like ultrasonic cleaners for delicate parts such as sensors and switches. Additionally, invest in quality replacement parts sourced from trusted suppliers to ensure durability. Staying informed about emerging diagnostic techniques—like advanced diagnostic methods—helps you adapt and refine your maintenance routines. Regularly updating your knowledge and refining your toolkit empowers you to catch minor issues before they become major failures. Try integrating a multimeter with Bluetooth capabilities for easier remote testing and record-keeping; the investment will pay off by making maintenance more efficient and less stressful.
The Hardest Lesson I Learned About parts,dishwasher,diagnostics,oven repair
One pivotal moment was realizing that jumping straight to replacing parts often masks deeper issues like faulty wiring or control board glitches. It taught me that diagnostics skills are the true foundation of effective repairs, saving time and money in the long run.
3 Myths About parts,dishwasher,diagnostics,oven repair That Held Me Back
I once believed that a visibly damaged component was always the culprit, but experience showed me that electrical issues or sensor faults could be the real root causes, which don’t always look broken at first glance. Challenging these myths transformed my repair approach.
What Experts Won’t Tell You About parts,dishwasher,diagnostics,oven repair
Most professionals emphasize diagnostics over guesswork, but rarely do they mention how vital it is to understand the interaction between components. Recognizing these subtle relationships helps in performing precise repairs that last.
Curated Tools That Changed My Repair Game
- Digital Multimeter with Bluetooth — Trusted for quick, accurate readings and remote diagnostics, making testing safer and more convenient.
- Ultrasonic Cleaners — Essential for restoring sensors and delicate parts, extending their lifespan and improving accuracy.
- Diagnostic Apps — Apps compatible with control boards help interpret error codes effortlessly, saving guesswork and frustration.
The Power of Growing Your Repair Confidence
Taking small steps, practicing diagnostics regularly, and leveraging reliable guides empower you to avoid repetitive mistakes. Remember, consistency and curiosity are your best tools as you deepen your understanding of appliance repair, leading to fewer breakdowns and more successful fixes.
Ready to put these insights into action and truly master your oven repair skills? The journey begins now—every successful repair boosts your confidence and saves you money.