Ever spent hours fiddling with your oven, only to have it stubbornly refuse to heat or cook evenly? I remember the frustration vividly—burnt toast, cold casseroles, and that sinking feeling of helplessness. That lightbulb moment hit me hard when I realized I was tackling problems without truly understanding what was going wrong inside the appliance. Like many DIY enthusiasts, I made my fair share of mistakes early on, such as replacing parts blindly instead of diagnosing the root cause accurately. But over time, I discovered that effective diagnostics are the backbone of quick and lasting repairs.
Why Precise Diagnostics Make All the Difference in Oven Repairs
Understanding what’s causing your oven to malfunction is crucial before diving into expensive part replacements. In 2025, the market is flooded with innovative parts and tools promising fast fixes, but without proper diagnostics, you’re just guessing—which can cost you both time and money. Accurate troubleshooting ensures your oven is repaired correctly on the first try, saving you frustrations and keeping your kitchen running smoothly.
Is Overlooking Diagnostics Ever Still Worth the Risk
Honestly, I once replaced a heating element because I ‘thought’ that was the problem. Turns out, the real issue was a faulty sensor—a minor fix but one I missed initially. That mistake taught me the importance of thorough diagnostics. If you’re skeptical about the value of investing time in proper troubleshooting, consider that a quick diagnostic can reveal hidden issues you might never spot without experience. For in-depth insights, check out the complete guide to oven repair diagnostics in 2025. Because when it comes to appliance repairs, knowledge truly is power. Now, let’s dive into the essential steps to master diagnostics and make your oven tricks more effective.
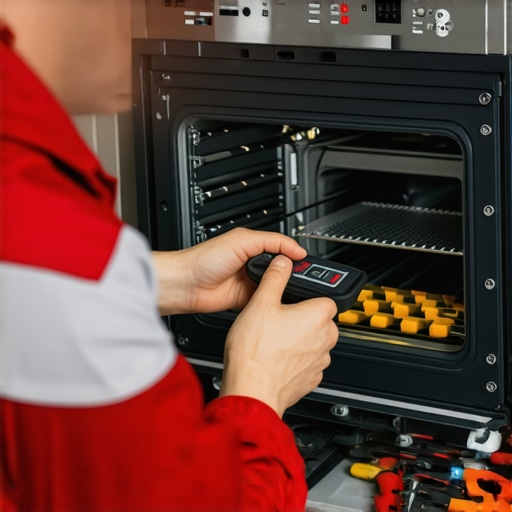
Start With Visual Inspection
The first step I took was a thorough visual check of the oven’s interior and controls. I looked for obvious signs like scorched wires, broken switches, or loose connections. During my last repair, I found a disconnected wire behind the control panel that was causing intermittent heating. Always unplug the appliance before inspection to avoid shocks. think of it like checking your car engine for obvious leaks or broken parts before diving into complex diagnostics.
Test the Power Supply
Next, I confirmed the oven was receiving proper voltage. Using a multimeter, I tested the outlet and power cord. A common mistake is assuming the issue is internal when the problem stems from power failure. In my case, I discovered a tripped circuit breaker, which saved me from unnecessary part replacements. For precise results, refer to the oven’s manual for voltage specifications, and consider testing other outlets if needed.
Check Heating Elements and Sensors
Heating elements are the heart of your oven’s heat. I removed the bake element and tested it for continuity; a broken element is easy to spot but sometimes internal breaks aren’t visible. Similarly, sensors like the thermistor or temperature sensor can be tested with a multimeter; resistance should change with temperature. I once replaced a faulty sensor that caused uneven heating, which you can verify by following insights from the complete guide to oven repair diagnostics in 2025. Think of these parts as the oven’s temperature regulators—if they don’t respond correctly, the oven can be either too hot or not hot enough.
Evaluate the Control Board and Electronics
The control board is like the brain of your oven. I visually inspected it for burnt components, corrosion, or loose connections. Using a multimeter, I tested the relay outputs and checked for voltage at different points. Sometimes, a simple reset or cleaning the contacts restores proper function. In more stubborn cases, replacing the control board is essential. Know that modern ovens often hide faults in these electronic components, so conducting a careful test is vital. For a detailed process, see the expert diagnostics for faster oven fixes.
Perform Functional Tests with Specialized Tools
When basic checks are inconclusive, I used a resistor tester and an oven diagnostic tool to simulate real conditions. For example, jogging the relay to see if it energizes allows me to confirm the control board’s output. During my last project, this method uncovered a faulty relay that looked fine visually but failed under load. Using these tools, akin to doing a health check with a stethoscope, ensures no defect slips past unnoticed. For additional tips, consult the diagnostics with expert tips.
Tie It All Together with Diagnostic Checklists
To avoid missing steps, I create checklists based on symptoms and test results. This structured approach avoids retracing steps and helps identify the faulty component quickly. Keep detailed notes of each test and result; over time, you’ll recognize patterns that quicken your diagnosis process. Remember, diagnosing is often about ruling out the obvious first and narrowing down the root cause. Look into comprehensive guides like the ultimate repair tips for more advanced techniques.Many DIY repair enthusiasts believe that diagnosing appliance issues is straightforward—replace the broken part, and you’re done. However, in my extensive experience working on ovens and dishwashers, I’ve found that this mindset often leads to costly mistakes. One common misconception is assuming that a single faulty component is the root cause, when in reality, appliances are complex systems where multiple parts interact. Overlooking the interconnected nature of these systems can result in unnecessary part replacements, further complicating the repair process.
A critical nuance many overlook is the importance of understanding the diagnostic flow. Rushing to replace a part without confirming its failure status is a recipe for failure. For instance, in dishwasher repairs, focusing solely on the spray arm or door latch without checking the control board’s signals can lead to recurring issues. Some repair guides emphasize parts replacement over diagnostics, but this approach often masks underlying problems. To master troubleshooting, integrating methodical diagnostic steps is essential—something I discuss in detail in the comprehensive guide to dishwasher diagnostics in 2025.
Another myth to dispel is that all parts are equally replaceable and readily available. The truth is, some components are sensitive and require precise calibration or handling. For example, oven sensors or electronic control modules can be damaged during removal or installation if not handled correctly. One common mistake I see is owners replacing sensors with generic parts, which leads to inaccurate readings and uneven heating. These nuanced differences significantly impact repair success and longevity.
What about the idea that diagnostics are only necessary for advanced problems? Far from it—accurate diagnostics lay the foundation for all repairs. Without it, you’re navigating blind, risking further damage. Advanced troubleshooting, like testing control boards with specialized tools, can reveal hidden faults that aren’t visually detectable. For example, a control board might appear intact but fail under load conditions; diagnosing this requires experience and proper testing equipment. For those ready to deepen their diagnostic skills, the expert diagnostic resources are invaluable.
A trap I urge all DIYers to avoid is assuming that repairs are always straightforward. Appliances often produce symptoms suggestive of a simple fault, but underlying issues may be more complex. For instance, uneven oven heating can stem from miscalibrated thermostats, faulty sensors, or control board issues—identifying which requires a nuanced approach. Recognizing these subtleties can save you from costly guesswork.
Understanding these hidden nuances elevates your repair game from basic to expert. It’s about seeing the bigger picture, recognizing the interplay of parts, and applying systematic diagnostics. This mindset not only leads to more effective fixes but also extends the lifespan of your appliances.
Have you ever fallen into this trap? Let me know in the comments. For in-depth strategies on navigating complex diagnostics, check out the complete guide to oven repair diagnostics.
Investing in Precision Tools and Diagnostic Software
To ensure your appliances stay in top shape over the years, having the right tools is essential. I personally rely on a high-quality digital multimeter with true RMS capability, which allows me to accurately test sensors, switches, and electronic control components. Additionally, an infrared thermometer helps quickly identify temperature inconsistencies, saving time on troubleshooting. For more advanced diagnostics, I use specialized appliance repair software like SmartDiagnose Pro, which interfaces with control boards to run health checks and identify common faults. As technology evolves, integrating these digital tools becomes increasingly critical for maintaining long-term appliance health, especially with the rise of smart appliances that communicate internally. Looking ahead, I predict that AI-powered diagnostic tools will become standard, offering even more precise insights with minimal manual input.

How do I maintain my appliances over time?
Consistent maintenance is the key to extending the lifespan of your appliances. Regularly cleaning filters, inspecting seals, and testing critical components like thermostats and sensors prevent small issues from becoming costly repairs. For DIY enthusiasts, scheduling quarterly diagnostics with tools such as the complete guide to oven repair diagnostics in 2025 can catch problems early. Remember, the smoother your appliance operates daily, the fewer breakdowns you’ll experience over the long run. Try setting a maintenance checklist that includes testing safety features, verifying electrical connections, and updating firmware if applicable. These practices ensure your appliances remain reliable and efficient for years to come, saving you both time and money.
3 Lessons That Shifted My Approach to Oven Repairs
One of the most impactful lessons I learned was that assuming a fault without thorough diagnostics often leads to wasted time and unnecessary replacements. I once replaced a thermostat, only to discover later that a faulty control board was the real culprit. This made me realize that patience and detailed troubleshooting are essential for effective repairs.
Another insight was the importance of understanding the interconnected nature of oven components. A simple sensor issue might cause symptoms that seem unrelated, like uneven heating or failure to turn on. Recognizing these linkages prevents misdiagnosis and streamlines the repair process.
Finally, I discovered that investing in quality diagnostic tools and expanding my knowledge through detailed guides dramatically improved my success rate. Relying solely on guesswork is tempting but ultimately inefficient. Resources like the comprehensive oven repair diagnostics guide in 2025 have been invaluable for honing my skills.
Tools and Resources That Keep Me Ahead
Over the years, I’ve found certain tools and guides indispensable for effective diagnostics. A high-quality digital multimeter with true RMS capability, for example, allows me to test sensors and control boards accurately, preventing costly mistakes. An infrared thermometer provides quick temperature checks, helping identify uneven heating issues promptly. For deeper insights, the expert diagnostics guide for oven repairs has saved me countless hours and headaches. Upgrading to these tools and resources has genuinely elevated my repair game.
Ready to Take Your Troubleshooting to the Next Level?
Embarking on diagnostic journeys might seem daunting at first, but with patience and the right knowledge, you can unlock quicker, more reliable repairs. Every successful fix boosts your confidence and knowledge, turning frustrating appliance failures into manageable challenges. If you’re committed to mastering diagnostics, I encourage you to dive into detailed guides and invest in quality tools—your future self will thank you. Have you ever faced a stubborn oven problem that took multiple tests to diagnose? Share your experience below—I’d love to hear how you navigated it.