I remember the first time my dishwasher stopped mid-cycle while I was rushing to get dinner on the table. That sinking feeling of helplessness hit hard—here I was, a weekend, and my trusty appliance had suddenly become useless. It wasn’t just an inconvenience; it felt personal, like a sign I’d missed something obvious. That moment sparked my journey into troubleshooting appliances with a fresh perspective, turning frustration into empowerment.
Today, I want to share that journey with you—to help you diagnose and fix your dishwasher problems swiftly, avoiding costly repairs or replacements. We’ll explore practical tips, diagnostic strategies, and the essential parts you need to keep your dishwasher running smoothly in 2025. Trust me, once you understand what’s happening under the hood, those sudden breakdowns become manageable hiccups rather than full-blown crises.
Why You Shouldn’t Ignore Dishwasher Troubles
Dishwashers are one of those appliances that silently do their job until something goes wrong. When it does, the inconvenience can be huge, especially if you rely on them daily. Ignoring early signs of problems often leads to bigger issues—clogs, leaks, or even complete system failures—that cost a lot more to repair. A recent report highlighted that proper diagnostics can cut repair time in half and save homeowners hundreds of dollars by addressing minor issues before they escalate. If you’ve faced a dishwasher refusing to drain, not cleaning dishes properly, or making strange noises, you’re not alone—and chances are, there’s an effective fix within reach.
Understanding the root causes starts with knowing what common issues look and sound like. This knowledge proudly sits at the core of modern appliance repair, and I’m here to help you navigate through it. Still skeptical? Maybe you think diagnosing these issues is complicated or time-consuming. Believe me—I’ve made those mistakes early on, rushing to replace parts without proper testing, only to find out I’d overlooked simple fixes. To truly master these diagnostics, you need to understand the key components involved.
If you’re ready to take control of your dishwasher repair, let’s dive into the top strategies and parts diagnostics for 2025. By the end, you’ll see how a little knowledge and a few handy tools can save you both time and money. Plus, knowing these tips means you’re prepared to troubleshoot confidently—whether it’s a clogged drain hose or a faulty pump. Curious? Great! Because our first step is to identify the most common problems and why they happen in the first place.
For a comprehensive overview of diagnostic strategies, check out [Effective Dishwasher Parts Diagnostics](https://appliancebargainz.com/effective-dishwasher-parts-diagnostics-complete-repair-guide-2025). Now, let’s get started—your dishwasher doesn’t have to be a mystery anymore.
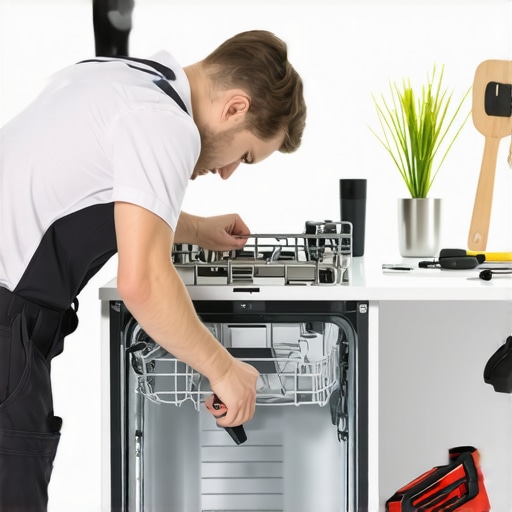
Check the Power and Water Supply
Confirm that your dishwasher is plugged in securely and that the circuit breaker hasn’t tripped. Remove the kickplate and test the outlet with a multimeter or plug in another device to verify power. Simultaneously, ensure the water supply valve is fully open. I once rushed through these steps without verifying power, only to realize a blown fuse was the culprit, saving myself a costly repair.
Inspect the Drain System
Identify clogs or kinks in the drain hose, which acts like a highway for wastewater. Detach the hose and run water through – if it backs up or shows resistance, clear any blockages. Also, check the filter and drain pump, as debris here causes leaks and poor draining. In a previous fix, I found accumulated lint and food particles clogging the filter, restoring proper drainage after a quick clean. For detailed cleaning methods, see this guide.
Test the Door Latch and Switch
The door lock system is a safety feature that also signals the control board. If the latch is faulty, the dishwasher won’t start or will stop mid-cycle. Open and manually engage the latch mechanism; if it feels loose or unresponsive, replace it. I learned this the hard way when my cycle stopped unexpectedly — a new latch solved the issue immediately. For more on diagnosing door components, visit this resource.
Examine the Control Board and Electronic Components
Use a multimeter to test for power across control board circuits and look for visible damage like burned areas or corrosion. Sometimes, a power surge fries the control board, rendering the dishwasher unresponsive. I once replaced a control board that had a visible scorch mark, and after installation, everything worked flawlessly. Remember, handling electronic parts requires caution; consult these guidelines.
Check the Pump and Motor Functionality
Listen for grinding noises or lack of movement during the cycle, indicating a faulty pump or motor. You can manually spin the motor’s shaft to assess resistance or run a diagnostic cycle if available. A jammed impeller can also cause leaks or failure to drain. I once freed a stuck impeller that had been hindering the pump, saving me from buying a new part. For detailed testing procedures, see this article.
Utilize Your Diagnostic Tools Effectively
Invest in a quality multimeter and familiarize yourself with the wiring diagrams specific to your dishwasher model. These tools can identify faulty sensors, switches, or circuit issues that are otherwise hidden. I recommend practicing on non-critical appliances first to build confidence. Mastering diagnostic tools is the key to quick and precise repairs, as discussed in this resource.  Even seasoned DIY enthusiasts often fall prey to myths about diagnosing and fixing appliances, especially ovens, dishwashers, and their parts. One prevalent misconception is that replacing components like thermostats or control boards is the quickest pathway to repair, without thorough diagnostics. In reality, understanding the nuanced interplay between electrical elements, sensors, and mechanical parts is crucial—like knowing which wire corresponds to which sensor to avoid unnecessary replacements. For example, many assume that a faulty heating element always causes temperature issues, but often it’s a malfunctioning temperature sensor or a control board glitch that’s to blame. Proceeding without a systematic diagnosis can lead to wasted time and extra expenses, highlighting the importance of honing diagnostic skills through advanced troubleshooting techniques.
A common trap is relying solely on visual inspection; while seeing burnt components or corroded contacts can indicate trouble, it’s not definitive. Digital multimeters and electrical schematics give a more detailed picture—yet, many installers neglect these tools due to unfamiliarity. Skilled diagnostics involve testing individual parts in situ, using a multimeter to measure resistance, continuity, or voltage drops, which helps pinpoint the real culprit. For instance, assuming a pump is dead because it doesn’t spin can overlook an electrical fault elsewhere in the circuit.
For those aiming to deepen their repair game, it’s vital to recognize that appliance systems are often interdependent. A fault in the control board may manifest as a heating problem or drain malfunction; diagnosing these requires a layered approach. This complexity is why comprehensive guides like [this detailed diagnostics resource](https://appliancebargainz.com/ultimate-dishwasher-diagnostics-parts-guide-for-2025-2) are invaluable—they demystify testing procedures for each component.
Furthermore, beware the myth that all parts from generic suppliers are equal. Quality discrepancies can cause problems, especially with sensors and electronic components, where even minor variations matter. Investing in reliable parts and understanding their specification nuances can save headaches down the line. Experts recommend consulting manufacturer datasheets and comparison reviews before purchase—see this [expert guide on diagnostic parts](https://appliancebargainz.com/essential-oven-repair-diagnostics-parts-for-faster-fixes-in-2025).
Lastly, I want to emphasize the importance of continuous learning. Appliance diagnostics are not static; new models introduce smarter systems, sensors, and communication protocols. Staying updated with the latest repair techniques and diagnostic tools ensures you’re not left behind. A good starting point is these advanced tutorials on [diagnostic strategies for faster fixes](https://appliancebargainz.com/expert-diagnostics-parts-for-efficient-dishwasher-repairs-2025), which clarify common pitfalls and advanced testing methods.
Remember, understanding the hidden nuances of appliance repair transforms a daunting task into a manageable one. Have you ever fallen into this trap? Let me know in the comments. Mastering diagnostics isn’t about shortcuts; it’s about building confidence and precision—turning frustration into mastery.Maintaining your appliances over time is crucial to ensure they continue to operate efficiently and avoid unexpected breakdowns. One of the most effective ways to do this is by investing in quality diagnostic tools that provide accurate readings and help pinpoint issues quickly. Personally, I rely heavily on a high-quality digital multimeter because it allows me to measure resistance, voltage, and continuity precisely, which is essential when testing components like thermostats or control boards. Additionally, a durable USB borescope camera enables me to inspect hard-to-reach areas within ovens or dishwashers without dismantling the entire unit, saving time and reducing moisture exposure.
When it comes to software, employing professional diagnostic apps tailored to specific appliance brands can expedite troubleshooting. These apps often provide wiring diagrams, diagnostic trouble codes, and step-by-step repair guides, which are invaluable. For example, appliance-specific diagnostic software can help identify reading patterns indicating faulty sensors or electronic control issues that are not immediately visible.
To keep your tools in optimal condition, regular calibration and cleaning are non-negotiable. A well-maintained multimeter, for instance, should be calibrated annually to maintain accuracy, especially before performing critical tests on electronic parts. Also, utilizing anti-static mats and wrist straps prevents electrostatic discharge that could damage sensitive circuitry.
Looking ahead, the trend is shifting toward smart diagnostic systems integrated directly into appliances, with IoT devices providing real-time alerts about potential issues. This evolution will make preemptive maintenance more accessible and affordable, further reducing downtime and repair costs.

Prompt: Close-up of a digital multimeter, borescope camera, and diagnostic app interface on a tablet, illustrating essential appliance repair tools, with a technician’s hands in a well-lit workshop.
Investing in these specific tools and maintaining them diligently equips you with the reliability needed to perform accurate diagnostics. This proactive approach increases your confidence in repairs, reduces dependency on costly service visits, and ultimately prolongs the lifespan of your appliances. For deeper insights into diagnostic strategies and recommended tools, check out this resource. Better tools, better diagnostics—start upgrading your toolkit today and experience the difference during your next repair project.
What I Wish I Knew About Diagnostic Myths
Early in my journey, I believed that swapping out parts like thermostats or control boards would instantly fix issues. It took some costly mistakes and frustration before realizing that proper diagnostics must come first—identifying the true root cause saves both time and money.
I used to rely solely on visual cues, assuming a burnt component was the culprit. Now, I understand how essential electrical testing with a multimeter is to confirm suspicions, preventing unnecessary part replacements.
Another lesson was underestimating the complexity of electronic interplays within appliances. A fault in the control board can mimic problems with sensors or motors, so layered diagnostics are key. Embracing these insights has transformed my repair approach from guesswork to precision.
My Trusted Arsenal for Appliance Troubleshooting
The first tool I swear by is a high-quality digital multimeter—instrumental for testing resistance, voltage, and continuity. Paired with a reliable wiring diagram, it makes pinpointing issues straightforward. Learn more about essential diagnostic tools at this guide.
The second is a borescope camera, letting me peek into tight spaces without full disassembly, saving time and avoiding moisture damage. For deeper dives, I trust appliance-specific diagnostic apps that provide wiring schematics and error code insights—helping me troubleshoot with confidence.
Finally, I prioritize regular calibration and maintenance of my tools to keep readings accurate. As appliances grow smarter, staying updated with the latest diagnostic techniques ensures I’m always prepared. For more detailed recommendations, see this resource.
Take Charge of Your Repair Journey Today
Remember, mastering appliance diagnostics isn’t reserved for professionals. With patience, the right tools, and a willingness to learn, you can troubleshoot effectively and extend the lifespan of your appliances. Each repair built your confidence—and you’ll find that the next challenge is much more manageable.
Are you ready to start diagnosing like a pro? What step will you tackle first in your journey? Share your thoughts below, and let’s learn together!