The sky turned that eerie shade of bruised purple, the thunder shook my windows, and for a split second, the whole house went black. When the power roared back to life, I thought I was in the clear. I was wrong. The next morning, I loaded up the breakfast plates, hit the ‘Normal Wash’ button, and… nothing. No chime. No lights. Just the heavy, humid smell of a kitchen that was about to be overrun by dirty dishes. I’ve been in this hobby long enough to know that silence is usually the most expensive sound an appliance can make. But before you start shopping for a new stainless steel replacement, let me tell you what I’ve learned from my own fair share of fried circuits and ‘oops’ moments.
That Silent Control Panel Isn’t Always the End of the World
We’re going to get that machine humming again today. I’ve realized over the years that we often overcomplicate things. I once spent three hours tearing down a door just to realize I hadn’t pushed the plug in all the way—don’t be like past me! If you’re staring at a machine that looks completely dead, the first thing we need to do is look at the control panel symptoms and see if the brain of the unit is actually fried or just playing dead to protect itself. According to the Electrical Safety Foundation (ESFI), power surges are responsible for a massive spike in insurance claims for home electronics because they can bypass basic surge protectors and hit the motherboard directly. It’s a protective response, much like how a circuit breaker works, but it happens deep inside the machine’s guts. It is often a matter of learning how to identify dishwasher faults quickly before you lose your mind.
Is fixing it yourself actually worth the hype?
You might be skeptical. ‘I’m not an electrician,’ you say. Neither am I! But I am a guy who hates wasting money. My biggest mistake early on was assuming that a power surge meant the entire motherboard was toasted. I actually tossed a perfectly good dishwasher years ago because I didn’t know how simple the fix could be. Don’t make that same mistake. Before you even think about calling a repair expert, you should be checking the thermal fuse. It’s a cheap part that acts like a bodyguard for your dishwasher. If it takes the hit, it saves the expensive components. Have you ever stood in your kitchen, pressing buttons and hoping for a miracle, only to be met with total silence? Tell me about your dead appliance horror stories—I bet I’ve had one worse. If you can use a screwdriver and use these multimeter tricks, you can likely fix this yourself for the price of a takeout dinner. This guide will walk you through the diagnostic steps I use every time the grid decides to go haywire. We will start with the easiest resets and move into the heart of the machine, checking the essential dishwasher parts that are most likely to quit after a voltage spike.
Force a Reset Before You Do Anything Else
The first thing I always do—and I mean always—is perform a hard reset. Think of your dishwasher like a computer that has just frozen up during a software update. When a surge hits, the control board can get stuck in an error loop. I once spent an hour troubleshooting a dishwasher only to realize it just needed to be unplugged for ten minutes to clear its ‘brain.’
The 10-Minute Power Nap for Your Appliance
Don’t just hit the ‘Off’ button. You need to physically cut the supply. Flip the breaker in your basement or pull the plug under the sink. Leave it alone for at least ten minutes. This allows any residual electricity in the capacitors to dissipate. When you flip that breaker back on, you are looking for a ‘handshake’ between the board and the display. If you still have a blank screen, it is time to identify dishwasher faults quickly by digging a bit deeper.
Dive Into the Door to Find the Thermal Fuse
If the reset failed, the thermal fuse is your primary suspect. This little component is like a sacrificial lamb; it blows so the expensive motherboard does not have to. On most models, you will find it tucked inside the inner door panel near the top. I remember the first time I went looking for one; I was terrified I would break the plastic clips, but a gentle hand and a Torx screwdriver are all you really need.
Check for Continuity to Be Certain
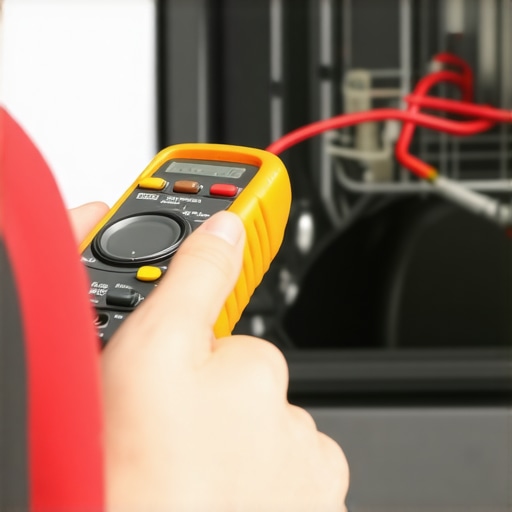
You cannot always tell if a fuse is blown just by looking at it. This is where multimeter tricks become your superpower. Set your meter to the ohms setting or continuity (the one that beeps). Touch the probes to both ends of the fuse. If you hear a beep, the fuse is good. If it is silent? That is your culprit. I have seen people assume it was the heater, but you should always check the fuse before testing the resistance on your dishwasher heating element.
Spotting Real Damage on the Control Board
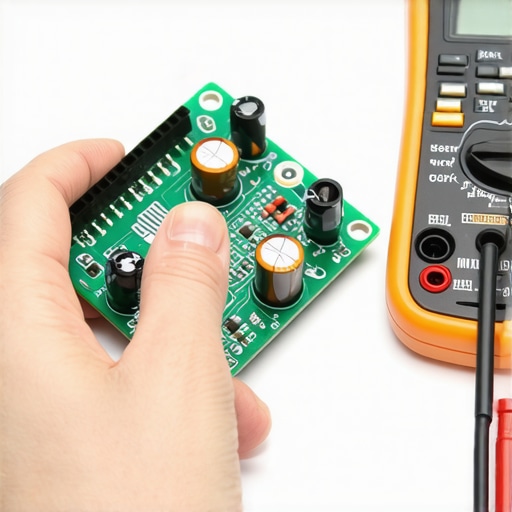
Sometimes the surge is too strong for the fuse, and it marches right onto the control board. This is the ‘brain’ of the machine. When you have the door panel open, take a close look at the green circuit board. You are looking for what I call ‘the ghost of electricity’—blackened soot marks or a pungent, metallic burnt smell. While you are at it, it is a great time to check other essential dishwasher parts like the wiring harnesses for any signs of melting.
Look for Blown Capacitors or Scorched Traces
A failed board often has a ‘blown’ capacitor, which looks like a tiny soda can with a bulging or popped top. If you see this, the board needs replacing. It is a similar process to inspecting your oven control board for burn marks when your stove goes dark. If the board looks pristine but the machine is still dead, you might want to look at the power cord itself. Overloaded circuits can sometimes fry the junction box where the house power meets the machine. I always recommend troubleshooting common issues with parts systematically so you do not end up buying a $200 board when a $5 wire nut was the problem.
Stop Blaming the Motherboard Right Away
Wait, don’t just order that $200 part yet. Here’s where things get nuanced. Most people assume that if the control panel is blank, the board is the cause of the failure. In my experience, a ‘fried’ board is often just the victim of a failing component elsewhere, like a shorted-out wax motor or a failing solenoid. If you replace the brain without fixing the muscle, you’ll just fry the new board in thirty seconds. It’s a common trap in oven repair essentials; people swap the clock or control head only to have it pop again because of a grounded heating element. While the internet usually says ‘replace the board,’ I say ‘trace the load.’ Use your multimeter tricks to check the resistance of every component connected to that specific burnt circuit path before installing a new part.
Why does your meter show power when the dishwasher stays dark?
This is what I call the ‘Ghost Voltage’ trap. You put your probes on the power leads, the meter says 120V, and you assume the supply is fine. But then you connect the load, and the voltage drops to zero. This happens because a high-resistance connection—like a corroded wire nut or a loose terminal—can pass enough current to trigger a digital meter but not enough to actually run a machine. According to research by the Institute of Electrical and Electronics Engineers (IEEE) on transient voltage, ‘dirty power’ and high-resistance faults are the leading causes of misdiagnosis in home appliances. If you aren’t identifying dishwasher faults quickly by testing under load, you’re just guessing.
Check the Junction Box Before You Spend a Dime
The ‘oops’ factor usually hides where the house power meets the machine. In dishwashers, this is that small metal box tucked under the front right kickplate. I’ve seen dozens of DIYers tear their whole machine apart only to find a melted wire nut in the junction box. If a surge hits, that junction is often the first point of failure. It is the same principle you use when inspecting your oven’s power cord for heat damage. A loose connection there creates heat, which increases resistance, which eventually kills the control board’s ability to pull current.
The Clicking Igniter Myth
In the world of oven diagnostics, there is a massive misconception that a clicking sound means your igniter is healthy. I’ve seen so many people focus on how to identify a bad oven relay because their igniter is clicking, yet the oven won’t light. In reality, an igniter can click but fail to reach the specific amperage required to open the safety valve. It’s a nuanced failure that bypasses basic logic. If you’re dealing with this, you need to know why your gas oven igniter clicks but the burner doesn’t light before you start replacing expensive boards. Have you ever fallen into the ‘it must be the board’ trap? Let me know in the comments—I once bought three boards for the same oven before I found the pinched wire!
The Gear I Keep in My Kitchen Drawer
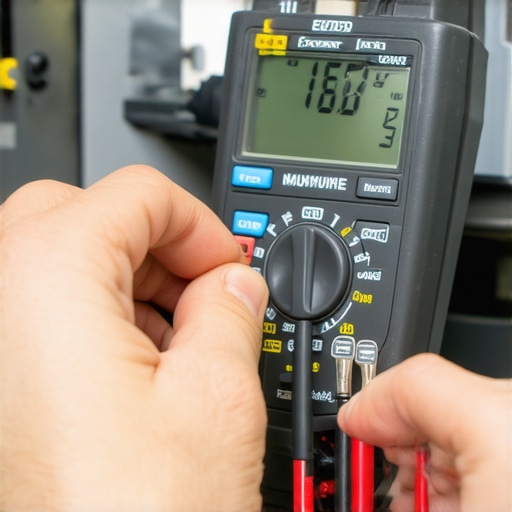
If you want to get serious about identifying dishwasher faults quickly, you need more than just a rusty screwdriver. I’ve carried several multimeters over the years, but I personally swear by the Fluke 117. Why? It isn’t just about the brand; it is about a specific feature called LoZ (Low Impedance). Most digital meters have high input impedance, which is great for delicate electronics but terrible for appliance repair because they pick up ‘phantom’ or ghost voltages. I’ve seen DIYers get totally confused because their meter showed 90V on a wire that was actually disconnected. According to technical documentation from Fluke Corporation, using a low-impedance voltmeter is essential to ‘eliminate false readings due to ghost voltage’ caused by capacitive coupling from nearby live wires. This one feature alone has saved me from replacing dozens of perfectly good essential dishwasher parts that I previously thought were failing.
Stop Chasing Ghost Voltages
Beyond the meter, I always keep a set of needle-nose probes. Standard probes are often too thick to fit into the tiny pin connectors on modern control boards. If you’re trying to perform oven diagnostics on a newer digital range, those slim probes are the only way to get an accurate reading without bending the terminals. I also recommend a telescopic mirror. It sounds basic, but being able to see the back of a gas valve or a hidden heater terminal without pulling the entire unit out of the wall is a game-changer for your back and your sanity. If you find yourself struggling to reach a component, don’t force it—that is how plastic clips snap and small repairs turn into expensive disasters.
How can I maintain my machines for the long haul?
Maintenance isn’t just about cleaning; it is about heat management. For ovens, the biggest killer is the self-clean cycle. I know it’s convenient, but the extreme heat often fries the very control boards we’ve been talking about. Instead, learn to check your oven’s bake element for tiny blisters regularly. These small bumps are early warning signs that the internal filament is breaking down. Replacing an element for thirty bucks is much better than waiting for it to short out and take the motherboard with it. For dishwashers, the ‘maintenance’ is actually in the water. Hard water buildup acts like insulation on your heating element, forcing it to run longer and hotter to reach the same temperature, which eventually burns out the relay on the board. A monthly descaling cycle isn’t a suggestion; it’s a survival tactic for your machine’s ‘brain.’
Smart Diagnosis is the Next Big Thing
We are moving toward a future where you won’t even need a multimeter. Many high-end units are already shipping with Wi-Fi modules that can beam a full error log directly to your smartphone. I predict that within the next five years, AI-driven troubleshooting apps will use your phone’s microphone to ‘listen’ to your dishwasher’s pump and tell you exactly which bearing is failing before you even hear the noise yourself. Until that day comes, we rely on our tools and our eyes. I want you to try one specific advanced tip today: pull the kickplate off your dishwasher and check the junction box for any loose wire nuts or discolored copper. It takes five minutes and could prevent a total board failure next time the power flickers. If the wiring looks scorched, it’s time to stop the DIY and consider reaching out to a professional before things get dangerous.
The sky turned that eerie shade of bruised purple, the thunder shook my windows, and for a split second, the whole house went black. When the power roared back to life, I thought I was in the clear. I was wrong. The next morning, I loaded up the breakfast plates, hit the ‘Normal Wash’ button, and… nothing. No chime. No lights. Just the heavy, humid smell of a kitchen that was about to be overrun by dirty dishes. I’ve been in this hobby long enough to know that silence is usually the most expensive sound an appliance can make. But before you start shopping for a new stainless steel replacement, let me tell you what I’ve learned from my own fair share of fried circuits and ‘oops’ moments.
That Silent Control Panel Isn’t Always the End of the World
We’re going to get that machine humming again today. I’ve realized over the years that we often overcomplicate things. I once spent three hours tearing down a door just to realize I hadn’t pushed the plug in all the way—don’t be like past me! If you’re staring at a machine that looks completely dead, the first thing we need to do is look at the control panel symptoms and see if the brain of the unit is actually fried or just playing dead to protect itself. According to the Electrical Safety Foundation (ESFI), power surges are responsible for a massive spike in insurance claims for home electronics because they can bypass basic surge protectors and hit the motherboard directly. It’s a protective response, much like how a circuit breaker works, but it happens deep inside the machine’s guts. It is often a matter of learning how to identify dishwasher faults quickly before you lose your mind.
Is fixing it yourself actually worth the hype?
You might be skeptical. ‘I’m not an electrician,’ you say. Neither am I! But I am a guy who hates wasting money. My biggest mistake early on was assuming that a power surge meant the entire motherboard was toasted. I actually tossed a perfectly good dishwasher years ago because I didn’t know how simple the fix could be. Don’t make that same mistake. Before you even think about calling a repair expert, you should be checking the thermal fuse. It’s a cheap part that acts like a bodyguard for your dishwasher. If it takes the hit, it saves the expensive components. Have you ever stood in your kitchen, pressing buttons and hoping for a miracle, only to be met with total silence? Tell me about your dead appliance horror stories—I bet I’ve had one worse. If you can use a screwdriver and use these multimeter tricks, you can likely fix this yourself for the price of a takeout dinner. This guide will walk you through the diagnostic steps I use every time the grid decides to go haywire. We will start with the easiest resets and move into the heart of the machine, checking the essential dishwasher parts that are most likely to quit after a voltage spike.
Force a Reset Before You Do Anything Else
The first thing I always do—and I mean always—is perform a hard reset. Think of your dishwasher like a computer that has just frozen up during a software update. When a surge hits, the control board can get stuck in an error loop. I once spent an hour troubleshooting a dishwasher only to realize it just needed to be unplugged for ten minutes to clear its ‘brain.’
The 10-Minute Power Nap for Your Appliance
Don’t just hit the ‘Off’ button. You need to physically cut the supply. Flip the breaker in your basement or pull the plug under the sink. Leave it alone for at least ten minutes. This allows any residual electricity in the capacitors to dissipate. When you flip that breaker back on, you are looking for a ‘handshake’ between the board and the display. If you still have a blank screen, it is time to identify dishwasher faults quickly by digging a bit deeper.
Dive Into the Door to Find the Thermal Fuse
If the reset failed, the thermal fuse is your primary suspect. This little component is like a sacrificial lamb; it blows so the expensive motherboard does not have to. On most models, you will find it tucked inside the inner door panel near the top. I remember the first time I went looking for one; I was terrified I would break the plastic clips, but a gentle hand and a Torx screwdriver are all you really need.
Check for Continuity to Be Certain
You cannot always tell if a fuse is blown just by looking at it. This is where multimeter tricks become your superpower. Set your meter to the ohms setting or continuity (the one that beeps). Touch the probes to both ends of the fuse. If you hear a beep, the fuse is good. If it is silent? That is your culprit. I have seen people assume it was the heater, but you should always check the fuse before testing the resistance on your dishwasher heating element.
Spotting Real Damage on the Control Board
Sometimes the surge is too strong for the fuse, and it marches right onto the control board. This is the ‘brain’ of the machine. When you have the door panel open, take a close look at the green circuit board. You are looking for what I call ‘the ghost of electricity’—blackened soot marks or a pungent, metallic burnt smell. While you are at it, it is a great time to check other essential dishwasher parts like the wiring harnesses for any signs of melting.
Look for Blown Capacitors or Scorched Traces
A failed board often has a ‘blown’ capacitor, which looks like a tiny soda can with a bulging or popped top. If you see this, the board needs replacing. It is a similar process to inspecting your oven control board for burn marks when your stove goes dark. If the board looks pristine but the machine is still dead, you might want to look at the power cord itself. Overloaded circuits can sometimes fry the junction box where the house power meets the machine. I always recommend troubleshooting common issues with parts systematically so you do not end up buying a $200 board when a $5 wire nut was the problem.
Stop Blaming the Motherboard Right Away
Wait, don’t just order that $200 part yet. Here’s where things get nuanced. Most people assume that if the control panel is blank, the board is the cause of the failure. In my experience, a ‘fried’ board is often just the victim of a failing component elsewhere, like a shorted-out wax motor or a failing solenoid. If you replace the brain without fixing the muscle, you’ll just fry the new board in thirty seconds. It’s a common trap in oven repair essentials; people swap the clock or control head only to have it pop again because of a grounded heating element. While the internet usually says ‘replace the board,’ I say ‘trace the load.’ Use your multimeter tricks to check the resistance of every component connected to that specific burnt circuit path before installing a new part.
Why does your meter show power when the dishwasher stays dark?
This is what I call the ‘Ghost Voltage’ trap. You put your probes on the power leads, the meter says 120V, and you assume the supply is fine. But then you connect the load, and the voltage drops to zero. This happens because a high-resistance connection—like a corroded wire nut or a loose terminal—can pass enough current to trigger a digital meter but not enough to actually run a machine. According to research by the Institute of Electrical and Electronics Engineers (IEEE) on transient voltage, ‘dirty power’ and high-resistance faults are the leading causes of misdiagnosis in home appliances. If you aren’t identifying dishwasher faults quickly by testing under load, you’re just guessing.
Check the Junction Box Before You Spend a Dime
The ‘oops’ factor usually hides where the house power meets the machine. In dishwashers, this is that small metal box tucked under the front right kickplate. I’ve seen dozens of DIYers tear their whole machine apart only to find a melted wire nut in the junction box. If a surge hits, that junction is often the first point of failure. It is the same principle you use when inspecting your oven’s power cord for heat damage. A loose connection there creates heat, which increases resistance, which eventually kills the control board’s ability to pull current.
The Clicking Igniter Myth
In the world of oven diagnostics, there is a massive misconception that a clicking sound means your igniter is healthy. I’ve seen so many people focus on how to identify a bad oven relay because their igniter is clicking, yet the oven won’t light. In reality, an igniter can click but fail to reach the specific amperage required to open the safety valve. It’s a nuanced failure that bypasses basic logic. If you’re dealing with this, you need to know why your gas oven igniter clicks but the burner doesn’t light before you start replacing expensive boards. Have you ever fallen into the ‘it must be the board’ trap? Let me know in the comments—I once bought three boards for the same oven before I found the pinched wire!
The Gear I Keep in My Kitchen Drawer
If you want to get serious about identifying dishwasher faults quickly, you need more than just a rusty screwdriver. I’ve carried several multimeters over the years, but I personally swear by the Fluke 117. Why? It isn’t just about the brand; it is about a specific feature called LoZ (Low Impedance). Most digital meters have high input impedance, which is great for delicate electronics but terrible for appliance repair because they pick up ‘phantom’ or ghost voltages. I’ve seen DIYers get totally confused because their meter showed 90V on a wire that was actually disconnected. According to technical documentation from Fluke Corporation, using a low-impedance voltmeter is essential to ‘eliminate false readings due to ghost voltage’ caused by capacitive coupling from nearby live wires. This one feature alone has saved me from replacing dozens of perfectly good essential dishwasher parts that I previously thought were failing.
Stop Chasing Ghost Voltages
Beyond the meter, I always keep a set of needle-nose probes. Standard probes are often too thick to fit into the tiny pin connectors on modern control boards. If you’re trying to perform oven diagnostics on a newer digital range, those slim probes are the only way to get an accurate reading without bending the terminals. I also recommend a telescopic mirror. It sounds basic, but being able to see the back of a gas valve or a hidden heater terminal without pulling the entire unit out of the wall is a game-changer for your back and your sanity. If you find yourself struggling to reach a component, don’t force it—that is how plastic clips snap and small repairs turn into expensive disasters.
How can I maintain my machines for the long haul?
Maintenance isn’t just about cleaning; it is about heat management. For ovens, the biggest killer is the self-clean cycle. I know it’s convenient, but the extreme heat often fries the very control boards we’ve been talking about. Instead, learn to check your oven’s bake element for tiny blisters regularly. These small bumps are early warning signs that the internal filament is breaking down. Replacing an element for thirty bucks is much better than waiting for it to short out and take the motherboard with it. For dishwashers, the ‘maintenance’ is actually in the water. Hard water buildup acts like insulation on your heating element, forcing it to run longer and hotter to reach the same temperature, which eventually burns out the relay on the board. A monthly descaling cycle isn’t a suggestion; it’s a survival tactic for your machine’s ‘brain.’
Smart Diagnosis is the Next Big Thing
We are moving toward a future where you won’t even need a multimeter. Many high-end units are already shipping with Wi-Fi modules that can beam a full error log directly to your smartphone. I predict that within the next five years, AI-driven troubleshooting apps will use your phone’s microphone to ‘listen’ to your dishwasher’s pump and tell you exactly which bearing is failing before you even hear the noise yourself. Until that day comes, we rely on our tools and our eyes. I want you to try one specific advanced tip today: pull the kickplate off your dishwasher and check the junction box for any loose wire nuts or discolored copper. It takes five minutes and could prevent a total board failure next time the power flickers. If the wiring looks scorched, it’s time to stop the DIY and consider reaching out to a professional before things get dangerous.
What Three Fried Motherboards Taught Me About DIY
I used to be a ‘parts cannon’ guy. Whenever a machine went dark, I’d order a new board, a new fuse, and a new wire harness all at once. It was expensive, and more importantly, it taught me nothing. I’ve realized that the real secret to identifying dishwasher faults quickly is to slow down and listen to what the multimeter is telling you. Often, a ‘dead’ board is just a machine protecting itself from a loose wire in the junction box or a simple mechanical failure in the door latch that looks exactly like an electrical death to the untrained eye.
The Gear That Separates Guesswork From Real Repairs
If you want to move beyond basic guessing, you need the right kit. I personally rely on a multimeter with a Low Impedance (LoZ) mode to prevent those ‘ghost’ voltage readings that lead so many DIYers astray. Combine that with a set of ultra-slim needle probes and a simple magnetic work light, and you can see into the dark corners of essential dishwasher parts without straining your eyes. I also suggest keeping a dedicated folder on your phone for PDF service manuals—they are the blueprints for your success and can be found for almost every major brand online.
Your Appliance Deserves a Second Chance
Repairing your own machine isn’t just about saving a few hundred bucks on a service call; it’s about the confidence that comes from knowing how your home actually works. Don’t let a blank screen or a silent motor intimidate you. With the right oven repair essentials and a bit of patience, you can master these diagnostics and keep your home running smoothly. It’s time to stop hand-washing those plates and get your kitchen back in order. What is the weirdest noise your dishwasher has ever made? Let me know in the comments below!