I opened my dishwasher last Tuesday and honestly, I thought I’d accidentally washed a bag of plaster. The interior walls, which used to be a sleek, reflective stainless steel, were covered in this stubborn, white, crusty film. It felt like sandpaper. If you live in an area with hard water, you know exactly what I’m talking about. It’s a slow-motion disaster that creeps up on you until one day, your glasses are cloudy and the machine looks like it’s been through a salt storm. I tried to ignore it for months, thinking it was just “character,” but when the sprayers started clogging, I knew I had to act.
Get Rid of That White Chalky Mess for Good
Hard water isn’t just an eyesore; it’s a silent killer for your kitchen appliances. Those mineral deposits—mostly calcium and magnesium—act like tiny rocks that settle into every nook and cranny. I learned the hard way that ignoring this buildup leads to bigger issues. Early in my DIY journey, I actually tried to scrape the deposits off with a metal putty knife. Spoiler alert: I ended up needing a guide on patching holes in the rack and luckily didn’t puncture the tub, but the scratches I left are still there to remind me of my impatience. We’re going to avoid the brute force approach today and use chemistry instead. According to the U.S. Geological Survey, over 85% of American homes have hard water, which means most of us are fighting this exact battle. If your machine is starting to look rough, you probably need to check how to clean mineral buildup from dishwasher spray nozzles as well, because if it’s on the walls, it’s definitely in the holes where the water comes out.
Is scrubbing the only way to save my machine?
The short answer is a resounding no. In fact, if you’re sweating and scrubbing for an hour, you’re doing it wrong. The secret lies in breaking the chemical bond between the minerals and the tub. We’re going to walk through a process that uses heat and acidity to do the heavy lifting for you. Have you ever looked inside your dishwasher and felt like just giving up and buying a new one because of the grit? Send me a message or leave a comment if you’ve faced that level of frustration—I’ve been there. Before we dive into the vinegar and citric acid methods, we need to make sure the hardware itself is still in good shape. Sometimes, what looks like mineral buildup is actually a symptom of a deeper issue, like a failing heater. If your water isn’t getting hot enough, the minerals settle much faster. You might want to peek at this comprehensive guide to DIY diagnostics to rule out mechanical failure before we start the deep clean. If the walls are crusty, chances are you also have hard water deposits on the tines that need a slightly different touch. Let’s get to work on making that interior shine like the day it was installed.
Before we pour a single drop of acid into that tub, we have to deal with the physical debris. If your filter is packed with old pasta and mystery sludge, the chemical clean won’t reach the surfaces it needs to. I remember the first time I pulled out my filter—I thought I kept a clean kitchen, but I found a literal calcified chicken bone wedged in the mesh. It was embarrassing. You really need to learn how to clean the hidden filter in your dishwasher sump before moving forward, or you’re just circulating dirty water over your clean chemicals.
Start with a Hot Vinegar Flush
Vinegar is the classic DIY solution because it’s cheap and safe. But here is where most people mess up: they just dump it in the bottom. Don’t do that. The dishwasher’s first move in a cycle is often to drain whatever is sitting in the bottom. If you pour your vinegar in and hit start, you’re literally pumping your cleaning solution straight into the sewer.
Wait for the mid-cycle fill
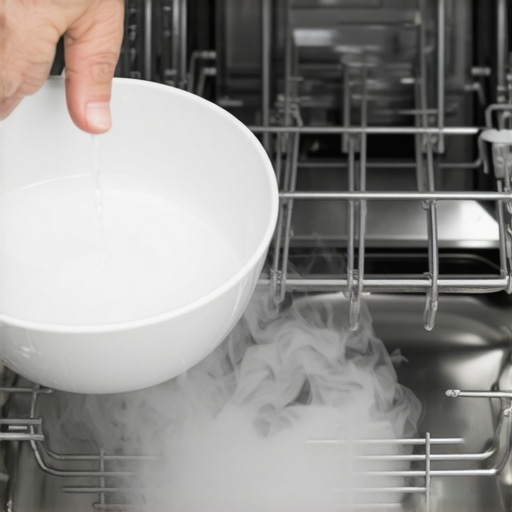
The right way to do it is to start a heavy-duty cycle with the hottest water setting possible. Let it run for about 10 minutes until you hear it finish its first fill and the spray arms start to slosh. Open the door—watch out for the steam—and place a bowl filled with two cups of white vinegar upright on the top rack. This ensures the vinegar is distributed slowly throughout the main wash. This is the trick to removing hard water spots from dishwasher walls effectively without wasting product.
When Vinegar Isn’t Strong Enough
If your dishwasher looks like the inside of a cave with stalactites, vinegar won’t cut it. You need citric acid. It’s a stronger organic acid that’s still food-safe but much more aggressive on calcium. I once helped a neighbor whose machine was so scaled up the door wouldn’t even latch properly. We used a cup of citric acid crystals in the detergent dispenser. By the end of the cycle, the stainless steel looked brand new. However, if you notice your dishwasher pod ends up undissolved in the tub even after a deep clean, the minerals might have already damaged your dispenser or your heating element is failing.
Check the heating element for white crust
Take a look at the black loop at the bottom of the tub. That’s your heating element. If it’s covered in white scale, it can’t transfer heat to the water efficiently. Think of it like trying to boil water in a pot with a thick wool blanket wrapped around the bottom. If the acid bath doesn’t clear the element, you might need to perform some testing the resistance on your dishwasher heating element to see if the scale has caused it to burn out. A cold dishwasher will never get rid of hard water buildup, period.
Rinse away the chemical smell
After a heavy descaling, you might notice a sharp scent. Nobody wants their plates smelling like a laboratory. If you find why your dishwasher still smells like chemicals after a rinse, it’s usually because some of the loosened minerals are trapped in the crevices. Run one final express cycle with absolutely nothing in the machine to flush everything out to the street.
I’ve seen plenty of homeowners get their machines sparkling clean only to find the same white haze back within a week. Here is the contrarian truth: a clean interior does not mean a healthy machine. Most people assume that once the scale is gone, the job is done. However, if your water temperature isn’t hitting that sweet spot of 120°F to 150°F, those minerals will fall out of suspension and bond to your tub faster than you can say ‘vinegar.’ This is why mastering parts and diagnostics to identify dishwasher faults quickly is far more valuable than just buying a gallon of citric acid. If the heater is lazy, the chemistry fails.
Stop trusting your eyes and start trusting the numbers
The biggest mistake—the ‘Oops’ factor I see constantly—is homeowners who test for continuity and assume a part is ‘good.’ I once spent three hours troubleshooting a dishwasher that wouldn’t get hot. The heating element had continuity, so I thought it was fine. I was wrong. The element had developed ‘high resistance.’ It was technically a complete circuit, but it couldn’t pull enough juice to actually get hot. You need to use multimeter tricks for diagnosing a dead control board or heating circuit to see the actual Ohms, not just the ‘beep’ of a continuity test. Have you ever replaced a part only to realize the problem was something else entirely? Let me know in the comments—we’ve all been there.
Why does my heating element still fail after a deep descale?
Sometimes, the damage is already done. Heavy mineral buildup acts like an insulator. When the element is buried in scale, it overheats because the heat can’t escape into the water. This internal stress can micro-crack the internal filaments. Even after you clean the outside, the internal resistance might be permanently out of spec. According to the Association of Home Appliance Manufacturers (AHAM), appliance efficiency drops significantly when thermal transfer is blocked by even a millimeter of calcium. This same logic applies when you are testing the resistance on your dishwasher heating element; if the numbers don’t match the manufacturer’s spec, it’s a paperweight regardless of how shiny it looks.

Avoid the trap of the ‘Visual Fix’
This isn’t just a dishwasher problem. I see the same thing when folks are pinpointing faults before calling an oven repair expert. They see a glowing igniter and think it works. But a glowing igniter can still be ‘weak,’ failing to pull enough amps to open the safety valve. Whether it is an oven or a dishwasher, the ‘visual fix’ is a trap. You have to dive into the comprehensive guide to DIY diagnostics to truly understand the relationship between voltage, resistance, and performance. For example, knowing how to tell if your oven control board is actually fried involves looking for scorched relays, not just hoping a reset button fixes the glitch. If you skip the deep diagnostic, you’re just throwing money at a metal box.
When I first started doing my own repairs, I bought a cheap, generic multimeter from a clearance bin. It was a huge mistake. Those bargain-bin units are fine for seeing if a battery is dead, but when you are deep into parts and diagnostics to identify dishwasher faults quickly, you need precision that won’t give you a ‘floating’ reading. I eventually upgraded to a Fluke 117 because I needed to know exactly what was happening when testing the resistance on your dishwasher heating element. If your meter is off by just 5 or 10 ohms, you might replace a perfectly good part or, worse, leave a failing one in place because you trusted a shaky number. It’s not just about the repair; it’s about the quality of the data you are gathering.
Don’t let a bad tool lead you to a bad diagnosis
Scaling your DIY skills means moving beyond simple parts-swapping and into board-level understanding. Learning 5 multimeter tricks for diagnosing a dead control board is a game-changer. It allows you to identify if a single capacitor or diode has failed, potentially saving you from buying a $200 replacement board. This is where professional-grade tools pay for themselves. I predict that the next generation of ‘right to repair’ legislation will eventually force manufacturers to include diagnostic ports on all major appliances, allowing us to plug in a laptop and see real-time sensor data, but until then, a high-quality multimeter is your best friend. 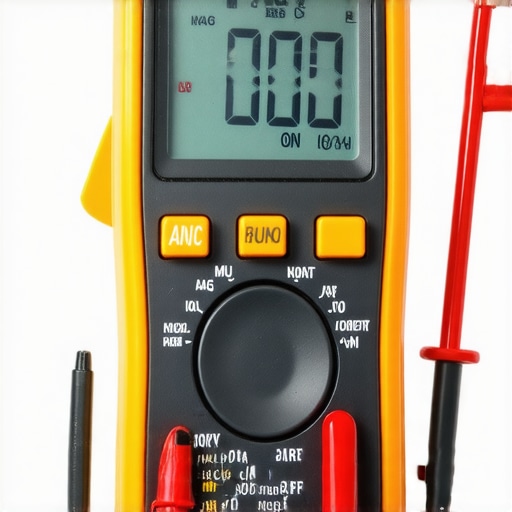
How do I keep my dishwasher running like new for years?
The secret isn’t a magic chemical you pour in once a year; it’s a dedicated monthly schedule. Every first Saturday, I pull the bottom rack and check the sump area. If you don’t know how to clean the hidden filter in your dishwasher sump, you are essentially leaving a rotting compost pile in your machine that creates acidic gasses. These gasses eventually eat away at your rubber seals, causing them to become brittle and leak. Maintaining these seals is just as important as the mechanical parts. This same philosophy applies to your cooking equipment. If you are pinpointing faults before calling an oven repair expert, check your door gasket first. A leak there forces the oven to work twice as hard, often leading to a premature failure of the control board due to heat exposure. Make sure you are finding the right part number for an oven door gasket to ensure a perfect thermal seal.
Stop the heat from escaping through a bad gasket
This level of care is even more critical for gas appliances. According to the National Fire Protection Association (NFPA) 54, which sets the national code for fuel gas equipment, even microscopic obstructions in gas delivery components can lead to incomplete combustion. This is why you must understand the invisible clog: how to clear an oven gas orifice before you assume a more expensive component like the safety valve is the culprit. When you dive into oven repair essentials and troubleshooting common issues, start with the smallest possible variables first. Advanced Tip: If your oven bakes unevenly, try the ‘toast test’—lay out slices of white bread across the rack to see exactly where the hot spots are. It’s a low-tech way to verify if your heating element is developing ‘dead spots’ before you start stripping wires.
The One Mistake That Kept Me Buying Citric Acid for Years
For a long time, I was caught in a cycle of cleaning the symptom rather than the disease. I would see the white haze return, buy more acid, and repeat the process every three weeks. The lightbulb moment for me came when I realized that dishwasher diagnostics aren’t just about finding what is broken, but understanding why the environment inside the tub is failing. I discovered that my water heater was set too low, which meant the minerals never fully dissolved. If you find yourself constantly scrubbing, check your water temperature at the kitchen sink; if it isn’t hitting 120°F, your cleaning efforts are essentially wasted. Also, don’t overlook the mechanical components that assist in water movement. Sometimes, identifying a bad dishwasher circulation motor by the sound can save you from a dozen failed cleaning cycles. A weak pump won’t push the acidic solution into the corners of the tub, leaving the hardest-to-reach scale untouched regardless of how much vinegar you use. Lastly, remember that your detergent choice matters; pods with built-in rinse aids are great, but in extreme hard water areas, they are often overwhelmed. Switching to a separate liquid rinse aid made a night-and-day difference in my home.
Gear That Actually Saves You From a Junked Appliance
I don’t believe in buying every gadget on the market, but there are three things I never tackle a repair without. First, a high-quality multimeter like a Fluke or a Klein is non-negotiable for anyone serious about oven repair or appliance maintenance. It removes the guesswork and stops you from being a ‘parts changer.’ If you are just starting out, you can get by testing oven continuity on a budget with basic tools, but precision pays for itself eventually. Second, I always keep a bag of pure, food-grade citric acid crystals in the pantry. It is far more potent than vinegar and much safer than harsh commercial descalers. Third, always have a small dental mirror in your toolkit. This allows you to look behind the spray arms and into the sump without fully disassembling the machine. I trust these tools because they provide the data and the access that your eyes alone cannot reach.
Take Control of Your Kitchen’s Longevity
Repairing your own equipment is about more than just saving a few hundred dollars on a service call; it’s about the confidence that comes from knowing exactly how your home functions. Whether you are scrubbing calcium off a dishwasher wall or when to skip the diy and call a professional oven technician, you are participating in a culture of maintenance that resists the ‘disposable’ mindset of modern manufacturing. You don’t have to be a master plumber or an electrical engineer to keep your kitchen running smoothly. You just need the right data, a little patience, and a willingness to get your hands a bit dirty. The next time you see that white film or hear a strange rattle, don’t reach for the phone—reach for your multimeter and your manual. Your appliances, and your wallet, will thank you. Have you ever found a weird object in your dishwasher filter that explained everything? Tell me your ‘treasure hunt’ stories in the comments below!