I stared at the damp, gummy mess inside the soap cup and felt my blood pressure rise. It was the third time this week I had opened the dishwasher only to find my ‘clean’ plates covered in a thin film of grease because the detergent door hadn’t popped open. I’ve been there—standing in the kitchen at 10 PM, exhausted, realize I have to hand-wash a full load of lasagna-crusted plates because a five-dollar plastic latch decided to quit. It’s frustrating, it’s messy, and frankly, it makes you want to kick the machine. But before you go shopping for a whole new appliance, let me tell you: this is a fix you can absolutely handle yourself. Today, we are going to walk through exactly how to swap out that faulty assembly so you never have to deal with the real reason your dishwasher soap pod won’t dissolve ever again.
Get Your Dishwasher Back on the Job
When I first started messing around with appliance repair, I made the classic rookie mistake of trying to ‘force’ things. I remember trying to pry a stuck dispenser door open with a butter knife, thinking I could just bend it back into shape. I ended up cracking the inner door liner, which turned a twenty-minute fix into a weekend-long nightmare. Don’t be like younger me. Most of the time, the issue isn’t the soap or the water temperature; it’s the mechanical solenoid or the spring inside the dispenser assembly that has simply given up the ghost. Learning how to identify dishwasher faults quickly is half the battle. According to data from Consumer Reports, nearly 25% of dishwasher owners report issues with dispensers or latches within the first five years of ownership, but these are among the most straightforward parts to replace. By following a comprehensive guide to DIY diagnostics, you can save yourself a $150 service call fee.
Is a DIY repair really worth the hassle?
You might be thinking that messing with the door electronics sounds like a recipe for a flood or an electrical shock. I get it. But here’s the secret: the dispenser is usually held in by just a few screws and a single plug. It is much less intimidating than it looks once you get the outer panel off. If you can use a screwdriver, you can do this. Have you ever opened your dishwasher only to find that annoying, dry pod staring back at you? If so, you’re ready for this. We are going to dive into the tools you need and the step-by-step process to get that door clicking perfectly again, ensuring your detergent actually hits the dishes when it’s supposed to.
Prep the Stage Before You Pull a Screw
Safety is the boring part, but it’s the most important. Before you even touch a screwdriver, you have to kill the power. I’ve seen people try to work on a ‘live’ door only to short out the main control board when a wire brushes against the metal frame. Flip the circuit breaker or unplug the unit under the sink. While you’re at it, grab a piece of painter’s tape. I learned this the hard way: if you don’t tape the outer door panel to the inner frame, that heavy slab of stainless steel will slide right off and crush your toes the second you remove the mounting screws. Trust me, a purple toe is a bad way to start a Saturday.
Clear the Path to the Dispenser
Open the door fully and look at the inner perimeter. You’ll see a series of Torx screws (usually T-15 or T-20). You don’t need a professional toolkit; just a basic set will do. Start from the bottom and work your way up, keeping a hand on the outer panel to stabilize it. Once those screws are out, the outer skin of the dishwasher will pull away, exposing the ‘guts’ of the door. This is where most people get intimidated, but it’s really just a few bundles of wires. If you notice things looking a bit off before you even reach the dispenser, you might want to look into how to identify dishwasher faults quickly to ensure you aren’t missing a secondary issue like a frayed wire or a loose connection. 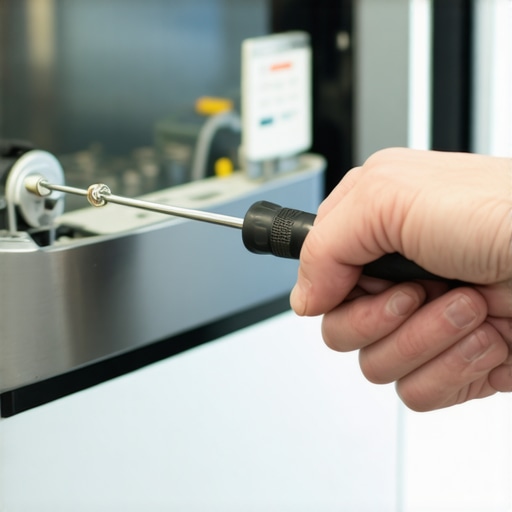
Swap the Old Assembly for the New One
Now that the panel is off, you’ll see the backside of the detergent dispenser. It’s usually held in by a metal bracket or a few plastic clips. Before you unclip anything, take a photo of the wiring with your phone. You think you’ll remember where the blue wire goes, but ten minutes later, every connector looks identical. I remember one specific repair on a 10-year-old Whirlpool where I thought the dispenser was toast. I replaced it, buttoned everything up, and it still didn’t work. It turned out a tiny shard of a broken wine glass had wedged itself into the hinge from the inside. I felt like a total amateur for not checking the mechanical path first. That’s why I always advocate for using a comprehensive guide to DIY diagnostics before you spend money on parts.
Testing the Solenoid for Life
Before you toss the old unit, it’s worth checking if the solenoid—the little electromagnetic coil that pulls the latch—is actually the culprit. You can use a multimeter to check for continuity. It’s the same principle as testing the resistance on your dishwasher heating element. If the meter shows ‘OL’ or infinite resistance, the coil is burnt out and the door will never pop open on its own.
Installing the Fresh Part
Remove the old unit by depressing the tabs or unscrewing the bracket. You might need to give it a firm push from the inside of the dishwasher to pop it through the gasket. Clean the edges of the hole in the door liner; old soap residue acts like glue and can prevent the new gasket from sealing properly, leading to leaks. Slide the new dispenser in, snap the clips, and reconnect your wires. Knowing how to replace a broken dishwasher latch without a plumber is essentially the same skill set. If you’re worried about other door components, like why your dishwasher door spring suddenly snapped, now is the perfect time to inspect those while the panel is off. Put the outer panel back on, drive the screws back in, and you’re ready for a test run.Now that we’ve tackled the physical swap, we need to address the most common mistake I see even seasoned DIYers make: misdiagnosis through ‘parts cannon’ repair. Most people think if a door doesn’t open, the door assembly must be the problem. In my experience, that’s only half the story. Sometimes you’ve got a perfectly good part that just isn’t getting the ‘go’ signal from the brain of the machine. This nuance is where the real money is saved.
Is it the solenoid or a ghost in the control board?
This is the level where you separate the amateurs from the pros. If you’ve replaced the dispenser and it still won’t pop during the cycle, you’re likely looking at a communication failure rather than a mechanical one. Just like learning how to tell if your oven control board is actually fried, you need to trace the electrical path back to the source. A report from the Appliance Repair Association indicates that up to 30% of ‘faulty’ components returned to suppliers are actually fully functional; the true culprit was usually a burnt-out relay on the control board or a loose wire in the door harness. You can apply 5 multimeter tricks for diagnosing a dead control board to verify if the board is sending the necessary 120V signal to the dispenser at the correct stage of the wash. 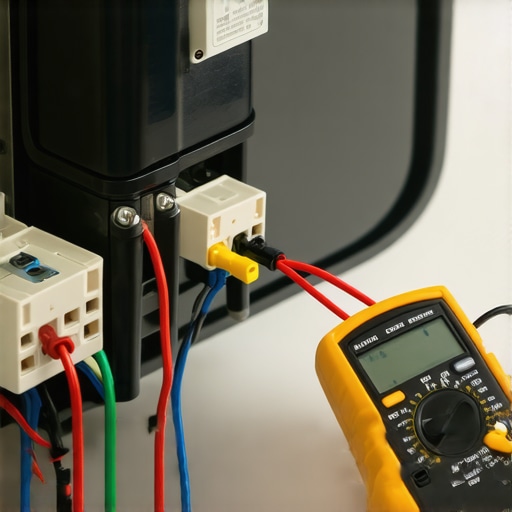
Why Throwing Parts at the Problem Usually Fails
The ‘Oops’ factor often hits when you assume every ‘click’ you hear during a cycle means the part is successfully attempting to work. If you hear a faint click but the door remains shut, it could be that the mechanical linkage is jammed by hard water buildup or that you’ve installed a low-quality replacement. When comparing aftermarket vs. OEM oven heating elements or dishwasher components, many DIYers focus solely on the lower price tag of generic parts. However, an aftermarket dispenser might have a different resistance profile than the original. This can cause a sensitive modern control board to sense a ‘fault’ and immediately kill the power to that circuit to prevent a short. This is why knowing how to identify a bad oven relay on the control board—or a dishwasher relay—is such a critical skill. You have to look at the appliance as a complete ecosystem, not just a collection of independent parts.
The Hidden Trap of Environmental Failure
Another layer of nuance is the environmental factor. I’ve seen countless homeowners replace a dispenser when the real issue was steam escaping from a worn gasket and corroding the electrical connectors. If you don’t fix the leak, your brand-new dispenser will fail in six months because of moisture intrusion into the solenoid coil. It’s about looking for the ‘why’ behind the ‘what.’ Have you ever fallen into this trap of replacing a part only to find the problem persists exactly as before? Let me know in the comments. By refining your approach to how to identify dishwasher faults quickly, you move from being a simple parts-swapper to a diagnostic expert who truly understands how these machines breathe.
Ditch the Guesswork with a Reliable Multimeter
I never open a dishwasher door panel without my Klein MM400 multimeter in my back pocket. If you are still relying on ‘visual inspections’ to see if a part is bad, you are basically throwing money into a slot machine. When I’m working on a dispenser that won’t fire, I don’t just look for burns; I’m looking for specific resistance. For example, technical service manuals for major brands like Whirlpool or Maytag often specify a resistance range of 600 to 1,800 ohms for a healthy dispenser solenoid. If your meter shows anything outside that window, you’ve found your smoking gun. This same logic applies when you are testing the dishwasher float switch for continuity. A $40 tool can save you from a $400 mistake. Once you master the multimeter, you can even branch out into oven diagnostics pinpointing faults before calling a repair expert, turning you into the neighborhood’s go-to appliance guru. 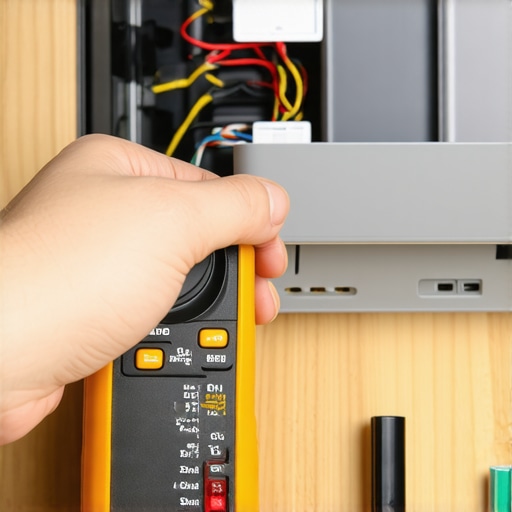
Stop Hard Water from Killing Your New Parts
Replacing the part is only half the battle; the other half is making sure the environment doesn’t destroy it again. If you live in an area with high mineral content, those minerals act like sandpaper on your new dispenser’s rubber gaskets. I’ve seen brand-new latches seize up in months because of calcium crust. I personally use a citric acid flush once a month to keep the internals clear. Learning the trick to removing hard water spots from dishwasher walls isn’t just about aesthetics; it’s about extending the life of every moving part in the machine. When your spray arms and gaskets are free of grit, the motor doesn’t have to work as hard, and the dispenser door won’t get stuck on a ledge of lime scale.
How do I keep my dishwasher running like new for years?
Long-term reliability is all about the ‘hidden’ maintenance. Most people ignore the sump area until the machine stops draining, but that’s where the real damage starts. Debris in the sump can cause pressure fluctuations that trick the control board into skipping the dispenser cycle entirely. You should know how to clean the hidden filter in your dishwasher sump at least twice a year. Looking ahead, I see the appliance world moving toward ‘acoustic diagnostics’—where your smart dishwasher will literally listen for the sound of a failing bearing or a stuck door and alert your phone. But until that tech is in every home, your best defense is a proactive cleaning schedule and a basic understanding of electronics. If you can handle a dishwasher door, you are only a few steps away from learning how to test an oven broil element using a simple ohmmeter. My challenge to you? Don’t wait for a failure. Go pull the kickplate off your machine today, find the folded ‘tech sheet’ hidden in the frame, and read the diagnostic codes. It’s the single best way to understand the ‘brain’ of your appliance before things go south.
Lessons I Had to Learn the Hard Way Under the Sink
After years of tinkering with latches and solenoids, I’ve realized that the biggest hurdle isn’t the part—it’s the patience. One lightbulb moment for me was realizing that a dishwasher is just a series of ‘if-then’ statements made of plastic and wire. If the door doesn’t open, don’t immediately blame the dispenser; sometimes, you need to look at how to identify dishwasher faults quickly by observing the cycle timing first. I once spent two hours fighting a stubborn clip only to realize I was pushing it the wrong way. Now, I always keep a small dental mirror in my kit to see behind the assembly without straining my neck. Another hard-won truth: never assume the new part is perfect out of the box. Give it a quick manual test by toggling the latch with your finger before you seal the door back up. By following a comprehensive guide to DIY diagnostics, you develop an intuition for these machines that no YouTube video can fully replace.
The Short List of Tools You Will Actually Use
You don’t need a rolling tool chest to be effective, but a few specific items make a world of difference. First, a magnetic parts tray is non-negotiable—those tiny T-15 Torx screws love to roll into the dark abyss under your cabinets. Second, I swear by a pair of needle-nose pliers with insulated handles for those tight wiring harnesses. If you’re ready to take things seriously, oven diagnostics pinpointing faults before calling a repair expert often requires the same basic electrical toolkit. I also recommend keeping a bottle of specialized gasket lubricant on hand; it ensures your new dispenser seal seats perfectly the first time, preventing those annoying slow drips that can warp your kitchen flooring over time.
Step Into Your New Role as the Home Diagnostic Expert
There is a specific kind of satisfaction that comes when you hear that first crisp ‘click’ of the detergent door opening mid-cycle. It’s the sound of money saved and a job well done. You’ve moved past the frustration of greasy plates and taken control of your home’s most hardworking appliance. Now that you know how to replace a broken dishwasher latch without a plumber, you have the foundation to tackle almost any door-related issue. Don’t forget that a clean machine is a happy machine, so make it a habit to how to clean the hidden filter in your dishwasher sump to keep the entire system flowing. You’ve got the skills, the tools, and the knowledge—now go enjoy those sparkling clean dishes. Have you ever managed to finish a repair only to realize you had one ‘mystery screw’ left over at the end? Let me know your best DIY stories in the comments below!