Ever opened your dishwasher and noticed a tiny, almost sneaky rust spot just sitting there, taunting you? I remember the moment vividly—standing in my kitchen, water dripping off my brow after a long day, only to find a small rust stain invading a dish rack that I thought would last forever. That lightbulb moment struck me hard: this tiny piece of metal didn’t need a full rack replacement; I could fix it myself. And let’s be honest, who wants to spend a hundred bucks on a new dish rack for a tiny rust patch? Not me. If you’re like me, you’ve probably faced the frustration of rust eating away at those delicate dishwasher tines, making your once shiny rack look more ruined than resilient. The good news? You don’t need to buy a whole new rack, and fixing a rusted tine can be simpler than you think. Today, I’m going to share how I tackled this issue, saving my dishwasher’s performance and my wallet. Sound good? Let’s dive in.
Why Rusted Tines Can Ruin Your Dishwasher Experience
When rust starts creeping onto your dishwasher’s tines, it’s more than just a cosmetic issue. Rust can weaken the metal, causing the tine to break or bend unexpectedly, which might lead to dishes not stacking properly or, worse, damage to your glassware. Plus, a rusty rack can harbor bacteria, compromising hygiene and making your dishwasher less effective. I learned this the hard way early on—ignoring that tiny rust spot led to a broken tine that had to be replaced entirely. Taking action early not only preserves the integrity of your rack but also extends its lifespan. I found that many people overlook the significance of minor rust spots, assuming they can ignore it until it gets worse. But as I discovered, a little rust can turn into a big hassle quickly. If you’re tired of watching rust threaten your dishwasher’s shelf life, keep reading for your DIY fix.
Is Repair Worth the Effort or Do You Need a New Rack?
Confession time: I once made the mistake of thinking a rusty tine was beyond repair, and I immediately looked for a new rack. Turns out, a bit of research and patience made all the difference. The secret isn’t in replacing the entire rack but knowing how to replace or reinforce a single tine or patch rust spots effectively. According to this guide, many rusting issues can be easily fixed with minimal tools and a bit of know-how. So, if rust is threatening your dishwashing experience but you’re hesitant about buying a new rack, I’ll show you how I did it—and how you can too.
Have you faced rust problems with your dishwasher rack? If so, you’re not alone. Many homeowners find themselves in this predicament. But with some simple steps, you can turn that rusty disaster into a durable repair that stands the test of time. Ready to get your hands dirty? Let’s move on to the step-by-step process I used to save my rack—and my sanity.
Removing Rust Stains and Preparing the Tine
First, wear protective gloves and use a small wire brush or steel wool to scrub off loose rust from the affected tine. This process is akin to sanding down a rough wood surface before painting—removing the loose rust ensures better adhesion of repair materials. I remember a time when I carefully scrubbed my rack, and it instantly looked cleaner, giving me a good starting point for repairs.
Applying Rust Converter for Lasting Protection
Next, apply a rust converter product, such as phosphoric acid-based solutions, which chemically transform rust into a stable, blackened compound. Use a small brush or sponge to coat the entire rusty area evenly. As I did this, I noticed how the rust visually vanished, turning into a solid layer that could be painted over. This step is crucial to prevent future rust formation and is explained in detail on this guide.
Let the Rust Converter Cure Properly
Allow the converter to cure for the time specified on the product label—usually 15-30 minutes. Don’t rush this step; patience ensures the chemical reaction fully stabilizes the surface. I once failed to wait long enough, and the rust reappeared soon after, so following curing times is vital.
Sealing and Reinforcing the Tine
After the converter has set, paint a layer of dishwasher-safe enamel or appliance paint over the treated area. This acts as a protective barrier against moisture, similar to applying a waterproof sealant on outdoor furniture. I used a heat-resistant, dishwasher-safe spray, which provided a durable finish. Follow the product instructions carefully, and avoid over-application, which can lead to drips or uneven coverage.
Testing and Reassembling the Rack
Once the paint has fully dried, reassemble the dishwasher rack carefully. Load a few dishes and run a short cycle to observe if everything is functioning properly. Pay close attention to any unusual noises or leaks around the repaired tine. During my own repair, I monitored the rack after running a cycle, ensuring that the protective coating held up and no further rust appeared.
By following these precise steps—scrubbing, converting rust, sealing, and testing—you can effectively extend the lifespan of your dishwasher’s rack. This process is much like repairing a rusty oven door hinge or troubleshooting a faulty oven sensor; it requires patience and attention to detail but saves you money and prolongs appliance life. For more diagnostics tips, check out this resource.
When it comes to appliance repairs, many enthusiasts and even seasoned DIYers fall prey to common misconceptions that can lead to costly mistakes or incomplete fixes. Let’s dig deeper into some nuanced truths that often go unnoticed, challenging popular beliefs and illuminating pitfalls to avoid.
Why Most People Overlook the Complexity of Diagnostic Processes
It’s a widespread myth that simply replacing a visibly faulty part will solve the entire problem. In reality, appliances like dishwashers and ovens often have interconnected systems, and a symptom might originate from an entirely different component. For example, a dishwasher that doesn’t drain may seem like a pump issue, but it could be a faulty float switch or a clogged filter—diagnostics are key. Many skip thorough troubleshooting, jumping straight to part replacement, which usually leads to wasted time and money. External guides like this resource detail how critical precise diagnostics are to a successful repair. Remember, knowing the root cause is half the battle won.
Common Mistakes in Replacing Parts Without Considering Compatibility
One trap many fall into is ordering replacement parts without validating their compatibility. For instance, using aftermarket oven heating elements may seem like a money-saver, but mismatched specifications can cause uneven heating or even damage your appliance. Experts recommend cross-referencing part numbers or consulting manufacturer specifications. An ill-fitting part might appear to fit initially but can lead to further issues, including safety risks. For detailed guidance on selecting the right part, visit this article. Ensuring compatibility isn’t just about saving money; it’s about safeguarding your appliances and your safety.
Wrong Ideas About DIY Repairs and When to Call a Pro
There’s a pervasive belief that DIY appliance repair is always straightforward and cost-effective. While this holds true for many minor fixes, some issues demand professional expertise. For example, troubleshooting a complex control board or dealing with gas oven components involves risks that DIYers might underestimate. Attempting these repairs without adequate knowledge can exacerbate the problem or pose safety hazards. According to industry standards highlighted in this guide, knowing your limits is crucial. Don’t fall into the trap of thinking all repairs are DIY-friendly—sometimes, calling a licensed technician ensures durability and safety.
Have you ever fallen into this trap? Let me know in the comments! Recognizing the nuances and avoiding these common myths can significantly extend the lifespan of your appliances and save you time and money in the long run.
Invest in Quality Diagnostic and Maintenance Equipment
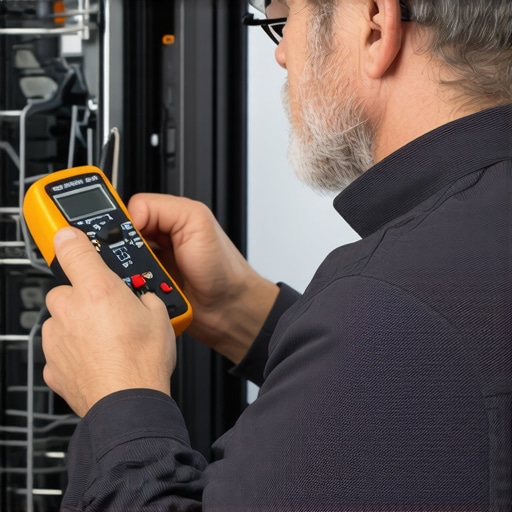
To truly master appliance repairs, investing in the right tools is essential. I personally recommend a high-quality multimeter, like the Fluke 117, because it provides precise voltage and continuity readings that are crucial for diagnosing electrical issues in both dishwashers and ovens. Additionally, a digital infrared thermometer helps detect uneven heating in ovens, preventing future damage due to hotspots. Using these tools regularly enables you to pinpoint problems before they escalate, saving both time and money in the long run. Remember, the key isn’t just having the tools but understanding how to use them effectively, which can be enhanced through online tutorials or courses offered by professionals.
Establish Routine Maintenance Practices
Preventative maintenance is often overlooked, but it’s the best way to extend appliance lifespan. For dishwashers, regularly cleaning the filters and check valves prevents clogs that can cause drainage problems. Similarly, inspecting door seals on ovens for cracks or wear helps maintain heat efficiency. I schedule quarterly maintenance sessions, during which I deep clean components like spray arms and water inlet valves. Consistent care ensures issues like leaks or uneven baking are caught early—much like a car’s regular oil changes prevent major engine failures. Keeping detailed logs of maintenance activities aids in tracking recurring problems and informing when professional intervention might be necessary.
Use Diagnostic Software and Resources
Leveraging diagnostic software can streamline troubleshooting significantly. Many modern appliances have diagnostic modes accessible via their control panels, revealing error codes that point directly to faulty parts. For older models, tools like the comprehensive diagnostic guides provide step-by-step instructions. Personally, I keep a digital logbook on my tablet with common fault code explanations, which expedites identifying issues. As technology advances, incorporating these resources into your routine allows for quicker repairs and minimizes unneeded part replacements.
Plan for Long-Term Results and Scaling
Effective maintenance and diagnostics today set the foundation for scalable repairs tomorrow. By investing in versatile tools and establishing routine checks, you create a maintenance ecosystem that adapts to complex issues as appliances age. I’ve started integrating smart sensors into my workflow, such as Wi-Fi-connected thermometers, that alert me to irregular temperature fluctuations in ovens, enabling preemptive action. As I scale my repair practices, I predict a future where AI-powered diagnostic apps could analyze appliance behavior in real-time, offering tailored repair recommendations—think of it as having a virtual technician by your side.
How do I maintain dishwasher and oven performance over time?
Maintaining your appliances involves regular cleaning, prompt repairs, and staying informed with diagnostic tools. Deep cleaning components like filters, spray arms, and door seals ensures optimal operation and prevents issues like leaks or poor baking results. Implementing routine checks with multimeters and infrared thermometers helps catch electrical or heating problems early, reducing downtime. Furthermore, keeping a maintenance log facilitates tracking recurring troubles, so you know when it’s time to seek professional help. Remember, smaller, consistent actions today can dramatically improve durability and performance tomorrow. To explore more about diagnostics, visit this resource. Try adopting a regular maintenance schedule with your preferred tools and see how your appliances thank you with prolonged service life.
What I Wish I Knew Before Diving Into Repairs
One of the most eye-opening lessons I learned was that even seemingly minor rust spots or electrical glitches often have underlying causes. Don’t just fix the visible issue—invest time in thorough diagnostics to prevent recurring problems. I realized that patience and precise troubleshooting are your best allies, especially when dealing with complex control systems or electrical components. Every repair taught me that understanding the interconnectedness of appliance parts saves time and money in the long run.
Tools That Transformed My Approach to Fixing Appliances
The right equipment makes all the difference. I rely on a high-quality multimeter like the multimeter guide for electrical diagnostics, and an infrared thermometer helps detect uneven heating in ovens without guesswork. A good set of brushes and rust converters, paired with dishwasher-safe enamel paints, provide durable repairs. These tools empower me to identify issues early and apply effective, long-lasting fixes, transforming appliance maintenance from a chore into a satisfying challenge.
Your Opportunity to Take Control of Appliance Care
Imagine confidently diagnosing and repairing your appliances, extending their lifespan, and saving hundreds of dollars. With patience, the right tools, and a curious mindset, you can turn common issues like rust or faulty wiring into manageable projects. Remember, every small repair adds up—building your skills and confidence step by step. Don’t wait for a breakdown to act; proactive maintenance and diagnostics are your best defense against costly replacements. Why not start today and take control of your home appliances? Share your experiences or questions below, and let’s learn together!