It was a frustrating Saturday morning when my dishwasher decided to throw a tantrum—leaking water all over the kitchen floor just as I was rushing to get breakfast on the table. I stared at the mess, feeling utterly helpless. Then, in a flash of insight that felt almost miraculous, I remembered reading about cleaning dishwasher check valves without any fancy tools. Suddenly, I realized this was a problem I could fix myself, saving me a ton of money and stress.
Why Clearing Debris from Your Dishwasher Check Valve Matters More Than You Think
Failing to maintain your dishwasher’s check valve can lead to recurring leaks, inefficient washing, and even costly repairs. The check valve is a small yet vital part—acting as a gatekeeper that prevents dirty water from backflowing into the dishwasher while it drains. When debris or mineral build-up clog this tiny component, it can cause all sorts of headaches, from poor cleaning results to water leaks.
But here’s the kicker: many folks dismiss this issue or believe it’s only fixable with professional tools and skills. That’s where I went wrong early on—I thought I needed a full set of specialty equipment to tackle these little clogs. Trust me, I learned the hard way that simple, manual methods often do the trick. In fact, according to [appliance repair experts](https://appliancebargainz.com/dishwasher-parts-a-comprehensive-guide-to-diy-diagnostics), many common dishwasher problems stem from debris in the check valve or drain assembly, and troubleshooting can be straightforward.
Today, I want to share my experience and practical tips to help you clear that stubborn debris—and do it without any tools! This approach saves time, money, and stress, turning you from a frustrated fixer into an empowered DIYer. So, have you ever faced persistent dishwasher leaks or drainage issues that made you scratch your head? If so, keep reading, because we’re about to make those problems disappear.
What to Expect When Clearing Your Dishwasher Check Valve
In the next steps, I’ll guide you through the process of inspecting and clearing debris from your check valve by hand. You’ll learn how to identify the right parts, work safely, and avoid common mistakes that could make things worse. Ready to take control and extend the life of your dishwasher? Let’s dive in.
Identify the Check Valve’s Location and Prepare for Manual Cleaning
Start by unplugging your dishwasher from the power source to ensure safety. Locate the check valve, usually found near the drain hose connection or at the base of the drain pump assembly. Use your dishwasher’s manual or a quick online search for your specific model if unsure. Once located, remove any panels or filters that hinder access. Gather a flashlight for better visibility, and prepare a small container to catch any residual water—this step is like opening a car hood to inspect the engine; clear access is essential.
Carefully Disassemble and Inspect for Debris
With your hand (no tools needed), unscrew the check valve or detach it gently from its fittings. Think of it as unscrewing a cap on a bottle—you want to do it slowly to avoid damaging any parts. Observe the interior and surrounding components for mineral buildup, dirt, or foreign objects that may be blocking flow. Be meticulous—sometimes debris hides in tiny crevices, much like removing a clogged filter in a coffee machine. Applying gentle pressure and twisting can often loosen stubborn debris.
Manually Remove and Clear Debris
Use your fingers to carefully pull out any visible debris or mineral deposits. In some cases, a toothbrush or soft cloth can help dislodge stubborn particles—think of it as cleaning a delicate jewelry piece. If debris is stuck in the check valve’s small openings, gently tease it free by hand or with a non-metallic tool like a plastic pick. Remember, forcing or using metal objects might damage the valve, creating more problems down the line. Rinsing the parts with water can help flush out remaining debris, ensuring free flow. I once cleaned a check valve this way, and my dishwasher was back to draining perfectly after just a few minutes of work, saving a costly service call.
Reassemble and Test the System
Once clean, reattach the check valve securely—tighten any fittings by hand, avoiding overtightening that could crack plastic components. Put back any panels or filters you removed, and restore power to your dishwasher. Run a short cycle with minimal dishes to confirm that leaks or drainage issues are resolved. If problems persist, double-check that all parts are properly seated, and revisit the cleaning process if necessary. Regular maintenance like this prevents mineral buildup, extending your appliance’s lifespan and performance.
When to Seek Professional Help or Further Diagnostics
If cleaning the check valve manually doesn’t fix the issue, consider inspecting other parts such as the drain hose or pump assembly. Diagnostic guides like this parts and diagnostics page can help you determine if a more complex repair is needed. Sometimes, neglecting these small steps results in recurring leaks or poor drainage, which might require a professional technician. For persistent issues, contacting a repair expert through contact us can save you time and headache.When it comes to appliance repairs, many DIY enthusiasts believe that replacing worn-out parts or following generic troubleshooting guides suffices. However, this approach often misses the deeper nuances that can make or break a successful repair. Let’s dig deeper into what most people get wrong and how understanding these subtleties can save you time, money, and frustration.
Why Myths about Parts Sometimes Lead to Costly Mistakes
Many assume that sourcing the cheapest replacement parts guarantees a quick fix. While affordability matters, the misconception that all replacement parts are equal can backfire. OEM parts are built to exact specifications and often last longer, reducing the risk of recurring issues. Conversely, aftermarket parts might be tempting but can lead to fitment problems or inferior durability, especially in critical components like oven heating elements or dishwasher pumps. According to experts on appliance parts, selecting the right part with proper compatibility is essential for a lasting repair.
The Common Trap of Overlooking Diagnostic Precision
A frequent mistake is assuming the symptom is always caused by the most obvious part. For example, when a dishwasher leaks only during rinsing, it’s easy to blame the door gasket. But sometimes, the real culprit is a misaligned check valve or a clogged air gap. Jumping straight to part replacement without precise diagnostics can lead to unnecessary expenses. For advanced repair, diagnostic tools like a multimeter or specific tests for continuity and resistance are invaluable. This guide can help you develop a more analytical approach to appliance diagnostics.
What about Overconfidence in DIY Skills and Its Risks?
Many repair attempts are guided by the belief that if a little tinkering is good, more tinkering is better. This can lead to over-tightening connections, damaging delicate plastic parts, or misaligning components. For instance, overtightening an oven thermal fuse during replacement can crack the ceramic insulator, rendering the part useless. The key is to know your limits. If you’re unsure about the proper torque or the correct diagnostic procedure, consulting professional advice through services like direct consultations can prevent costly errors.
Are You Ignoring Less Obvious Signs of Faults?
Sometimes, the signs of appliance decline are subtle—slightly uneven oven heating, inconsistent cycle times, or persistent odors. Overlooking these clues can cause major breakdowns down the line. For example, a slow-closing dishwasher door might seem minor but could indicate misaligned hinges or worn gaskets, which if ignored, might lead to water leaks and electrical issues. Learning to interpret these nuanced signals sharpens your diagnostic skills. Dive into advanced diagnostics to uncover hidden faults before they escalate.
Make sure you’re not falling into these traps next time you tackle appliance repairs. Recognizing the importance of quality parts, developing precise diagnostic habits, respecting your skill limits, and paying attention to subtle signs will elevate your DIY game. As you gain experience, you’ll find that appliance repair becomes less of a guesswork game and more of a strategic, cost-effective craft. Have you ever fallen into this trap? Let me know in the comments.
Keep It Running: Tools I Recommend for Appliance Maintenance
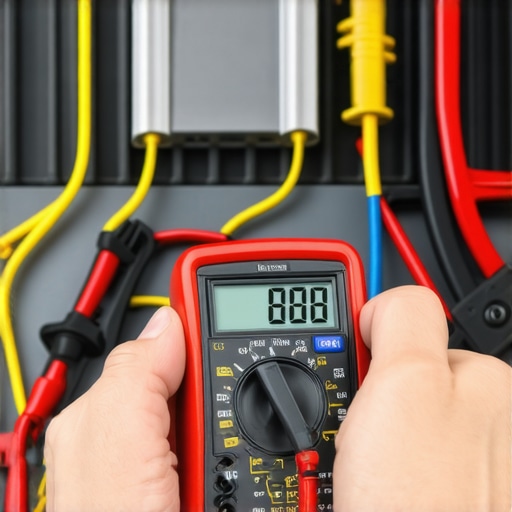
Maintaining your household appliances like dishwashers and ovens isn’t just about fixing problems as they arise—it’s about investing in the right tools that ensure longevity and performance. Over the years, I’ve found that precision and durability are key when diagnosing and repairing these systems. For dishwasher check valves and oven thermostats, high-quality tools make all the difference. For instance, a digital multimeter with auto-ranging capability allows me to quickly test electrical components like heating elements or thermostats without fuss. I personally prefer brands like Fluke for their reliability; their fluke 117 model offers the accuracy needed for troubleshooting subtle faults.
Similarly, a small inspection mirror helps in accessing tight spaces within ovens and dishwashers, especially when checking for debris buildup or damage. I’ve often used a LED headlamp to illuminate hidden corners, which is invaluable during complex diagnostics. These tools not only speed up repairs but also protect you from accidental contact with hot or live parts, making your maintenance routine safer and more effective. Look for equipment with sturdy construction and ergonomic design—it’s worth the investment.
Automation and Software for Smarter Diagnostics
In recent years, software solutions like diagnostic apps have started to complement physical tools. For example, certain smart ovens and dishwashers come with built-in diagnostics accessible via manufacturer apps. These can pinpoint faults like sensor failures or control board issues quickly. Personally, I use a Bluetooth-enabled multimeter paired with diagnostic apps that interpret readings and suggest potential causes. This combination enhances my diagnostic accuracy and saves time, especially when troubleshooting complex electronic faults. The future of appliance maintenance seems headed toward increased automation, with IoT-enabled diagnostics becoming more prevalent—and critical—for effective long-term care. For oven troubleshooting, investing in compatible diagnostic tech is becoming increasingly valuable.
How do I maintain these tools over time?
Proper maintenance of your diagnostic tools is crucial for their longevity. Regularly calibrate your multimeter according to the manufacturer’s instructions to ensure accuracy. Keep your inspection mirrors and LED headlamps clean and store them in a dry, dust-free environment. Replace batteries promptly in wireless devices to maintain performance. For software tools, always download updates to access the latest features and bug fixes. Maintaining your tools not only preserves their precision but also ensures safety during every repair session. With diligent care, these tools can serve your repair needs for years, making DIY appliance maintenance more reliable and less stressful.
Remember, staying prepared with the right equipment transforms troubleshooting from a daunting task into a manageable project. Try upgrading to an auto-ranging digital multimeter or pairing your existing multimeter with diagnostic apps—these small steps can significantly improve your repair outcomes. And as technology advances, keeping your tools in top shape will prepare you for the future of smart appliance diagnostics.
The Hardest Lesson I Learned About dishwasher,parts,diagnostics,oven repair
One of the most humbling moments was realizing that rushing into parts replacement without proper diagnostics often leads to wasted time and money, especially with dishwasher check valves. Patience and careful inspection—not just replacing what looks faulty—are key. The second lesson was understanding that small debris can cause big problems; a thorough manual cleaning can save entire units from unnecessary repairs.
3 Myths About dishwasher,parts,diagnostics,oven repair That Held Me Back
Believing that all replacement parts are interchangeable or that professional tools are always necessary can prevent you from effective DIY fixes. I used to think that fixing a leak meant replacement, but cleaning and reassembling often did the trick. Similarly, diagnosing without proper knowledge can lead to more damage. Question assumptions, verify each step, and develop your diagnostic skills beyond the surface.
What Experts Won’t Tell You About dishwasher,parts,diagnostics,oven repair
Many professionals focus on parts replacement without emphasizing the importance of understanding how systems work together. Gaining insight into the flow of water, the role of the check valve, and electrical controls transforms troubleshooting from guesswork into a strategic process. Plus, investing in quality diagnostic tools has paid dividends in both time savings and repair success.
My Essential Toolkit for dishwashers and ovens
Having a reliable digital multimeter like the Fluke 117 makes electrical diagnostics straightforward and accurate—crucial for troubleshooting items like heating elements or control boards. A compact LED headlamp illuminates those tight spots inside appliances, preventing missed debris or cracks. Additionally, a small inspection mirror allows you to see hidden components without dismantling everything. These tools have made my DIY repairs safer, faster, and more effective.
Books That Changed How I View appliance repair
Investing in comprehensive guides such as this resource broadened my understanding of troubleshooting and part replacement. They offer detailed insights into diagnostics, common failures, and preventive maintenance—transforming repair from a stressful chore into an empowering craft. The knowledge gained here often saves me from costly calls to the pros.
Where to Go from Here
If you’re eager to master DIY appliance repairs, start by building your toolkit, learning basic diagnostics, and understanding each component’s role. Visit oven diagnostics guides or dishwasher troubleshooting tips to deepen your skills. Remember, every successful repair boosts your confidence and saves you money—so take the first step today.