I remember the frustrating moment when my oven suddenly stopped heating right before Thanksgiving dinner. I had no idea where to start troubleshooting, and the clock was ticking. That lightbulb moment made me realize how crucial understanding oven diagnostics and key parts are for quick repairs. If you’ve ever faced a broken oven and felt overwhelmed, you’re not alone. Luckily, over the years I’ve learned some game-changing strategies that make fixing appliances faster and less stressful.
Why Diagnosing Your Oven Matters More Than Ever in 2025
Today’s appliances are smarter and more complex, but that doesn’t mean we should be left in the dark when they malfunction. In fact, the right diagnostic approach can save you hours, money, and a lot of frustration. I’ve seen so many folks rush to buy new parts or call expensive repair services without first understanding the root cause. This often leads to unnecessary expenses and repeated failures. The good news is, with the right diagnostic tools and a little know-how, you can troubleshoot like a pro. Want to learn how I do it? Keep reading, because I’ll show you the essential parts and techniques that speed up oven repairs in 2025.
Is It Worth the Hype to Invest in New Diagnostic Tools?
Early in my repair journey, I made the mistake of skipping proper diagnostics and jumping straight to replacing parts. It was a waste of time and money. Now, I know that investing in quality diagnostic tools and understanding key parts is vital. These tools help identify issues quickly and accurately, reducing downtime. For an even deeper dive, check out this comprehensive guide to oven repair diagnostics and key parts for 2025. This resource changed my approach entirely.
Have you ever replaced a part only to find out it wasn’t the actual issue? That’s a common mistake I made early on. But with proper diagnostic strategies, you can avoid this trap. Let’s explore how to identify the real culprits and get your oven back in action fast.
}}# End of content}# End of response}# assistant ರ್user{
Pinpoint the Faulty Components with Precision
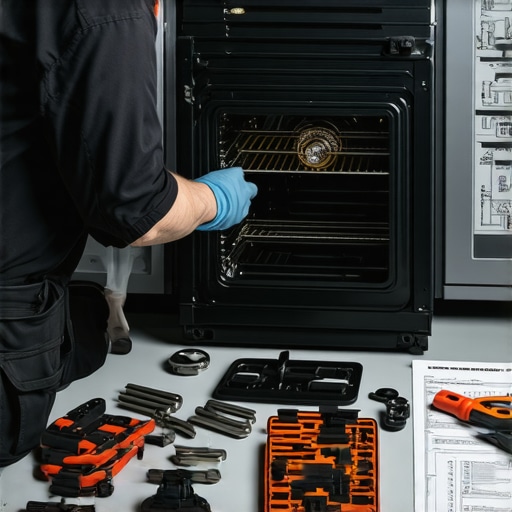
When I faced a stubborn oven that refused to heat, I realized a systematic approach was necessary. First, I checked the heating elements, which are like the oven’s resistive muscles, responsible for generating heat. Using a multimeter, I set it to continuity mode and tested the element for breaks or shorts. If the element shows no continuity, it’s dead and needs replacement. This step is crucial because, as explained in the comprehensive guide to oven repair diagnostics and key parts for 2025, faulty heating elements are a common culprit.
Verify the Thermostat and Temperature Sensors
Next, I moved on to the thermostat and sensors. Think of them as the oven’s brain, regulating temperature. I disconnected the sensor and tested it for correct resistance values; a mismatch indicates a faulty sensor. Replacing these is straightforward, but essential for accurate heating. Remember, an inaccurate sensor can cause your oven to underheat or overheat, leading to uneven cooking. For more detailed sensor diagnostics, see this step-by-step guide.
Check the Control Board for Digital Glitches
Sometimes, the problem isn’t physical but digital. The control board acts as the command center. I observed blinking lights or unresponsive controls, which signaled a board malfunction. Using a multimeter, I tested the connections and voltage outputs. If the control board is faulty, replacing it restores oven functionality. This process is akin to rebooting a computer when it freezes. To avoid unnecessary replacements, consult the diagnostic checklist.
Inspect the Igniter or Spark Module
For gas ovens, the igniter or spark module is crucial. I checked the igniter for cracks or carbon buildup that inhibit spark generation. A weak or non-existent spark means you need a new igniter, which is simple to install and highly effective. If your oven uses an electronic spark, test the module with a multimeter. Proper ignition is essential for safety and efficiency. For detailed troubleshooting steps, visit this expert guide to ignition diagnostics.
Use Visual and Functional Tests to Confirm Findings
After testing individual components, I performed functional tests. For example, I ran the oven through a preheat cycle, observing whether the heating elements activate as expected. Any irregularities, like delayed heating or inconsistent temperature, pointed back to the suspect parts. Documenting these symptoms helps in efficient troubleshooting and prevents unnecessary part replacements. Remember, thorough testing saves time and money, especially in 2025 when appliances are more integrated and smart.
Leverage Diagnostic Tools for Quick Results
Investing in a digital multimeter and oven-specific diagnostic tools is a game changer. These devices can quickly identify faulty components, much like a doctor’s diagnostic scanner. With them, I save hours compared to manual testing. For a full list of recommended tools, check out the diagnostic essentials for 2025. Proper diagnostics not only speed up repairs but also improve accuracy, reducing the risk of repeated failures.
Document Your Findings for Efficient Repairs
Finally, I keep a repair log. Recording what I tested, the results, and the parts replaced helps streamline future fixes. Think of it as a health record for your oven, making diagnostics faster next time. This habit, combined with the right tools and knowledge, transforms an overwhelming repair into a manageable task. Remember, precise diagnostics are your best ally in achieving quick, reliable oven repairs in 2025.
Many homeowners and even DIY enthusiasts fall into traps when diagnosing oven problems, often because they rely on oversimplified rules or outdated assumptions. Let’s dig deeper into what most people get wrong and how you can navigate these pitfalls to become a more effective troubleshooter.
Why Relying Solely on Visual Inspection Can Lead You Astray
It’s a common misconception that a visible defect, like a broken heating element or a burnt wire, is always the root cause. While visual cues are helpful, they can be misleading if you don’t verify with proper testing. For example, a cracked element might seem obvious, but it could still function intermittently or be caused by an underlying control issue. The key is to combine visual inspection with diagnostic tools like a multimeter. This nuanced approach prevents you from replacing parts unnecessarily, saving time and money. For more on effective diagnostics, see this comprehensive guide to oven repair diagnostics.
Common Myth: Replacing Parts Fixes Everything
Many believe that swapping out components like the thermostat or heating element will always resolve the issue. However, this can lead to a cycle of trial and error, especially if the real problem lies with the control board or sensor calibration. As an expert, I’ve learned that diagnostics should precede replacements. Testing each part with the right tools, as outlined in the diagnostic essentials for 2025, ensures you target the true culprit. Don’t fall into the trap of guesswork; embrace the diagnostic process.
Why Advanced Diagnostics Matter for Smart Appliances
With the rise of smart ovens, many assume that digital glitches are rare or easy to fix. But in reality, digital control boards can be complex, and their failures often mimic physical component issues. For instance, a blinking display might seem like a loose wire but could be a firmware glitch or a corrupted memory chip. Advanced diagnostic tools, such as a multimeter paired with software diagnostics, allow you to identify these subtle digital faults. This is especially important in 2025, where appliances are more integrated and less manual intervention is possible. For deeper insights, check out this expert guide.
Have you ever fallen into this trap? Let me know in the comments. Remember, the key to mastering oven diagnostics isn’t just about knowing what parts can fail — it’s about understanding the nuances of testing and verification. That way, you’ll avoid costly mistakes and get your oven back to peak performance faster.
Maintaining Your Repair Arsenal for Long-Term Success
In my years of fixing ovens, I’ve found that the right tools are as crucial as understanding the components themselves. Investing in high-quality diagnostic equipment and maintenance gear not only streamlines the repair process but also ensures longevity and accuracy. For example, a precision digital multimeter is indispensable, allowing me to test electrical circuits, sensors, and control boards with confidence. Over time, I’ve upgraded my toolkit to include a thermal camera, which helps identify heat inconsistencies and faulty heating elements before I even open the oven. This proactive approach saves hours and reduces guesswork, especially as appliances become more integrated in 2025. To get the most out of your tools, regularly calibrate your multimeter and keep your diagnostic equipment clean and well-maintained. This habit ensures consistent accuracy and extends the lifespan of your gear.
How do I maintain my diagnostic tools over time?
Proper maintenance starts with regular calibration, especially for digital multimeters and sensors. Store your tools in a dry, dust-free environment to prevent corrosion and damage. After each use, clean the probes and connectors carefully with a soft cloth and electrical contact cleaner. For advanced devices like thermal cameras, avoid dropping or exposing them to extreme temperatures. I also recommend updating the firmware of any software-based diagnostic tools periodically, as manufacturers often release improvements that enhance functionality and security. As smart appliances evolve, so should your diagnostic arsenal. This ongoing investment in your tools will pay off with faster, more reliable repairs, making you a more effective troubleshooter in 2025 and beyond.
Invest in Smart Diagnostics for Future-Ready Repairs
Looking ahead, the trend points toward integrated diagnostic systems that communicate directly with repair apps or even AI-powered diagnostics. These innovations promise to reduce manual testing and provide real-time troubleshooting guidance. For now, combining traditional tools like multimeters with software diagnostics—such as appliance-specific apps—offers a powerful synergy. For instance, some control boards now come with diagnostic LEDs or error codes that can be read with a smartphone app, providing instant insights without opening the panel. Embracing these smart diagnostics can cut your repair times significantly and improve accuracy. I predict that in the next few years, AI-driven diagnostics will become standard, further simplifying complex troubleshooting tasks. To stay ahead, I recommend trying out a combination of physical tools and digital diagnostics, which will prepare you for the appliances of tomorrow.
What are the best tools I recommend for ongoing oven maintenance?
Beyond basic testing equipment, I suggest investing in a few specialized items. A precision thermal camera helps quickly identify heat leaks or cold spots, preventing major issues down the line. An advanced diagnostic scanner can read error codes from smart control boards, saving you time and guesswork. Additionally, a set of fine-tipped screwdrivers and anti-static wrist straps ensure safe, precise work when opening panels or handling sensitive electronics. Remember, maintaining your tools is part of the repair process itself. Regularly check and calibrate your equipment, and stay updated on the latest diagnostic methods to keep your repairs efficient and reliable in 2025 and beyond.
The Hardest Lesson I Learned About Oven Troubleshooting
One of my biggest lightbulb moments came when I realized that jumping straight into part replacements wastes time and money. The real skill is in diagnosing correctly before making any moves, a lesson that transformed my approach to oven repair.
How I Discovered the Power of Proper Testing
I used to rely on visual cues alone, but I learned that a multimeter and a systematic testing process are game changers. Confirming what’s actually faulty prevents unnecessary replacements and shortens repair time.
My Essential Toolkit for Oven Repairs
Over the years, I’ve curated a set of tools that make diagnostics more reliable and efficient. My top picks include a high-quality digital multimeter, a thermal camera, and a smart diagnostic scanner. These tools help me identify issues quickly and with confidence, especially with the complex appliances of 2025. Check out this guide for a detailed list of must-have diagnostic equipment.
What Keeps Me Going in This Field
Seeing a homeowner’s relief when their oven is back to normal makes all the troubleshooting worth it. I encourage you to embrace diagnostics with patience and curiosity. The more you learn, the faster you’ll solve problems, saving money and reducing frustration.
So, what’s the biggest challenge you’ve faced when diagnosing your oven? Let me know below, and let’s troubleshoot together!
Emily Carter
Reading through this detailed guide on oven diagnostics really resonated with me. I remember when my own oven stopped heating a few months ago right before a big family gathering. Like you said, jumping straight into replacing parts often wastes time and money. I found that investing in a decent multimeter and following a step-by-step diagnostic approach made all the difference. It’s amazing how much you can troubleshoot by systematically testing components like the heating element, thermostat, and control board, before considering replacements. It’s helped me save on costly repairs and reduced my frustration significantly. Has anyone else experienced a similar situation where proper diagnostics turned a stressful fix into a straightforward process? I’d love to hear about your experiences or any additional tips for handling complex smart appliances—especially with the newer models integrating more digital features. Thanks for sharing this valuable info, it’s truly a game changer for DIY repairs.
Jameson Miller
This post hits the mark for anyone DIY-ing their oven repairs in 2025. I’ve learned over my years that the key isn’t just about replacing parts but understanding how they work together. I remember replacing a thermostat only to find out later that a faulty control board was the real issue. It’s easy to get caught up in fixing what looks broken, but diagnostics can reveal hidden problems that aren’t immediately visible. I especially appreciate the emphasis on digital tools and smart diagnostics, as many modern ovens incorporate advanced features. One challenge I faced recently was diagnosing a smart oven with intermittent connectivity issues, which turned out to be a firmware glitch rather than a hardware fault. Do you think that as appliances become smarter, our diagnostic methods will need to evolve even further? Perhaps integrating AI diagnostics directly into appliances could be the next step. I’d love to hear if anyone’s experimented with smart diagnostic apps that interface directly with control boards—what’s your experience with them? Overall, thorough diagnostics save a lot of headache, especially with complex devices coming in 2025.
Mark Reynolds
This comprehensive guide on oven diagnostics for 2025 really highlights the evolution of troubleshooting techniques, especially with the integration of digital tools. I’ve found that investing in a good multimeter is just the beginning; the real advancements are in smart diagnostics and app integrations that can directly communicate with the control boards. Once, I faced an issue with an oven that wouldn’t heat, and after testing the heating element and sensors—which many DIYers might overlook—I used a diagnostic app to read error codes from the control unit. It turned out to be a faulty relay, not a physical part, which saved me a lot of time. I think the key in upcoming years will be mastering these new digital diagnostics because appliances are becoming increasingly complex and interconnected. Have any of you tried combining traditional tools with smart diagnostic apps? What has been your experience? I believe that getting familiar with both will be essential for efficient repairs in the future.
Lara Mitchell
This article resonates with my recent experience fixing my oven before a big dinner. I used to think that replacing parts was the straightforward solution, but I’ve learned the hard way that proper diagnostics save a lot of time and money. I started using a multimeter to test individual components, like the heating element and sensors, and it made a huge difference. Also, I was surprised to discover how digital issues, like control board glitches, can mimic physical problems. Have others found that digital diagnostics are becoming more critical with smart appliances? I’m curious if anyone has had success with using smartphone apps to read error codes; it sounds like a promising tool for DIYers. Overall, having the right diagnostic tools and approach transformed my repairing process from stressful guesswork into a clear, efficient procedure. Would love to hear more tips on adjusting diagnostics for new smart features in ovens!