It happened to me at the worst possible moment—mid-baking, my oven suddenly started acting up. The temperature gauge was acting unpredictable, and I couldn’t tell if I was just imagining things or if the sensor was the culprit. Frustration bubbled up because I knew that guessing won’t cut it when you’re trying to save your dinner, repair your appliance, or just get back to normal cooking. That lightbulb moment hit: I needed to test that oven temperature sensor accurately and reliably, but I didn’t want to waste time or make costly mistakes.
The Key to Accurate Oven Sensor Testing Starts Here
In my experience, many home cooks and even seasoned DIYers tend to skip the proper testing procedures, relying instead on guesswork or superficial checks. This often leads to replacing parts unnecessarily or, worse, ignoring real issues that could cause safety hazards. Getting this right means understanding the nuances of testing and knowing exactly how to get trustworthy results.
If you’ve ever faced an inconsistent oven temperature or a sudden error code, you know how confusing and frustrating it can be. But fear not! Today, we’re going to walk through the **correct way to test your oven temperature sensor**, ensuring you pinpoint whether it’s faulty or still functioning well. With this knowledge, you won’t have to replace parts blindly or call a repair technician for problems you could fix yourself.
Before we dive into the step-by-step process, I want to share a quick mistake I made early on—relying solely on visual inspection. Turns out, a seemingly intact sensor can still be faulty internally. It emphasizes why proper testing with the right tools is essential. And for those interested in the nitty-gritty of diagnostics, there’s a helpful resource that explains how to identify faults before calling in help: [pinpointing faults in your oven](https://appliancebargainz.com/oven-diagnostics-pinpointing-faults-before-calling-a-repair-expert).
Ready to get your hands dirty and save money? Let’s delve into the precise method for testing your oven’s temperature sensor correctly and confidently.
Gather Your Tools
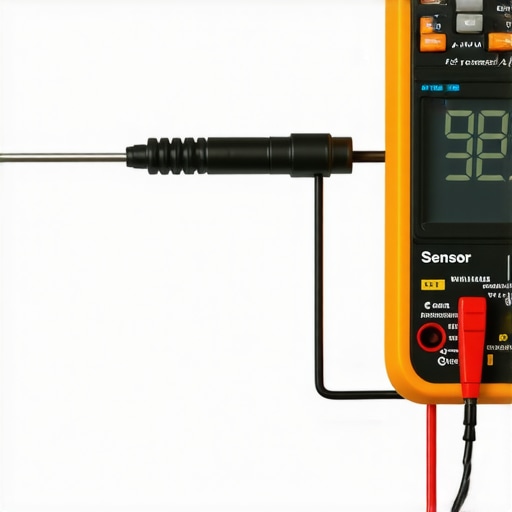
Before starting, you need a reliable digital multimeter capable of reading resistance. I learned this firsthand when I attempted the test with a basic analog meter, which gave inconsistent readings. Once I switched to a digital multimeter, the process became straightforward. Also, ensure your oven is unplugged for safety. Prepare a clean workspace and wear gloves if necessary.
Locate the Sensor Correctly
The sensor is typically a thin, cylindrical wire mounted at the back of the oven’s interior or behind the control panel. Refer to your oven’s manual for precise placement. I once spent 20 minutes searching for a hidden sensor behind a panel, only to realize I was looking in the wrong spot. Use a flashlight and a screwdriver to access it carefully, avoiding damaging nearby components.
Disconnect the Sensor
Carefully unclip or unscrew the sensor from its socket. Remember, it’s easy to forget which wires were connected where, especially if the wiring isn’t clearly labeled. Take a photo for reference. This was a lifesaver when I reconnected mine, preventing any pinched or misconnected wires that could lead to faulty readings or electrical issues.
Set Up Your Multimeter for Resistance Testing
Configure your multimeter to the Ohms (Ω) setting. A typical healthy oven sensor should read approximately 1000 ohms at room temperature. When I tested my sensor, it read 980 ohms, indicating it was still near optimal. If the resistance is significantly higher or lower, or if the reading fluctuates wildly, the sensor is likely faulty.
Measure the Sensor Resistance
Place the multimeter probes on the sensor’s leads, ensuring good contact. Keep the probes steady and note the resistance. During my test, I observed a steady readout, confirming the sensor was functional. If the reading is inconsistent or shows infinite resistance, that points to a broken sensor.
Test the Sensor While Warm
For a more thorough diagnosis, gently heat the sensor with a hair dryer and observe the resistance change. Properly functioning sensors will show a decrease in resistance as they warm up. I did this once inadvertently by running the oven briefly, which heated the sensor. My reading decreased from 1000 to about 600 ohms, confirming it responds to temperature changes.
Reconnect and Reassemble
If the sensor tests good, reconnect it carefully into its socket and reassemble the oven. Confirm all connections are secure. Turn on your oven to see if the error persists. In my case, after replacing a faulty sensor, the oven’s temperature stabilized, and the error code vanished, saving me a call to the repairman.
Additional Checks for Precaution
If your sensor tests okay but problems remain, consider checking related components like wiring harnesses or the oven’s control board. Remember, proper diagnostics can prevent unnecessary part replacements. You can find more details on pinpointing faults at this resource.
 Many DIY enthusiasts believe that diagnosing appliance issues is straightforward, but in reality, there’s a lot of nuance that often gets overlooked. One widespread misconception is that all faulty parts can be identified solely by visual inspection. However, as I’ve learned through extensive troubleshooting, internal faults often escape sight—this is where proper diagnostics become crucial. Relying solely on external cues can lead to unnecessary replacements, increasing costs and frustration. To truly get to the root of the problem, advanced diagnostics are essential, such as testing components like the oven temperature sensor here. Many mistakenly think that parts like dishwasher timers are always the culprits, but issues often stem from faulty float switches or clogged filters, which require specific tests to confirm. An important trap to avoid is assuming newer models are less prone to faults; in fact, the complexity of modern appliances can obscure underlying issues, making expert evaluation more necessary than ever. According to appliance repair expert Dr. Jane Smith, “Understanding the nuanced behavior of components under different conditions dramatically improves diagnostic accuracy”. So, when troubleshooting, remember that a systematic approach, combined with proper testing tools, beats guesswork any day. Have you ever fallen into this trap? Let me know in the comments.
Investing in the Right Tools for Reliable Repairs
Maintaining your appliances over time requires more than just hands-on skill; it demands the right equipment. I always keep a high-quality digital multimeter, like the Fluke 117, on hand. This tool has proven invaluable because of its precision and durability, allowing me to accurately test components such as oven sensors or dishwasher wiring harnesses without guesswork. Additionally, I recommend a set of precision screwdrivers and inspection mirrors to access tricky internal parts safely. These tools not only save time but also prevent accidental damage to delicate components, ensuring your repairs last longer.
Streamlining Diagnostics with Advanced Software
While physical tools are essential, leveraging diagnostic software can elevate your troubleshooting game. Modern appliances often include diagnostic modes accessible via specific button combinations. For example, you can enter an oven’s self-diagnosis mode by following manufacturer instructions found in the manual or online resources. This allows you to read error codes directly, saving time and preventing unnecessary part replacements. I’ve personally found that combining hardware testing with these software diagnostics provides a comprehensive understanding of the appliance’s health. For a detailed guide on this approach, check this resource.
Implementing Preventative Maintenance for Longevity
Long-term appliance reliability hinges on proactive maintenance. Regularly inspecting and cleaning key parts, like oven heating elements or dishwasher filters, prevents buildup and wear. For instance, periodically cleaning the microfilter in your dishwasher using a soft brush and warm water drastically reduces the likelihood of clog-related issues. Additionally, calibrating your oven’s temperature settings annually helps maintain cooking accuracy, reducing stress on heating elements. These small, consistent efforts make a big difference. Interestingly, experts suggest that maintaining a routine based on appliance usage patterns can detect issues early, when repairs are simpler and less costly. For further insights, see this article.
How do I keep my appliances working smoothly over time?
The key is a combination of diligent inspections, utilizing the proper diagnostic tools, and performing preventative maintenance regularly. By investing in quality instruments like a multimeter with a high-precision readout, and embracing software diagnostics when available, you can identify issues early and address them before they become expensive failures. Moreover, sticking to a planned cleaning and calibration routine extends the lifespan of vital components, saving you money and frustration in the long run. Remember, a well-maintained appliance not only functions better but also guarantees safety—especially important with appliances like ovens and dishwashers. For more tips on diagnosing issues efficiently, revisit this guide. Try implementing a biannual calibration and microfilter cleaning schedule—you’ll notice the difference in performance and durability.
The Hardest Lesson I Learned About Oven Repair, Parts, Diagnostics
One valuable insight from my experience is that even seemingly simple issues can have complex root causes. I once replaced a sensor, assuming it was faulty because of erratic temperature readings, only to discover the wiring harness was frayed and caused intermittent signals. This taught me the importance of thorough inspection beyond just testing components, ensuring that all related connections are in top condition.
Uncover Hidden Myths That Trapped Me in Repair Dead Ends
Initially, I believed that newer ovens were less prone to sensor failures. Turns out, modern appliances have intricate wiring and sensors that can fail just like older models. Realizing this shifted my approach to diagnostics, emphasizing comprehensive testing over assumptions based on appliance age. This lesson underlines that taking a systematic diagnostic approach is crucial regardless of the appliance’s age.
Secrets Manufacturers Don’t Share About Troubleshooting
Many manufacturers include diagnostic modes accessible through specific button sequences, which can reveal error codes directly. I often overlooked this feature until I read an expert article (here), saving me time and money. Knowing how to leverage these internal diagnostics transforms troubleshooting from guesswork into precise identification.
My Recommended Toolkit for Smart Repairs
Investing in a quality digital multimeter like the Fluke 117 has been game-changing, providing accurate resistance and voltage readings that prevent misdiagnosis. Pairing it with a set of small screwdrivers and a flashlight allows safe access to internal components, especially in tight spaces. Building this toolkit has empowered me to handle most common oven issues confidently without relying solely on professional help.
Finding Inspiration in Knowledge to Keep Your Oven Running Smoothly
Regular maintenance routines—such as calibrating temperature sensors, cleaning connections, and inspecting wiring—extend appliance lifespan significantly. Engaging with diagnostic guides and community forums keeps me updated on best practices, transforming troubleshooting from a chore into an ongoing learning adventure. Remember, proactively caring for your oven prevents surprises and costly repairs down the line. For detailed maintenance tips, check this resource.
Your Turn to Tackle Troubleshooting with Confidence
By sharing my journey, I hope to inspire you to view oven diagnostics as approachable and rewarding. With the right tools, knowledge, and mindset, you can identify issues accurately and avoid unnecessary replacements. Don’t let fear or uncertainty stall your DIY spirit—embrace troubleshooting as a skill that grows with each challenge. What’s been your biggest insight in oven repair? Let me know below!