Ever had your dishwasher decide to leak, make bizarre noises, or just stop working altogether right when you’re hosting guests? I remember the moment I realized my trusty dishwasher was giving me trouble — water pooling on the floor, a terrible smell emanating from the kitchen, and a sense of helplessness that I couldn’t quite shake. It hit me: I needed to fix this, but faced a confusing choice. Do I go for an OEM part, guaranteed to be exact, or try a cheaper, generic drain pump and hope for the best?
Why Your Choice of Drain Pump Matters More Than You Think
This decision isn’t just about saving a few bucks — it can impact the longevity, efficiency, and even safety of your appliance. I once tried a cheap, off-brand pump on my dishwasher, thinking I could save some money. Quickly, I learned a hard lesson: not all parts are created equal. The pump failed sooner than I expected, and I ended up spending more on repairs than I would have if I had chosen OEM from the start. Understanding the ins and outs of these options can help you avoid the same pitfalls, and ensure your dishwasher runs smoothly for years to come.
Is Going Cheap Really Worth It When It Comes to Repair Parts?
Early on, I made the mistake of assuming that all replacement dishwasher parts are the same, which isn’t true at all. An OEM (Original Equipment Manufacturer) part is designed specifically for your model, ensuring perfect fit and compatibility. On the other hand, generic parts might be cheaper initially but can cause issues down the line, such as leaks or motor failures. This dilemma is common among DIY enthusiasts and homeowners alike. If you’re considering fixing your dishwasher, it’s wise to understand what sets these options apart, so you don’t end up with more headaches than necessary. For more insights on diagnosing common dishwasher issues, check out this comprehensive guide.
So, have you faced a situation where you were torn between OEM and generic parts? If so, you’re not alone. Let’s explore how to make an informed decision that saves you money and preserves your appliance’s health, starting with understanding the real differences between these options and how to choose the best drain pump for your dishwasher’s needs.
Disconnect Power and Access the Pump
Unplug your dishwasher before starting the repair to ensure safety. Locate the access panel at the bottom, typically held by screws. Remove the panel carefully using a screwdriver. Consult your appliance manual if needed for specific model instructions.
Inspect the Drain Pump and Identify Damage
Visually examine the pump for cracks, corrosion, or debris blockage. Use a flashlight to see inside the pump housing. Check the impeller for obstructions — a jammed impeller can cause leaks or noise. If the pump’s motor is burned out or the impeller is damaged, replacement is necessary.
Disconnect and Remove Old Pump
Locate the water inlet and outlet hoses attached to the pump. Place a towel or bucket underneath to catch residual water. Use pliers to loosen clampings holding hoses. Carefully disconnect hoses from the pump. Unscrew the mounting screws or clips securing the pump to the dishwasher frame. Remove the pump with steady hands, ensuring no other components are disturbed.
Test the New Pump Before Installation
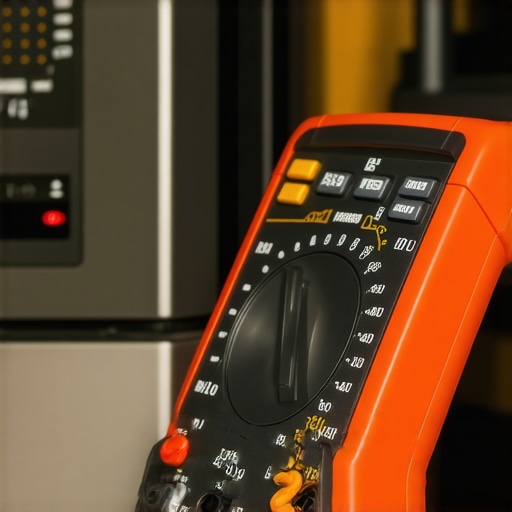
Before installing, verify your new pump functions correctly. Use a multimeter to check for continuity if applicable. Some models require testing the motor’s resistance, which should align with manufacturer specifications. This step can prevent future return visits for repairs.
Install the Replacement Pump
Carefully position the new pump into the mounting bracket. Reattach screws or clips tightly but avoid overtightening which can cause damage. Connect the water hoses to the respective inlet and outlet ports, installing new clamps if necessary. Ensure all connections are secure and free of leaks.
Reconnect Power and Run a Test Cycle
Replace the access panel and tighten all screws. Plug the dishwasher back into the outlet. Run a short wash cycle without dishes to check for leaks and proper operation. Watch for abnormal sounds and verify water drains correctly. If issues persist, revisit connections or consult a technician.
Remember, correct diagnosis is crucial. If the pump seems functional but problems endure, consider inspecting other components like the drain hose or control board. For advanced diagnostics, review this guide. Proper testing and careful installation extend the lifespan of your dishwasher, saving money and frustration in the long run. Where applicable, replacing just the pump impeller or seals can sometimes suffice, but always replace the entire pump if it shows signs of failure.
Tip for a Trouble-Free Repair
Keep a clean workspace and organize screws and parts as you disassemble. Having all tools ready speeds up the process. If you encounter unexpected wiring or stubborn hoses, consult the manufacturer’s diagram or seek professional guidance. Regular maintenance, like cleaning filters and checking hoses, also helps prevent future breakdowns.
Many DIY repair enthusiasts and homeowners approach appliance diagnostics with a simplistic mindset: swap parts, run tests, and hope for the best. However, this mentality often leads to costly mistakes and overlooked nuances. Let’s dig deeper into what most people get wrong about diagnosing, repairing, and choosing parts for appliances like ovens and dishwashers, and why understanding these subtleties can elevate your repair game.
Myth Busting: Will Replacing Parts Always Fix the Problem?
It’s a common misconception that swapping out a faulty component guarantees a successful repair. In my experience, diagnostics is more of an art than a science. For example, replacing a heating element in an oven might not resolve temperature issues if the real culprit is a faulty thermostat or a failing sensor. Rushing to change parts without thorough testing can lead to unnecessary expenses and recurring problems. For advanced troubleshooting, this diagnostic guide emphasizes multi-faceted testing rather than one-to-one part replacements.
Another trap many fall into is assuming that all parts are interchangeable. OEM parts are designed with precision, but generic replacements can sometimes mismatch and cause more issues. The key is understanding the nuances of part specifications such as resistance, size, and connector types.
Beware of the ‘more is better’ approach: replacing an entire component when only a small part, like a seal or a connector, is damaged. Often, small repairs suffice, preventing the need for full replacements and saving you money.
Why Many Miss the Real Issue During Diagnostics
One of the most overlooked nuances is the importance of comprehensive testing. For example, a dishwasher might drain improperly not because of the drain pump but due to a obstructed spray arm, clogged filter, or even a faulty control board. Assuming you’ve identified the wrong faulty component can create a cycle of unnecessary replacements. This guide highlights the importance of step-by-step diagnosis, emphasizing the need for multimeter testing, visual inspections, and process elimination.
Furthermore, many underestimate the impact of secondary issues like wiring faults, moisture intrusion, or buildup of debris affecting sensor accuracy. Recognizing these hidden factors saves time and prevents misdiagnosis.
How to Avoid Falling for Common Repair Traps?
Patience and knowledge are your best allies. Before rushing into repairs, invest time in proper diagnostics: use multimeters, review your appliance’s wiring diagrams, and consult reputable guides. This article discusses diagnostic steps tailored for oven repairs, which can be adapted for other appliances.
Also, don’t overlook preventive maintenance. Regularly cleaning filters, verifying hoses, and testing sensors prolong the lifespan of parts and reduce surprises. Remember, understanding the intricacies of how your appliance functions is key to effective repair and diagnosis.
So, have you ever fallen into this trap? Let me know in the comments. Mastering these nuances not only saves you money but also helps you become more confident in tackling appliance issues.
Keeping Your Tools Sharp and Up-to-Date
When it comes to appliance repair, having the right tools is half the battle won. Personally, I swear by a quality digital multimeter like the Uni-T UT61E. Its high accuracy and wide measurement range make troubleshooting faster and more reliable, especially when testing components like thermostats or control boards. I also keep a set of precision screwdrivers and soldering equipment handy, which are invaluable for delicate repairs or replacing PCBs. Using reputable brands ensures consistency and reduces frustration, saving you time and avoiding unnecessary damage to delicate parts.
Investing in Diagnostic Software and Apps
Beyond physical tools, I rely on diagnostic software such as specialized diagnostic guides online. These platforms can help interpret multimeter readings or error codes, guiding me through complex troubleshooting steps. For example, when diagnosing oven problems, I use digital thermometers to cross-check sensor readings against manufacturer specifications, ensuring that any deviations are genuinely problematic rather than false alarms. Staying current with software updates, or new diagnostic apps, is critical as appliances become increasingly tech-savvy and feature-rich.
Maintaining Your Tools for Long-Term Success
Proper maintenance of your equipment extends its lifespan and ensures accuracy. Regularly calibrate your multimeter, replacing batteries and testing its functionality with known voltage sources. Keep screwdrivers and soldering iron tips clean and rust-free. Store tools in a dedicated toolbox to prevent misplacement and damage. A well-organized toolkit not only speeds up repairs but also prevents mistakes caused by using the wrong tool for a job. Remember, invested effort in maintenance pays off during urgent repairs, where precision and speed are essential.
Preparing for Future Repairs Through Documentation
Maintaining detailed records of your repairs, including parts used and troubleshooting steps, creates a valuable resource for future reference. I usually keep a repair log with photos, notes, and dates, which helps identify recurring issues or worn parts before a failure occurs. Digital documentation can be organized using apps like Evernote or Notion, making it easy to search for solutions when upcoming problems arise. This proactive approach minimizes downtime and reduces costs—especially with appliances like ovens or dishwashers that may develop subtle issues over time.
Predicting Repair Trends and Emerging Tools
Looking ahead, I anticipate increasingly sophisticated diagnostic tools powered by AI and IoT connectivity. Features like remote diagnostics, app-based sensors, and predictive maintenance software could revolutionize DIY repairs. For example, smart appliances equipped with built-in sensors can alert you to issues before they manifest visibly, saving you from costly repairs or replacements. Staying informed about these trends—such as updates from industry leaders like Bosch or Whirlpool—can prepare you to adapt your toolkit accordingly. Investing early in such technology now might future-proof your repair endeavors.
How do I maintain diagnostic tools and equipment over time?
Regular calibration and proper storage are the keys to keeping your tools reliable. Test multimeters periodically against known voltage sources, and replace faulty probes immediately. Keep tools clean and dry; store them in cases or cabinets to avoid corrosion. Adhering to this routine ensures your diagnostics are accurate, which is critical for precise repairs. For detailed tips on maintaining specific equipment, consult trusted resources or the manufacturers’ manuals. Remember, investing a small amount of time now saves you much frustration during urgent repairs later.
Ready to elevate your appliance repair game? Try calibrating your multimeter as a first step—it’s a game changer for accurate diagnostics and a skill that pays off long-term. By maintaining your tools diligently, you’ll build confidence to handle even complex issues like control board failures or sensor replacements with ease.
What cracked my repair confidence open
I used to believe that replacing faulty parts was the end-all solution—until I realized how often misdiagnoses led me astray. The biggest lesson was understanding that a symptom like a leaking dishwasher isn’t always due to the drain pump itself; sometimes, it’s a clogged filter or worn seals that cause the issue. This lightbulb moment taught me the importance of thorough diagnostics before pricey replacements, saving time and money while boosting my confidence.
The tools that transformed my troubleshooting routine
Investing in a reliable digital multimeter, like the Uni-T UT61E, revolutionized my ability to pinpoint electrical issues accurately. Alongside a set of precision screwdrivers and a good flashlight, these tools minimized guesswork and allowed me to verify parts before swapping them. Reaching out to trusted resources such as this guide helped me refine my diagnostic skills and approach each repair with clarity.
When patience beats panic in repairs
My most valuable insight is that rushing repairs often leads to overlooked details. Taking the time to thoroughly test each component, cross-examine wiring diagrams, and perform step-by-step diagnostics ensures that I’m fixing the right part, the first time. This patience has saved me from unnecessary expenses and occasional frustration, reminding me that meticulousness always pays off.
Leaning into ongoing learning and community wisdom
Staying updated with the latest repair techniques and tools keeps me ahead. Engaging with forums, reading blogs, and regularly calibrating my tools improve my accuracy and confidence. Sharing experiences with fellow DIY enthusiasts has also unveiled smarter, safer practices, emphasizing that repair mastery is a continuous journey—never a one-time achievement.
Now, it’s your turn—advance your appliance skills
Every mistake and insight adds up to a deeper understanding of diagnostics, oven repair, parts, and dishwashers. Embrace the learning process, invest in proper tools, and don’t shy away from complex issues—these steps bring long-term satisfaction and savings. Remember, mastering appliance repair isn’t about perfection but progress. Are you ready to tackle that next challenge with confidence?
What’s the most surprising fix you’ve learned through hands-on troubleshooting? Share your story below and keep the learning going!