Ever been in the kitchen, trying to bake that perfect cake, only to find your oven refuses to turn on? Or maybe it heats up unevenly, turning your culinary dreams into a frustrating guessing game. I remember the first time I faced a stubborn oven that refused to heat. I spent hours fiddling, replacing parts blindly, and still, no fix. That lightbulb moment hit me—knowing the right key parts and how to diagnose them can turn a long, frustrating repair into a quick, confident fix.
Why Knowing Your Oven Parts Can Save the Day
When my oven stopped working, I realized I was wasting time and money replacing the wrong components. Early on, I made the mistake of assuming that all heating issues stemmed from the thermostat. Turns out, the heating element itself or even the control board could be the real culprits. By understanding which parts matter most, I learned to pinpoint problems faster and avoid unnecessary replacements. Want to cut down your repair time and get your oven back in action? Stick around, because I’ll share the key parts and diagnostic tips that made all the difference for me. For deeper insights, check out effective oven repair tips.
Is It Really Worth Learning About Oven Parts?
Honestly, I was skeptical at first. I thought, “How complicated can this be?” But skipping the diagnostics and jumping straight to a replacement often led to more wasted parts and money. I learned this the hard way early on—replacing a control board when the issue was actually a faulty sensor. Taking the time to understand the key parts—like heating elements, thermostats, and control boards—has saved me countless hours and headaches. If you’ve ever faced a stubborn oven that just won’t cooperate, you know the frustration. But trust me, with the right knowledge, you’ll be fixing faster and smarter. Want to get started? Dive into my favorite diagnostic strategies and key parts guide here.
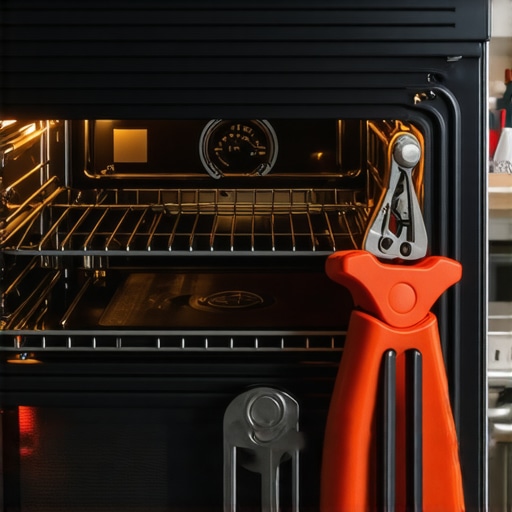
Test Your Heating Elements First
When I faced my stubborn oven, the first step I took was to test the heating elements. These are the coils or rods that produce heat. Use a multimeter to check for continuity—if the reading is zero or infinite, replace the element. This quick test saved me from unnecessary repairs, and I learned that faulty heating elements are a common cause of heating issues. For reliable parts, check out best diagnostic parts.
Inspect and Replace the Thermostat
The thermostat controls the oven’s temperature. If it’s faulty, the oven may not heat or may heat unevenly. To test, remove the thermostat and use a multimeter to check for continuity. If it’s defective, replacing it is straightforward. Remember, a malfunctioning thermostat can mimic other issues. For detailed diagnostics, visit essential diagnostic tips.
Check the Control Board and Wiring
The control board acts as the oven’s brain. Sometimes, it’s the culprit behind inconsistent heating or no heat at all. Look for burnt or damaged components, and test connections with a multimeter. If the control board is faulty, replacing it can restore full control. Be cautious—wiring issues can also cause problems. For expert guidance on diagnosing control boards, see top repair strategies.
Understand Your Oven’s Main Components
Knowing the core parts—like the heating element, thermostat, control board, and wiring harness—makes diagnostics faster. I once replaced the thermostat only to find the wiring was loose. Ensuring all connections are tight and intact can save time. If you suspect a part, consult the detailed repair tips for proper testing methods.
Using Diagnostic Tools Effectively
Invest in a good multimeter and learn how to use it. When my oven stopped heating, I systematically tested each component. Testing the heating element, thermostat, and wiring with multimeter saved me from costly replacements. Remember, diagnostics isn’t guessing—it’s methodical. For expert insights, visit diagnostic tips.
< >
>
Many homeowners fall prey to misconceptions when diagnosing oven issues, leading to costly mistakes. One prevalent myth is that replacing the control board always fixes heating problems. In reality, the control board is often the last component to fail, and issues are more frequently caused by faulty heating elements or thermostats. Jumping straight to replacing the control board without proper diagnostics can waste money and time. Instead, it’s wise to systematically test each component, starting with the heating elements and thermostats, before considering the control board. You can find detailed diagnostic strategies in my essential diagnostic tips guide.
Another misconception is that all heating issues stem from the thermostat. While thermostats are common culprits, wiring problems or a malfunctioning control board can mimic thermostat failure. For example, loose wiring or corroded contacts often cause inconsistent heating. To avoid this trap, always check wiring connections and test continuity with a multimeter before replacing parts. This nuanced approach saves money and prevents unnecessary part replacements. For expert wiring diagnostics, visit diagnostics of wiring harnesses.
How do I tell if my oven’s control board is the real issue?
Many advanced repair technicians emphasize that control boards often show visible signs of damage, such as burnt components or swollen capacitors. However, in some cases, the control board appears intact but is malfunctioning due to faulty relays or microchips. To reliably diagnose a control board problem, perform a component-level test with a multimeter or seek professional diagnostic tools. This ensures you’re not replacing a control board unnecessarily. For in-depth troubleshooting, see top diagnostic strategies.
Overlooking the importance of proper testing can lead to the classic trap of replacing parts in the wrong order. As an expert, I recommend a step-by-step diagnostic process that includes testing heating elements, thermostats, wiring, and control modules before any replacements. This approach is backed by industry standards and can be found in my recommended diagnostic procedures.
Have you ever fallen into this trap? Let me know in the comments. Mastering these nuances can save you significant money and time, making you a smarter DIYer and a more confident homeowner in appliance repairs.
Keep It Running: Tools That Make a Difference
When it comes to maintaining your oven and ensuring it stays in top shape, the right tools can make all the difference. I personally rely on a high-quality digital multimeter because it provides precise readings, which are crucial when diagnosing issues like faulty thermostats or control boards. For instance, testing the heating element’s continuity with my multimeter helps me quickly identify whether it needs replacing, saving time and unnecessary repairs. Additionally, a good set of insulated screwdrivers allows me to work safely around electrical components without risking shorts or shocks.
Beyond basic tools, I recommend investing in an infrared temperature gun. This device helps me quickly check the actual surface temperature of heating elements, helping me verify whether they are functioning within the expected range. It’s especially useful for detecting uneven heating issues that may not be obvious visually. For detailed diagnostics, I often refer to this comprehensive repair guide to ensure I’m using the right methods and tools.
How do I maintain my oven over time?
Regular maintenance is key to keeping your oven in peak condition. I schedule a thorough inspection every six months, checking for loose wiring connections, cleaning the control panel, and testing the heating elements. Keeping the interior free of grease and debris not only prevents fire hazards but also ensures better heat distribution. Using a soft cloth and mild cleaning agents prevents damage to sensitive electronic parts. Furthermore, inspecting the door seals and hinges periodically helps maintain energy efficiency and consistent heating. As technology advances, I predict more homeowners will leverage smart diagnostic tools—like Wi-Fi-enabled multimeters—that can connect to apps for real-time diagnostics, making maintenance even easier.
Another critical aspect is staying informed about common issues and their fixes. For example, knowing how to test the thermostat with a multimeter or how to read error codes from the control board can save you hours of troubleshooting. For a detailed walk-through, I recommend reviewing this diagnostic resource. Mastering these maintenance routines will extend your oven’s lifespan and improve overall performance.
Adopt a Systematic Approach to Repairs
When diagnosing problems, I always follow a step-by-step process—starting with testing the heating elements, then moving on to the thermostat, wiring, and control board. This methodical approach prevents unnecessary part replacements and saves money. For example, I once replaced a control board only to find that a loose wire was the real culprit. Using tools like a multimeter and infrared thermometer, combined with the knowledge from trusted guides, helps me identify issues precisely. If you want to streamline your repairs, consider investing in an expert diagnostic kit, which can provide more detailed insights than basic tools.
In the future, I see a growing trend toward integrated diagnostic systems that can automatically identify faults and suggest repairs. This evolution will make DIY repairs more accessible and reduce reliance on professional technicians for minor issues. For now, mastering the tools and techniques I’ve shared will empower you to keep your oven working reliably for years to come.
The Hardest Lesson I Learned About Oven Troubleshooting
One of my biggest realizations was that jumping straight to replacing parts without proper diagnosis wastes time and money. I once replaced the control board only to find out the real issue was a loose wire. It taught me to always test each component systematically before making replacements.
3 Myths About Oven Repair That Held Me Back
I used to believe that the thermostat was always the culprit for heating problems. Later, I discovered that wiring issues and faulty heating elements are more common. Busting these myths helped me diagnose problems faster and avoid unnecessary parts replacement.
What Experts Won’t Tell You About Diagnosing Oven Issues
Many professionals emphasize checking the heating element first, but the real game-changer is understanding how to test the control board and wiring connections with a multimeter. This deeper knowledge can prevent costly mistakes and ensure a quick fix.
My Essential Toolkit for Oven Troubleshooting
My trusted tools include a high-quality digital multimeter for precise testing, insulated screwdrivers for safety, and an infrared temperature gun to verify heating performance. These tools, combined with the right diagnostic guides, make troubleshooting efficient and reliable.
Where to Go from Here to Keep Your Oven in Top Shape
Start by mastering basic diagnostics—test the heating element and thermostat before replacing anything. Follow detailed guides like this one for step-by-step instructions. Regular maintenance and understanding key components will extend your oven’s lifespan and save you money in the long run.
Your Turn to Try Fixing Your Oven with Confidence
Now that you have some insider wisdom, don’t be afraid to troubleshoot your oven yourself. With the right knowledge and tools, you can fix common issues efficiently and confidently. Remember, patience and systematic testing are your best friends in appliance repair.
Have you ever struggled with diagnosing an oven problem? Let me know below, and share your experiences or questions!
Stephanie Carter
This post really hits home for me—especially the part about diagnostics versus blind replacements. I once wasted a lot of money replacing a control board that seemed to be fried, only to find out later that a loose wiring connection was the actual culprit. It’s a reminder that systematic testing can save both time and resources. I’ve found that investing in a good multimeter was a game-changer for troubleshooting my appliances, along with taking my time to carefully check each component. I’m curious, has anyone here used smart diagnostic tools or apps that connect to multimeters or oven systems? Do they really make the process easier, or is manual testing still the best way to go? Would love to hear everyone’s experiences—especially with newer technology in appliance repair.
Mark Anderson
Reading this post really made me reflect on my own experience with oven repairs. I used to think that if my oven wasn’t heating properly, it was always the thermostat’s fault, so I’d replace it right away. However, after some trial and error, I learned that wiring issues were more common than I initially assumed. Systematic testing with a multimeter helped me identify loose or corroded connections that caused inconsistent heating. It’s a simple step but makes a huge difference in diagnosing the root problem accurately. I also started investing in a good infrared thermometer, which helps me quickly verify if the heating elements are reaching the right temperature. This combination of tools and patience has saved me both time and money. Has anyone else found that focusing on wiring diagnostics first can avoid costly part replacements? I’d love to hear what worked best for others, especially when troubleshooting persistent issues that don’t seem to respond to standard fixes.