Ever stood in your kitchen, ready to bake that perfect cake or casserole, only to find your oven refuses to heat? It’s frustrating, right? I’ve been there, feeling that sinking disappointment when the oven just won’t cooperate. The lightbulb went off for me the day I realized a simple test could save me hours calling in a technician or wasting money on unnecessary parts. Testing the resistance of the oven bake element turned out to be the hidden key to diagnosing the problem — and it might be the same for you.
Why Checking the Resistance of Your Oven Bake Element Matters
Most folks overlook the importance of properly diagnosing oven faults before jumping into costly repairs. A failing bake element typically shows up with uneven baking, longer cooking times, or no heat at all. Knowing how to test its resistance can be a game-changer. It’s not just about fixing an oven; it’s about understanding your appliance better and saving money in the process. Early mistakes like assuming the control board is at fault without doing a basic resistance check can lead you down a costly rabbit hole. Trust me, I did that early on, and it delayed my repairs much longer than necessary. I recommend reading this helpful guide to learn more about diagnostics—it’s packed with tips that saved me a lot of frustration.
Will Testing Resistance Really Save Time and Money?
Absolutely. When I first tried to fix my oven, I skipped basic diagnostics and bought a new control board — an unnecessary expense. Properly testing the resistance of the bake element pointed me directly to the broken part. According to appliance repair experts, measuring the ohms of the element helps identify if it’s open or shorted, which are common issues (source: appliancebargainz.com). Knowing what to test and how made all the difference. By understanding this simple resistance check, you can avoid unnecessary replacements and focus on what truly needs fixing. Ready to dive into the practical steps? Let’s get your oven back to baking perfection.
Start with Safety First and Gather Your Tools
Before diving into resistance testing, unplug your oven to prevent electrical shock—think of it as turning off a water supply before repairing a leaky pipe. Grab a digital multimeter, which acts like a medical monitor for electrical components, and locate the bake element terminals at the back or inside the oven.
Identify the Bake Element and Prepare to Test
Remove the oven racks and access the bake element. It’s the heating coil you see when opening the oven door—imagine it like the heating element in your toaster, just larger. Disconnect the wires connected to the terminals, noting their positions. Clean any dirt or grease to get accurate readings, similar to wiping dust off a camera lens.
Set Your Multimeter to Measure Resistance
Turn on your multimeter and set it to the lowest ohms (Ω) setting—comparable to turning a thermostat to its coldest point to test if it’s open. Touch one probe to each terminal; if the multimeter shows a reading between 20 to 50 ohms, the element is likely good. If it shows infinity or opens circuit (no continuity), it’s broken—think of the circuit as a broken string in a guitar, preventing current flow.
Interpreting the Results and Next Steps
If your reading indicates a broken element, replacing it is straightforward. You can find a compatible part online or at local stores—here’s a helpful guide to oven parts. For a successful replacement, disconnect and remove the faulty element, then install the new one securely, matching the original wiring. Remember, this simple step is often the fix for uneven baking or no heat at all.
Double-Check and Test Again
Once installed, reconnect the wires, restore power, and test your oven. It’s wise to run a quick bake cycle to verify proper operation. Think of this as a test drive after replacing a car battery—ensuring everything runs smoothly before the full journey. If the oven still doesn’t heat, further diagnostics might be necessary, possibly involving testing the control board or thermostat, which you can explore in detail here.
Keep Safety and Precision in Mind
Handling electrical components requires care—never skip unplugging your appliance, and always handle probes gently. If any step feels uncertain, consulting a professional can prevent mishaps. With these clear and actionable steps, you’re well on your way to fixing your oven efficiently—saving money and gaining confidence in your home repair skills.
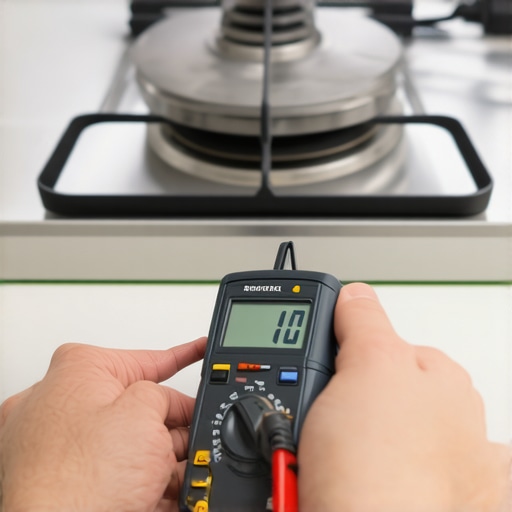 When it comes to fixing appliances like dishwashers and ovens, many DIY enthusiasts and even seasoned homeowners tend to overlook nuanced details that can make or break the repair process. One common misconception is that replacing parts blindly is the best approach. In reality, thorough diagnostics—like measuring the resistance of heating elements or testing control boards—are crucial before any part replacement. Relying solely on visual inspection often leads to unnecessary purchases and unsuccessful repairs. For instance, many believe that a broken dishwasher spray arm is the primary culprit for poor cleaning, but the real issue may be a clogged filter or defective pump, which requires thorough diagnostics.
What advanced diagnostic steps can prevent costly mistakes?
Experts recommend using multimeters to test continuity and resistance in components such as heating elements or solenoids, instead of assuming failure based on appearance alone. A study by appliance repair specialists emphasizes that proper diagnostic procedures increase repair success rates and help avoid replacing functional parts—saving time and money. Remember, understanding the specific nuance of each component’s behavior under testing conditions transforms troubleshooting from guesswork into precise diagnosis. Don’t fall for the trap of assuming parts are faulty without proper testing. Instead, invest in the right tools and knowledge to identify faults accurately. This approach not only extends your appliance’s lifespan but also enhances your repair confidence. Want to learn more about advanced diagnostics? Check out this comprehensive guide on identifying faults efficiently. Visit here. Beware of common pitfalls such as misinterpreting testing results due to improper multimeter settings or neglecting safety precautions. Always unplug appliances before testing and handle probes carefully. Are you guilty of jumping straight to parts replacement without proper diagnostics? Share your experience in the comments and let’s discuss smarter repair strategies!
Keep Your Appliance Running Smoothely Using Smart Maintenance and Top-Notch Tools
Maintaining your appliances over time is crucial to ensure they remain efficient and long-lasting. One of the key strategies involvesusing precise diagnostic tools to detect issues before they escalate. For example, a good quality digital multimeter isn’t just a basic tester—it allows you to perform detailed resistance and continuity checks, providing clear insights into whether a component like a heating element or control board is functioning correctly. I personally rely on a Fluke 115 multimeter because of its durability and accuracy, especially when testing oven thermostats or dishwasher sensors. This precision helps prevent unnecessary part replacements, saving both time and money.
In addition to diagnostic devices, software tools are making appliance troubleshooting more accessible. I recommend appliance-specific diagnostic apps that guide you through testing procedures step-by-step. These tools often include troubleshooting flowcharts and repair videos, which I find invaluable when diagnosing complex issues like control board failures or sensor malfunctions. Over the next few years, I predict a rise in integration between hardware diagnostics and smart appliance apps, making home repairs even more straightforward for DIY enthusiasts.
How do I maintain parts like dishwashers and ovens over time?
Regular maintenance is your best line of defense. For dishwashers, I clean the filter and spray arms regularly to prevent clogs and ensure optimal water circulation. A simple cleaning of theair gap can prevent overflows and improve cleaning performance. For ovens, keeping the interior free of grease buildup and inspecting door seals helps maintain even heating. Using specialized cleaning sprays like oven control knob cleaner can make this routine easier.
One effective maintenance tip is to schedule periodic diagnostic checks using your multimeter—testing components like heating elements and thermostats annually helps spot potential failures early. For instance, measuring the Ohms resistance of oven heating elements can reveal internal fractures before they stop working completely, as highlighted in appliance diagnostics literature.
Achieving Long-Term Results with Proper Care
The key to long-lasting appliances lies in ongoing maintenance combined with quality tools. In my experience, establishing a routine diagnostic check every six months keeps small problems from snowballing into costly repairs. Additionally, keeping a detailed repair log helps track component ages and anticipate when replacements are due—much like a vehicle maintenance schedule. Over time, these practices help extend the lifespan of your appliances and sustain their efficiency.
What about scaling repair efforts as your skills improve?
As you become more confident, investing in professional-grade diagnostic equipment like thermal cameras and advanced multimeters can exponentially improve diagnosis accuracy. Moreover, learning to calibrate components such as thermostats or control boards ensures your repairs are precise, saving money and time in the long run. Check out appliance repair certifications and courses available online to elevate your skills.
Start small by applying a meticulous resistance check on your oven’s heating element. Use your multimeter to measure the Ohms value—if it’s outside the recommended range, replace the part before further testing. Remember, proactive maintenance plus the right tools creates a sustainable approach to appliance longevity and smart repair.
3 Mistakes That Held Me Back from Fixing My Oven Efficiently
- Assuming visual damage equals failure: I used to think a broken-looking element was the only indicator—turns out, resistance testing reveals internal breaks invisible to the naked eye, saving me from unnecessary replacements.
- Ignoring safety protocols: Skipping unplugging before testing almost resulted in an electric shock. Prioritizing safety is crucial to avoid accidents and diagnose with confidence.
- Rushing to replace parts without proper testing: I learned the hard way that measuring resistance needs to be the first step. It prevented me from buying faulty parts or overlooking the real issue.
My Go-To Resources That Transformed My Repair Skills
- Comprehensive Diagnostic Guides: These give step-by-step instructions that demystify complex issues, making diagnostics approachable.
- Trusted Multimeters like Fluke 115: I rely on their accuracy, which is vital when measuring oven element resistance or testing control boards. Quality tools make all the difference.
- Online Forums and Community Groups: Engaging with experienced DIYers provides practical tips and validation, boosting my confidence with each repair.
Believe in Your Ability to Diagnose and Repair
Every troubleshooting session brings a sense of accomplishment and independence. Remember, mastering resistance testing and safety procedures elevates your repair skills beyond just fixing an oven—it’s about empowering yourself to handle household challenges confidently. Start small, stay curious, and enjoy the satisfaction of bringing your appliances back to life.
What’s the next appliance repair you’re eager to tackle? Share your thoughts below—I’d love to hear about your journey!