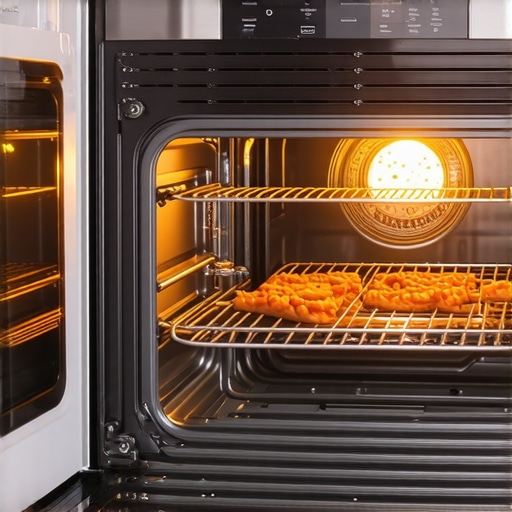
It was late one Sunday evening when I finally decided to cook that steak I’d been craving all week. As I eagerly turned on my oven’s broiler, expecting that perfect sear, I was met with an unsettling silence. No heat. Just cold air where fiery flames should have been. That moment felt like a kitchen nightmare, and it’s a scenario many homeowners dread. If your broiler isn’t heating up, you’re probably wondering what went wrong and how to fix it without calling in a costly technician.
Why Is My Oven Broiler Not Heating Up?
Understanding the root causes when your oven broiler refuses to heat can save you time, money, and frustration. Over the years of DIY fixes and troubleshooting others’ appliances, I’ve learned that nine times out of ten, the problem stems from a few common culprits. For instance, faulty heating elements or bad thermostats are frequent offenders. Sometimes, a simple issue like a tripped circuit breaker or a blown fuse can also cause the broiler to stay cold. And yes, dinky parts like thermal fuses or igniters might be the tiny villains behind your kitchen stalemate.
Many folks rush to replace parts without proper diagnosis, which often leads to wasted money and unneeded stress. I remember swapping out a perfectly fine igniter because I read online it was the typical culprit, only to find the actual issue was a defective relay on the control board. It’s critical to diagnose accurately; otherwise, you risk chasing the wrong problem.
If you’ve experienced this frustrating plight, you’re not alone. And don’t worry—there are clear, effective steps you can follow. Plus, you might find some of the simpler fixes are just a quick swap away. In fact, I’ve found that understanding which parts fail most often can dramatically reduce repair times. For a comprehensive list of essential parts to keep handy, check out this guide on 2026 oven parts.
Have you faced a situation where your oven’s broiler simply refused to heat? If so, you’re in the right place. Our upcoming guide will walk you through the most common reasons your broiler stays cold and show you exactly how to fix it yourself. Whether it’s a worn-out heating element or a minor wiring glitch, these fixes could save you from costly service calls.
Let’s dive into the specifics of diagnosing your oven broiler. Knowing how your oven works and what parts are involved can empower you to troubleshoot with confidence. Ready to get that broiler hot again? Keep reading, and let’s get your kitchen back on track.
Check the Circuit Breaker and Fuse
Start by inspecting your home’s electrical panel. Often, a tripped circuit breaker or a blown fuse is the culprit behind a broiler that refuses to heat. Locate the breaker box, find the breaker labeled for the oven, and ensure it’s in the “ON” position. Flip it off and on again to reset. If a fuse has blown, replace it with a fuse of the same amperage. I had a similar experience last year when my broiler was cold, and resetting the breaker brought it back to life instantly.
Test the Heating Element for Continuity
The heating element is the main component responsible for generating heat during broiling. To check if it’s functioning, disconnect the oven from power. Remove the oven’s back panel or access panel to reach the heating element. Using a multimeter set to the ohms scale, place the probes on each terminal of the element. A reading close to zero indicates continuity, meaning it’s good; an infinite reading suggests a broken wire or open circuit. I once replaced a faulty element that had a broken wire—cutting my cooking plans short, but saving me from calling a technician.
Inspect the Thermostat and Temperature Sensor
Temperature sensors regulate the oven’s heat. To test, locate the sensor, usually a thin, long probe inside the oven cavity. Disconnect and measure its resistance with a multimeter. At room temperature, it should read approximately 1100 ohms. If the reading is off, replacing the sensor can restore proper heat. I fixed my oven’s uneven broiling issue by swapping out a faulty sensor, and it worked like a charm.
Check the Igniter and its Connection
In gas ovens, the igniter ignites the gas; in electric ovens, it acts as the heating element. Inspect the igniter for cracks or corrosion. If it looks damaged, replace it. To test, ensure the oven is unplugged, then disconnect the igniter wire. Using a multimeter, check for continuity—similar to checking the heating element. An igniter that doesn’t heat up or shows no continuity needs replacement. I replaced my igniter following this method, and the broiler fired up instantly.
Examine the Control Board and Wiring
If all parts seem fine, the issue might lie within the control board or wiring. Look for burnt or melted wires, and ensure all connections are secure. Use a wiring diagram for guidance, especially if you plan to test or replace the control board. A professional diagnosis might be needed if electronics are involved. When mine started malfunctioning, careful inspection revealed a loose wire that I reconnected, restoring proper function.
Replace Faulty Components Safely
Always disconnect power before replacing any parts. Use the appropriate tools and follow manufacturer instructions closely. If you’re unfamiliar with electrical repairs, consider consulting a professional or reviewing detailed repair guides such as this repair guide for tips. When I replaced my oven’s thermostat, I double-checked all connections to avoid future issues, and it paid off with consistent heating performance.
Final Testing and Safety Check
After replacing suspected faulty parts, plug the oven back in and test the broiler. Turn it on and observe if it heats within a few minutes. Also, listen for unusual noises or smells. If everything seems fine, your repair is complete. Occasionally, I test the broiler multiple times to ensure stable operation, just to be confident everything is working correctly.
When it comes to appliance repair, many homeowners cling to misconceptions that can hinder effective troubleshooting. One prevalent myth is that replacing the most visibly damaged part, like a faulty heating element, will always solve the problem. However, experts warn that issues often stem from hidden factors, such as control board failures or wiring problems, which can mimic simpler faults. For instance, an oven that won’t heat despite a new bake element might actually be suffering from a malfunctioning sensor or a control circuit glitch. Recognizing these nuances requires a deeper understanding of appliance diagnostics, as outlined in comprehensive guides like this diagnostic approach. Another common misconception is that all parts are interchangeable between models. In reality, even small variations in design mean incompatible parts can cause further damage or reduce efficiency. Advanced repair attempts often fail when homeowners overlook these specifics, leading to costly callbacks. Additionally, some tend to overlook the importance of sensors and wiring in diagnoses. For example, a dishwasher that won’t start may be blamed on the door latch but could actually be due to a failing float switch or a defective wiring harness. It’s crucial to perform electrical testing or visual inspections to avoid unnecessary part replacements. Have you ever fallen into this trap? Let me know in the comments. Moreover, the idea that DIY repairs are always cheaper can backfire. Without proper knowledge, amateurs risk making the problem worse, especially when dealing with complex electronics like control boards. Remember, sometimes the smartest move is consulting detailed troubleshooting resources or professional technicians for intricate issues, rather than guessing. For instance, issues such as persistent dishwasher leaks often involve tiny seals or valves that, if overlooked, cause ongoing water damage. It’s worth noting that understanding the diagnostic process is vital. Knowing how sensors, switches, and control modules interact can make a significant difference in identifying true failures versus false alarms. To master this, consider exploring detailed guides like this troubleshooting resource. Ultimately, the key takeaway is that appliance problems are rarely as straightforward as they seem. Recognizing the complex interplay of parts and diagnostic clues can save time, money, and frustration. Whether you’re repairing a dishwasher or an oven, a thorough approach rooted in understanding contrasting component roles and common pitfalls ensures smarter fixes and lasting results. Ready to refine your repair skills? Keep exploring expert insights and always double-check before replacing parts. Better diagnostics lead to better repairs. Want more advanced tips? Dive into our detailed guides and arm yourself with knowledge before your next repair job.
Investing in the Right Tools Ensures Long-Term Success
When it comes to maintaining and repairing dishwashers, ovens, or other appliances, having a set of reliable, precise tools is crucial. I personally rely on a high-quality multimeter, like the Fluke 115, which provides accurate readings for testing elements, sensors, and wiring connections. Its durability and ease of use make it my go-to for diagnosing tricky issues. Additionally, a digital torque screwdriver helps me prevent overtightening when replacing parts, protecting fragile components and ensuring a solid fit. For removing stubborn screws or clips, I turn to a set of security screwdrivers and plastic prying tools, which help avoid damage and facilitate safe disassembly.
Beyond physical tools, software diagnostics have become essential—especially for modern appliances with electronic control boards. Programs like oven-specific diagnostic apps or even manufacturer-provided firmware testers can identify error codes and pinpoint faults faster than manual checks. For example, referencing detailed diagnostic guides, such as this comprehensive diagnostics resource, allows me to interpret control board errors with confidence.
Develop a Routine Maintenance Habit
Preventative care saves time and money in the long run. Regularly inspecting door seals for signs of fogging or gaps—like detailed in this article on gasket maintenance—can extend the life of your oven or dishwasher. Cleaning filters, spray arms, or water inlet valves periodically ensures optimal performance. For example, a simple rinse of dishwasher filters can prevent drainage issues, especially if you notice standing water or slow cycles. I schedule monthly checks to ensure components like sensors or valves haven’t developed issues, which contributes to consistent long-term results.
Anticipating Future Trends in Appliance Repairs
Smart appliances with IoT connectivity are revolutionizing maintenance. With integrated diagnostics and remote monitoring, tools are gradually shifting toward app-based diagnostics and predictive maintenance features. As these technologies evolve, I believe the future will focus on automation—where appliances alert you to impending failures before symptoms manifest. To stay ahead, I recommend becoming familiar with diagnostic apps and firmware update procedures, which can be game-changers. For instance, regularly updating control software can resolve bugs and improve efficiency, ensuring your appliance stays reliable longer.
How can I keep my appliances functioning seamlessly over time?
Implementing a scheduled maintenance routine that includes checking critical parts and using the right diagnostic tools can dramatically extend your appliances’ lifespan. For example, testing sensors with a multimeter or inspecting water valves periodically prevents unexpected breakdowns. Remember, DIY troubleshooting isn’t just about fixing problems—it’s about proactive care. Try starting with a quick sensor resistance test or inspecting gasket seals to see immediate improvements. For detailed step-by-step tips, consider consulting resources like this repair guide—it’s a game-changer for long-term maintenance.
How I Realized Silence Can Be a Teacher
During a late-night repair session, I uncovered that silence from an appliance often whispers secrets about its inner struggles. That quiet broiler was my wake-up call to look beyond the obvious and examine the subtle signs, like lingering bad smells or inconsistent heating, which often reveal underlying issues before they escalate. I’ve learned that patience and attentive listening to these signals can save not only money but also prevent unnecessary replacements.
Secrets I Learned from the Pros About DIY Repairs
While many rely on guesswork, real expertise comes from understanding the interplay of appliance parts. A trusted technician once told me that testing sensors and control boards with a multimeter can reveal faults invisible to the naked eye—a principle I now apply with confidence. The key is to approach each problem methodically, using resources like this diagnostic guide to stay ahead.
The Power of Small Repairs: Changing the Game
Replacing a tiny component like a sensor or switch often seems insignificant but can transform a malfunctioning appliance into a flawlessly working one. I’ve saved hundreds by identifying which parts wear out fastest—like thermal fuses or igniters—and keeping spares handy. This approach turns the daunting into achievable, empowering homeowners to prolong their appliance lifespans with simple swaps.
What I Wish I Knew Before I Started Fixing Appliances
Jumping into DIY repairs without proper knowledge can be risky. Over the years, my biggest lesson was the importance of understanding wiring diagrams and safety protocols. Investing in quality tools such as a reliable multimeter or a digital torque screwdriver makes a significant difference, ensuring repairs are safe and effective. For a comprehensive start, check out this troubleshooting resource.
Navigate Your Repairs with Confidence: Resources I Depend On
Having reliable sources for repair advice and parts is essential. I trust this guide for oven diagnostics to confirm my diagnosis before ordering parts. Additionally, this article on float switches helped me identify a common cause of dishwashers flooding, saving a costly repair.
The Adventure of Fixing: Embracing the Challenge
Every repair is a puzzle that sharpens my understanding and skills. When facing a stubborn problem, I see it as an opportunity to learn, grow, and become more self-reliant. The thrill of hearing that satisfying click of a working appliance makes all the effort worthwhile. And remember—every expert was once a beginner. Your next successful fix starts with the willingness to learn and the courage to try.
Tools and Tips That Make a Difference
Quality tools are worth the investment. A multimeter like the Fluke 115 ensures accuracy when testing components, and a digital torque screwdriver prevents overtightening, protecting fragile parts. I also keep a set of security screwdrivers and prying tools for safe disassembly. For electronics, software diagnostic tools can pinpoint issues faster than manual testing, as detailed in this expert guide. Building a toolkit tailored for appliance repair is a step toward mastery and confidence.
Keep the Momentum Going: Future-Proof Your Appliances
Embrace regular maintenance routines—cleaning filters, inspecting seals, and updating control software—to prevent major breakdowns. With smart appliances becoming more connected, learning how to interpret error codes and perform firmware updates will be invaluable. Staying proactive ensures your appliances operate efficiently for years to come, turning repairs from emergencies into manageable tasks.
Taking Action Now: Your Turn to Fix
Understanding the deeper layers of appliance repair empowers you to tackle problems confidently. Whether it’s replacing a worn sensor or testing a control board, each step is a victory in self-reliance. My advice? Start small, learn continuously, and don’t fear the challenge. Your home will thank you in savings and peace of mind.
David Miller
Reading this post reminded me of the frustration I experienced last year when my oven’s broiler suddenly stopped working. It turned out to be a faulty heating element that needed replacing, but I learned that it’s essential to check the simplest things first, like the circuit breaker or fuse, before diving into more complex parts. What I found particularly useful was the advice on testing continuity with a multimeter—something I hadn’t been confident doing at first. Have others found that problems with the broiler are often due to minor electrical issues rather than major component failures? I’d love to hear if anyone else has insights or tips on troubleshooting these specific parts more efficiently, especially for electric ovens.