I remember the moment clearly—standing in my kitchen early one morning, craving that perfect breakfast, only to be met with an unexpected and unsettling smell of fuel wafting from the oven. It was a stark realization that my trusty gas oven was having a serious problem. The kind that makes you question whether you should just call a pro or try to solve it yourself. If you’ve ever faced this, you know how nerve-wracking it can be, especially when your oven refuses to ignite but still emits that telltale fuel smell. It’s more common than you might think, and understanding why it happens can save you both time and money.
Decoding the Fuel Smell: What’s Really Going on in Your Oven?
Is Your Gas Oven Dangerous or Just Annoying?
First off, let’s get one thing straight. That fuel smell isn’t just a minor odor—it’s a potential safety concern. Gas leaks or incomplete combustion can lead to dangerous situations, including carbon monoxide buildup. According to the U.S. Consumer Product Safety Commission, improperly functioning gas appliances are responsible for hundreds of accidents annually. So, if your oven smells like fuel but won’t light, it’s crucial to address the issue promptly—don’t ignore it. Early on, I made the mistake of thinking I could just clean the burners and hope for the best. Spoiler alert: that approach can be risky. Instead, diagnosing the root cause requires a bit of knowledge about how your oven’s ignition system works and what might be blocking or malfunctioning.
This issue often arises due to worn-out ignition components, gas leaks, or clogged burners. When the gas is released but not ignited, you get that distinct smell lingering in your kitchen. The good news? With a little patience and some guidance, you can troubleshoot the problem yourself before calling in a professional. I’ll walk you through the essential steps later, so keep reading!
What We’ll Cover Today
In this post, I’m going to show you how to identify whether your oven’s problem is related to gas supply, ignition, or appliance faults. We’ll explore common causes, safety precautions, and simple DIY fixes that can get your oven firing up again safely. If you’ve been hesitant because you’re worried about causing more harm or missing something critical, don’t worry—I’ve been there. And after years of tinkering with kitchen appliances, I know how frustrating it can be when things go wrong. Together, we’ll demystify the process and get you back to cooking without that lingering fuel smell.
}
Inspect the Gas Supply and Shutoff Valves
Begin by ensuring your gas supply is turned off at the main valve—think of it as shutting a water hose before fixing a leak; safety first. Check the supply line for any obvious cracks or leaks. Turn the valve back on cautiously and listen for hissing sounds, which could indicate a leak. If you smell gas during this process, immediately evacuate and contact professionals via this link. Once confirmed safe, proceed to the next step.
Examine the Oven Ignition System
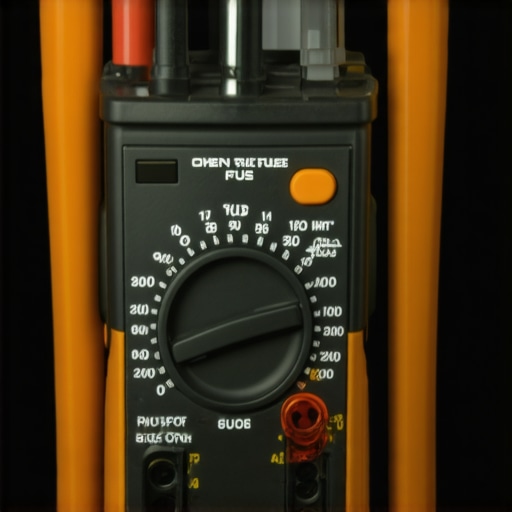
Identify the igniter located near the burner. It resembles a small, ceramic filament. If it looks cracked or sooty, it’s likely weak or failed. To test it, disconnect the igniter and use a multimeter set to check for continuity—think of it as testing if a light switch is working. Replace if necessary, referencing this diagnostic guide for detailed instructions. A faulty igniter often causes incomplete combustion, resulting in fuel odors.
Clean and Clear the Burners
Clogged burners can obstruct gas flow, leading to leaks. Remove the burner caps and tubes, and clean them thoroughly with a brush and soap, ensuring no debris blocks the gas outlets. Visualize this as clearing a clogged artery to restore normal flow. Reassemble and test the oven; if the smell persists, proceed to check the gas valves.
Test the Gas Valves and Connections
Gas valves regulate flow; if faulty, they may leak or not shut off properly. Use soapy water to spray on connections; bubbling indicates leaks—similar to how you’d check for leaks in a bicycle tire. If leaks are detected, switch off the gas and replace the faulty valves, referring to this repair guide. Always consider calling a professional if you’re unsure about handling gas components.
Check the Oven’s Ventilation and Exhaust System
Obstructed vents cause incomplete combustion and fuel odors. Remove and clean the vent filters, ducts, and fans. Consider environmental factors like accumulated dust or grease as clogging agents—think of this like clearing the dust out of a chimney for proper airflow. Proper ventilation ensures gas burns completely, eliminating off-odors. If issues persist, examine the control board for faults, which could mismanage gas flow.
Perform a Final Safety Test
Once all components are inspected, cleaned, or replaced, perform a cautious test. Turn on the oven and observe the ignition process. The flame should light swiftly and burn blue with no smell of gas. Use a mirror or camera to inspect the flame if needed. If fuel odors linger, do not attempt further fixes—contact a professional to ensure safety. For troubleshooting deeper electrical or component faults, considering the complexities involved, consulting diagnostics experts is wise.
Many homeowners believe that replacing parts is always the simplest fix for appliance issues, but this can be a dangerous misconception. Relying solely on swapping out components without proper diagnosis often leads to wasted time and money, and worse, overlooks the real problem. Advanced diagnostics require understanding the nuances of how parts function within the entire system—something many technicians and DIY enthusiasts overlook. For example, replacing a heating element without testing the control board or sensor may just mask the real fault, and you could end up repeating the same mistake repeatedly.
Another common myth is that all spare parts are created equal. OEM parts might seem pricier, but they often provide better reliability and compatibility, reducing the risk of further damage. Conversely, cheap aftermarket components can sometimes cause more harm than good, especially if they don’t meet manufacturer specifications. When selecting parts, always consult trusted sources, and avoid the mistake of assuming that cheaper options are always better.
Now, let’s consider the pitfalls around diagnostics themselves. People often skip crucial steps, like verifying power supply or checking for error codes, which can lead to misdiagnosis. It reminds me of a case where a dishwasher kept failing to drain; users replaced the pump prematurely only to find out a clogged filter was the actual culprit. Proper diagnostics, using tools like multimeters or external test boards, are essential because they help isolate faults accurately and prevent costly repairs.
Ever wondered how advanced technicians identify faults that are invisible to the naked eye? They look for subtle signs like slight corrosion on connectors, voltage drops, or inconsistent resistance readings. These details can prevent unnecessary part replacements and pinpoint issues precisely. For example, checking the thermal fuse with a probe can reveal micro-cracks that cause intermittent failures, something I explain in depth on this diagnostics guide.
Don’t fall into the trap of assuming the problem is always a faulty part. Sometimes, the real issue is a wiring fault, a control system glitch, or environmental factors like dust and grease buildup. Recognizing that appliance systems are complex and interconnected is key to effective repair. For comprehensive troubleshooting, consider scanning your oven or dishwasher with diagnostic tools, which often uncover hidden faults that manual checks might miss. For example, a control board issue can cause irregular heating patterns that seem like a failing element but actually stem from faulty electronics. You can read more about diagnostics before calling in an expert.
Making assumptions regarding appliance repairs can lead to bigger problems—so always dig deeper, verify thoroughly, and choose quality parts. Have you ever fallen into this trap? Let me know in the comments! Remember, proper diagnostics show respect for the complexity of your appliances and save you from unnecessary expenses.
Keeping It Working: Essential Tools and Maintenance Strategies
Maintaining your kitchen appliances over the years isn’t just about fixing problems when they arise; it’s about proactive care and having the right tools at your fingertips. As an enthusiast who has tinkered with everything from dishwashers to ovens, I can attest that the right equipment not only makes diagnostics easier but also extends the lifespan of your appliances. Investing in quality tools and understanding their proper use empowers you to troubleshoot and perform routine maintenance confidently.
Invest in a Reliable Digital Multimeter
One of my most used tools is a digital multimeter. I prefer models with auto-ranging capabilities because they streamline testing components like thermal fuses, control boards, and sensors. For example, when diagnosing flaky oven heating elements, a multimeter helps me quickly verify continuity and resistance values, preventing unnecessary part swaps. I recommend the budget-friendly multimeter guide for choosing a device that balances cost and accuracy.
Use a Set of Precision Screwdrivers and Specialty Bits
Appliance screws are often tiny, and stripped heads can be frustrating. I rely on a set of precision screwdrivers, including Torx, Philips, and flathead tips, tailored for small appliances. For stubborn parts like oven door hinges or dishwasher racks, I use specialty bits like the impact driver with correct bits to prevent damage. Keeping these tools organized and clean saves time, and always remember to disconnect power before working on any appliance.
Apply Proper Diagnostics with External Test Equipment
Beyond standard tools, specialized diagnostic instruments are invaluable. For instance, a controlled voltage tester helps me verify whether the control board outputs the correct signals, a critical step when troubleshooting complex oven control issues. Industry-grade testers designed for appliance diagnostics can often detect micro-cracks or micro-fissures in components like thermal fuses, like described in the diagnostics overview. Regular testing prevents costly repairs down the line and builds a deeper understanding of your appliances’ inner workings.
Predicting the Future of Appliance Maintenance
In the coming years, I expect that smart diagnostic tools integrated with apps will become mainstream. Devices capable of providing real-time health reports and error codes, synced directly to your smartphone, can streamline maintenance even further. As AI and IoT continue to evolve, DIY enthusiasts and professionals alike will benefit from quicker, more accurate diagnostics—reducing downtime and extending appliance life significantly.
How do I keep my appliances in top shape over time?
The key lies in routine inspections and cleaning, combined with gradual tool upgrades. Regularly inspecting components like door seals, filters, and vents can prevent many issues. For example, cleaning dishwasher spray nozzles or oven vents not only improves performance but also reduces wear. Incorporating scheduled diagnostics using your multimeter and other tools ensures that minor issues are caught early.
To get started, I recommend trying out a multimeter test on your oven’s thermal fuse—it’s straightforward and immediately gives you insight into its condition. Detailed guides are available, such as this thermal fuse testing tutorial. Applying these techniques now can save you from expensive repairs later and give you the satisfaction of keeping your appliances humming smoothly.