There was a morning when I opened my dishwasher, expecting the usual quick cycle, only to be greeted by a small flood pooling at my feet. My heart sank. How could a seemingly perfect machine leak only during the rinse cycle? That moment was a real eye-opener—until then, I’d thought dishwasher leaks are straightforward, easy to diagnose problems. But this puzzle bugged me for days, making me realize how tricky appliance issues can be, especially when they only show up under specific conditions.
Unmasking the Sneaky Leak During Rinse Cycles
If you’ve ever faced a leak that appears exclusively during the rinse cycle, you’re not alone. It’s more common than most realize and can be incredibly frustrating because the leak isn’t constant, making it harder to identify and fix. Today, I’ll guide you through understanding why your dishwasher might only leak during this phase and, more importantly, how to troubleshoot and resolve the issue effectively. As I learned through my own experience, rushing into repairs without proper diagnostics can lead to worse problems or unnecessary costs. To avoid that, it’s essential to understand what’s happening behind the scenes during the rinse cycle. Interestingly, according to appliance experts, leaks during specific cycles often result from a faulty water inlet valve, worn-out door gaskets, or even clogged drainage. Proper diagnosis saves you time, money, and a lot of stress. If the leak is giving you sleepless nights, let’s explore how you can identify and fix the culprit, beginning with a mistake I made early on that almost cost me dearly: I tried to replace parts blindly without first consulting reliable diagnostics guides like this resource. Now, I know better. Before diving into repairs, understanding the root cause is crucial. Are you currently facing this sneaky leak during your dishwasher’s rinse? If yes, stay with me—by the end, you’ll have the confidence to troubleshoot your machine like a pro and end those floods for good.
Check the Water Inlet Valve for Leaks
First, unplug your dishwasher and locate the water inlet valve behind or underneath it. Use a multimeter to test for electrical continuity by following instructions at this beginner’s guide. If the valve’s coil shows no resistance or the component is physically cracked or corroded, replace it to prevent leaks during the rinse cycle. I once replaced a faulty inlet valve that was dripping slowly, and it instantly stopped the leak, saving the entire machine from further damage.
Inspect the Door Gasket for Wear and Tear
Open the dishwasher door and examine the rubber gasket around the door frame for cracks, warping, or debris buildup. Clean the gasket thoroughly with a damp cloth, then run a short cycle with the door open to observe any leaks. If water drips from the gasket area during the rinse, swap it out. I learned to regularly inspect this part after a stubborn leak nearly flooded my kitchen; a simple gasket replacement fixed it overnight.
Clean and Unclog Spray Arms and Filter
Remove the spray arms and clear any debris or mineral deposits using a vinegar soak. Also, check the filter assembly for blockages that could cause water to backflow or overflow during rinsing. Use a brush to scrub away stuck particles. During my troubleshooting, clearing blocked spray holes dramatically reduced my leak issues and restored proper water circulation.
Test the Drainage System for Blockages
Ensure the drainage hose isn’t kinked or clogged. Disconnect the hose from the sink or drain pipe and run water through it manually. Check for obstructions in the drain pump or check valve, which can cause water to spill or leak during the rinse cycle. I once found a small piece of debris lodged in the check valve, which caused water pooling in the bottom—removing it solved my leak problem.
Use Diagnostics Tools for Precise Troubleshooting
Leverage diagnostic guides like this resource to identify faults systematically. Many modern dishwashers have error indicators or diagnostic modes you can activate to pinpoint issues accurately. I recommend running these diagnostics after each step to ensure all leaks are addressed conclusively.
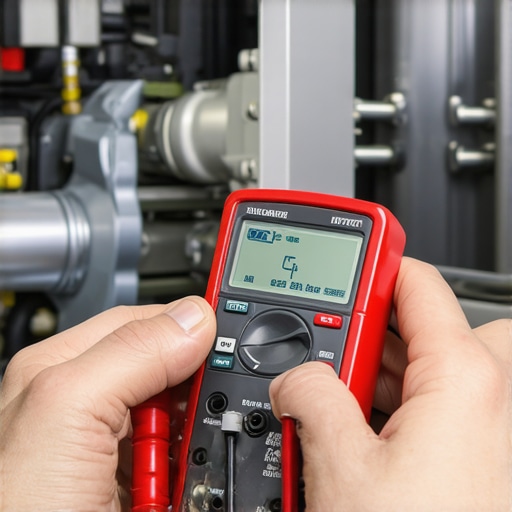 Many DIY enthusiasts believe that replacing faulty parts like water inlet valves or gaskets guarantees a quick fix, but in my experience, diagnosing appliance issues requires a nuanced approach. Common beliefs suggest that a single faulty part is always the culprit, yet appliances often have intertwined problems that mask their true source. For example, a leak during the rinse cycle might seem confined to a specific component, but sometimes the root lies elsewhere, such as in a clogged drain pump or improper leveling. Rushing to swap parts without comprehensive diagnostics can lead to wasted time and money, and even cause additional damage. Experts emphasize the importance of systematic testing—using tools like multimeters and diagnostic modes—to identify faults accurately. Relying solely on visual inspection or symptom-based guesses is a trap many fall into. Instead, leverage resources like this detailed guide to understand how multiple components interact during various cycles. An advanced mistake is assuming newer models have fewer problems; however, sophisticated appliances often feature multi-layered electronic controls that are susceptible to subtle faults not obvious to the layperson. A misdiagnosed control board issue, for instance, can manifest as leaks or inconsistent operation, leading to unnecessary part replacements if not properly checked. Proper diagnostics involve understanding the appliance’s operational nuances, such as the specific timing of sensor signals or the pressure differentials during cycles. Moreover, many individuals overlook the importance of routine maintenance, like cleaning spray arms and filters, which can prevent false fault indications. Ignoring these simple steps often results in misdiagnosis and needless repairs. Equip yourself with knowledge from trusted sources and avoid falling into common traps like replacing parts blindly or misinterpreting error codes that may have multiple potential causes. Remember, a systematic approach saves time, money, and frustration. Have you ever fallen into this trap? Let me know in the comments—your experiences can help others avoid the same mistakes.
Invest in Quality Diagnostic Equipment for Reliable Troubleshooting
High-quality multimeters are indispensable for any serious DIYer or professional troubleshooting technician. Personally, I rely on a digital multimeter with auto-ranging capabilities, such as the Fluke 115, because it provides precise readings quickly and reduces guesswork during diagnostics. This tool allows me to test continuity and measure resistance accurately, helping to identify faulty heating elements or control board issues efficiently. Additionally, a reliable clamp meter can simplify testing of high-current circuits without disconnecting wires, providing safety and convenience. Over time, investing in these tools pays off by enabling quick, accurate diagnostics, ultimately extending the lifespan of your appliances and saving money on unnecessary part replacements.
Leverage Diagnostic Software for Advanced Appliance Monitoring
Modern appliances often feature diagnostic modes accessible through manufacturer-specific buttons or control panels. To utilize these effectively, I recommend downloading diagnostic software compatible with your appliances—such as the diagnostic mode guides found at this resource. These tools help interpret error codes and sensor readings, streamlining the troubleshooting process. For example, some dishwashers and ovens emit specific error signals when sensors or controllers are malfunctioning, which can be pinpointed precisely with software-assisted diagnostics. By routinely running these tests, you can detect problems early, schedule targeted repairs, and prevent small issues from escalating into costly failures.
Implement Routine Maintenance Checks to Prevent Major Failures
Regular inspections and cleaning are vital for long-term appliance health. For dishwashers, this means checking spray arms for clogs using a toothbrush and vinegar soak, and replacing worn door gaskets before leaks occur. Using a service like this guide helps me stay proactive, preventing issues from developing into emergencies. Similarly, ovens benefit from periodic testing of temperature sensors with a multimeter, as outlined in this article. Consistent maintenance reduces the likelihood of breakdowns, improves efficiency, and extends appliance service life.
Scaling Up: Tools I Use for Systematic Repairs
When tackling larger projects or multiple appliances, I recommend organizing your toolkit with stackable plastic containers to keep parts sorted and accessible. Quality socket sets, precision screwdrivers, and a soldering iron for minor electronic repairs are also part of my essential kit. For complex diagnostics, I use software such as appliance-specific firmware testers, which are invaluable for modern units with integrated control modules. According to appliance repair expert this detailed guide, having these tools ready can significantly reduce repair time and increase success rates.
Where Do You Want to Improve Next?
Maintaining appliances over time isn’t just about having the right tools; it’s about developing a systematic approach. To get started, try calibrating your oven’s temperature sensor using the method in this tutorial. Simple as it may sound, this small step can dramatically improve baking accuracy and energy efficiency. By integrating diagnostic routines and possessing the right equipment, you ensure your appliances remain reliable for years to come. Remember, proactive maintenance is your best defense against unexpected breakdowns—so invest wisely and stay curious about new tech developments in appliance diagnostics.
What I Didn’t Expect About Diagnosing Persistent Leaks
One of the hardest lessons I learned was that appliances often hide their true issues beneath a veneer of simple symptoms. Just replacing a gasket or valve isn’t always the fix; sometimes, the root cause is deeper—like unseen cracks or subtle control failures. It taught me to approach each leak with patience and a willingness to think beyond the obvious, embracing a holistic diagnostic mindset rather than relying solely on quick fixes.
This is Why I Trust Comprehensive Diagnostic Guides
Resources like this guide have become lifelines in my repair toolkit. They provide systematic approaches that prevent guesswork and save time and money. Trustworthy software and detailed troubleshooting flows help me confidently identify the actual source, whether it’s a stubborn check valve or a malfunctioning control board, rather than just swapping parts blindly.
What Fixing My Leaks Taught Me About Safety and Persistence
Working with water leaks isn’t just about fixing a machine—it’s about safeguarding your home. Properly diagnosing faults, turning off water supply before repairs, and testing with the right tools can prevent bigger hazards. Each leak became a mini-lesson in patience, precision, and thoroughness, which transformed my approach from reckless trial-and-error to thoughtful diagnostics.
The Small Details That Make a Big Difference
Finally, paying attention to minor clues, like subtle water pooling or gear tension, often revealed hidden problems. Over time, I realized that meticulous inspection and keeping a repair journal sharpened my skills, making each successive fix smoother and more reliable. These small habits accumulated into a deep understanding of appliance behavior, empowering me to troubleshoot with confidence instead of guesswork.
My Essential Toolkit for Dishwasher and Oven Troubleshooting
Investing in quality tools like a reliable multimeter (I recommend the Fluke 115) and diagnostic software has revolutionized how I approach repair jobs. These tools help me pinpoint faults accurately, avoiding unnecessary part replacements. Additionally, keeping a magnetic parts organizer and reference manuals nearby streamlines the entire process, making repairs more efficient and less frustrating.
Find Your Own Path for Better Appliance Care
Remember, mastering appliance diagnostics isn’t about memorizing every fix but cultivating curiosity and patience. Explore resources, experiment cautiously, and learn from each repair. Over time, you’ll develop an instinct for what needs attention—saving you money and giving peace of mind. So, what new diagnostic skill will you try next? Share your journey below, and let’s grow together!