Ever had that sinking feeling when your oven suddenly shuts off mid-bake, leaving you puzzled and a bit frustrated? I remember the first time my oven overheated unexpectedly, and I panicked, thinking I’d have to call in an expensive technician. But after some digging, I discovered a simple yet critical step I was missing: testing the thermal switch for continuity. It’s a game-changer, and I want to share that lightbulb moment with you today.
The Hidden Culprit Behind Oven Overheats and Shutdowns
Ovens are often designed with safety features—thermal switches that trip when temperatures spike too high. But here’s the kicker: sometimes, these switches fail to reset properly after an overheat, causing the oven to refuse to turn back on. That’s where testing for continuity becomes essential. My early mistake was assuming that if the oven *looked* fine on the outside, the internal parts were okay. Turns out, a switch can look perfect yet be faulty internally, blocking the current and preventing the oven from working. According to appliance repair experts, testing for electrical continuity with a multimeter isn’t just a good idea—it’s a necessary step in diagnosing oven problems accurately (source).
Is Testing a Thermal Switch Actually Worth the Hype?
I used to think that testing was overkill, especially if the switch looked intact. But I learned that ignoring this step can lead to more frustration down the line. A faulty thermal switch can fool you into changing unrelated parts, wasting time and money. By learning to check that tiny component for proper continuity, I saved myself a lot of hassle and kept my oven safely running. So, have you ever faced an oven that just won’t heat again after overheating? If not, chances are, you might sooner or later. Testing the thermal switch is a straightforward, quick, and reliable method to diagnose whether your oven’s safety cut-off is still functional or needs replacement.
Now, let’s dive into exactly how to test that switch step-by-step, so you can fix your oven or at least know when it’s time to call in the pros. Ready? Your oven’s health might depend on it.
.
Locate the Thermal Switch
First, unplug your oven and move it to access the back panel or control area where the thermal switch is mounted. Usually, this tiny component is attached near the heating elements or safety cutoff points. Use a flashlight if needed to spot it clearly. Remember, safety is paramount, so ensure the appliance is disconnected from power before proceeding.
Remove the Switch with Precision
Carefully disconnect any wires connected to the thermal switch, noting their positions for reassembly. Use a screwdriver to detach the switch if it’s secured with screws. Handle all parts gently to avoid damaging delicate wiring or connectors. It’s similar to removing a fuse in your car—precision prevents accidental damage.
Set Up Your Multimeter Correctly
Configure your multimeter to measure continuity or resistance (ohms). For most tests, continuity mode is preferable—if your device beeps, the circuit is complete; if not, the circuit is open. Think of it like checking if a water pipe is blocked: continuity indicates a clear path, resistance shows how easily current flows.
Test the Switch for Continuity
Hold the multimeter’s probes against the switch’s terminals, ensuring good contact. Press the switch button or operate the mechanical part gently if it has one. If the multimeter beeps or shows a low resistance value, the switch is good. If there’s no beep or it reads infinite resistance, the switch is faulty and needs replacing. This step is straightforward but crucial, akin to testing if a doorbell button is working before replacing the entire unit.
Reassemble and Verify
After testing, reconnect the wires to the switch, securing them firmly. Mount the switch back onto its original position, then restore power and turn on the oven. Observe if the oven heats properly or if previous shutdown issues persist. If the switch was defective, a simple replacement can restore safety and functionality. I recall replacing mine after an accidental overheat burned out the component—it was messy but rewarding. For detailed guidance on parts, check out this resource to prevent future mishaps.
While many DIY enthusiasts and even professionals stick to basic diagnostic steps, there’s a wealth of subtle nuances that can make or break your repair success. A common misconception is the belief that parts like thermal switches or heating elements are either functional or faulty based solely on external appearance or simple continuity tests. However, the reality is far more complex; internal mechanisms can fail in ways that evade straightforward diagnostics, especially when heat sensors and control boards become involved.
One prevalent myth is that replacing a visibly burnt or corroded part guarantees resolution. In truth, these symptoms often stem from secondary faults or misinterpretations. For instance, a thermal cut-off might seem defective when, in fact, the root cause is a miswired sensor or a failing control relay. Experts recommend combining electrical testing with contextual troubleshooting—examining wiring diagrams, checking voltage patterns, and inspecting for hidden corrosion.
Another advanced mistake is overlooking the importance of verifying the entire diagnostic chain. For example, an oven that doesn’t heat might have a perfectly good heating element but a failed relay on the control board. Without a comprehensive diagnosis, you risk replacing parts unnecessarily. For deeper insights into these hidden faults, visit this guide.
Why do some faults seem intermittent or hard to reproduce, and how can you detect them?
Intermittent faults often trap even seasoned technicians because they can be caused by fluctuating voltages, cold solder joints, or failing relays that only act up under specific conditions. For example, a control board relay might work perfectly at room temperature but fail when heated during operation. To uncover these elusive issues, using thermal imaging cameras or data logging devices can be invaluable—they reveal temperature hotspots or voltage dips that static tests miss. Such tools transform guesswork into measurable data, leading to more effective fixes.
Ignoring these nuanced factors can prolong repair times or result in recurring problems. As pointed out by appliance repair researchers, understanding the interplay between electrical, mechanical, and control systems is essential for accurate diagnostics (source: this comprehensive source). Whether you’re repairing a dishwasher or an oven, adopting this holistic approach elevates your troubleshooting skills beyond the basics.
Remember, every appliance has its quirks, and a superficial diagnosis often misses the subtle signals pointing towards the true fault. Do you recall a repair where thinking outside the box saved the day? Share your experience in the comments below! Staying aware of these advanced nuances not only saves time and money but also sharpens your repair proficiency.
Invest in Quality Diagnostics Equipment
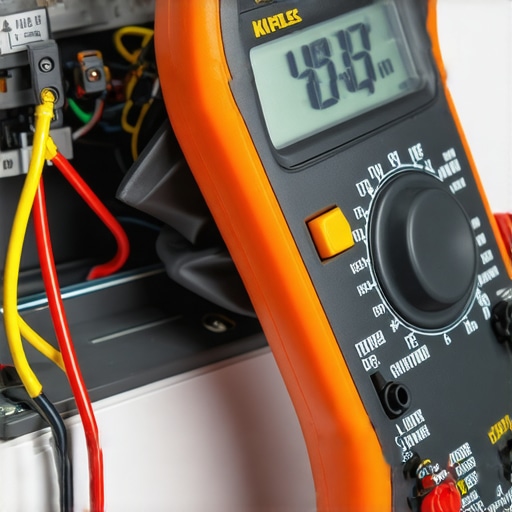
One of the most valuable tools I rely on is a high-quality digital multimeter. I personally use a Fluke 117 because of its precision and durability, which is crucial when testing components like thermal switches or heating elements. A multimeter allows me to quickly verify continuity and resistance, cutting down diagnostic time significantly. For instance, when troubleshooting a dishwasher that refuses to drain, I test the drain pump’s relay coil for proper resistance, ensuring it’s not a wiring issue. Remember, consistent testing with reliable tools prevents unnecessary replacements and extends appliance lifespan.
Leverage Software and Apps for Accurate Troubleshooting
Modern diagnostic software, like appliance-specific apps or even virtual wiring diagrams, provide real-time data and helpful tips. I recommend using detailed troubleshooting guides to cross-reference symptoms with common faults. For example, correlating error codes from your oven’s control board with diagnostic charts can pinpoint issues faster. These digital resources, combined with your multimeter, create a formidable diagnostic toolkit that saves time and money.
Keep Your Tools Calibrated and Maintained
Regular calibration of your multimeter ensures accuracy over time. I personally calibrate mine annually using a calibration standard to avoid slipping readings—crucial when testing sensitive components like oven sensors. Additionally, maintaining clean probes and storing your tools properly prevents corrosion and damage. Well-maintained equipment not only provides reliable data but also prolongs tool life, making repairs more predictable and less frustrating.
The Future of Repair: Smart Diagnostics and Automation
Looking ahead, I predict a greater integration of smart diagnostics—wireless sensors that monitor appliance health and communicate with mobile apps. This technology could automatically alert homeowners or technicians of developing faults before failure occurs. Similarly, AI-driven troubleshooting may become standard, offering step-by-step repair guides tailored to your specific model. Embracing these innovations now can prepare you for a more efficient repair experience and reduce downtime.
How do I maintain my appliance diagnostics over time?
Consistently update your diagnostic tools’ firmware, keep detailed logs of repairs, and familiarize yourself with the latest troubleshooting techniques. Periodically review appliance manuals and online resources to stay ahead of common faults and solutions. Engaging with online repair communities can also provide fresh insights and tips. By actively maintaining your diagnostic arsenal, you ensure faster, more accurate repairs, ultimately extending your appliances’ life and performance.
Now, I challenge you to try calibrating your multimeter before your next repair. Accurate readings can make all the difference in diagnosing a faulty thermal switch or heating element. Have you used any advanced tools or techniques recently? Share your experience in the comments or reach out via our contact page for personalized advice.
The Hardest Lesson I Learned About Oven Repair
One of the most valuable insights I gained was understanding that even seemingly minor components like thermal switches can be the root cause of significant issues. I once replaced a heating element, only to find the oven still refused to heat. It was a sobering realization that testing for internal faults like continuity in the thermal switch could have saved me time and resources. That moment taught me to dig deeper and not rely solely on external appearances or assumptions.
My Go-To Tools That Elevated My Diagnoses
Over time, I discovered that investing in quality diagnostic tools—especially a reliable multimeter—transformed the way I approach oven repairs. Brands like Fluke offer precision that prevents misreads, which is crucial when testing delicate parts such as relays or switches. Pairing this with detailed wiring diagrams from trusted sources allows me to spot faults quickly. These tools have become indispensable in my toolkit, giving me confidence in every diagnosis I make.
The Surprising Truth About Common Oven Myths
A mistake I often see homeowners make is assuming that if an oven’s outer shell looks intact, the internal components must be fine. Conversely, I learned that internal faults can be hidden behind a perfectly clean exterior—so don’t be fooled. Additionally, there’s a misconception that thermal switches can only fail visibly; in reality, internal breakdowns can be silent but equally disruptive. Recognizing these nuances has helped me avoid unnecessary replacements and focus on the true causes of faults.
Where I Turn When I Need Expert Advice
For comprehensive troubleshooting, I trust resources like this guide on appliance diagnostics. It offers detailed flowcharts and part-specific advice that are invaluable for both DIYers and professionals. Additionally, engaging with online communities has allowed me to share experiences and uncover solutions I might not have considered alone. These curated resources and networks continually sharpen my repair skills and keep me updated on the latest techniques.
Believing in Your Ability to Make the Fix
Ultimately, mastering oven diagnostics starts with confidence. Remember, every expert was once a beginner who dared to pull apart a machine. With patience, the right tools, and credible sources, you can troubleshoot effectively and avoid costly replacements. So, next time your oven acts up, step back, test that thermal switch, and trust in your growing expertise. Your kitchen’s heartbeat depends on it—are you ready to take the first step?
Have you ever struggled with pinpointing a faulty component in your oven? Share your experience below—I’d love to hear how you tackled the challenge!
,