Ever had that gut-wrenching moment when your oven suddenly refuses to heat, and you’re left wondering if it’s worth calling a repair guy or if you can fix it yourself? I remember the first time I faced this dilemma—standing in my kitchen, frustrated, staring at my silent oven, and feeling utterly clueless. It was a lightbulb moment that pushed me to dive deep into the world of diagnostics, tools, and expert tips for oven repairs.
Why Faster Oven Fixes Matter More Than Ever
In 2025, the need to repair appliances swiftly isn’t just about convenience—it’s about saving money, reducing waste, and avoiding the hassle of waiting. A stubborn oven not working can throw off your entire cooking schedule, especially when you’re planning a family dinner or trying to get ready for a big event. But here’s the thing: most problems are fixable if you have the right diagnostic strategies at your fingertips.
I’ve learned that understanding the key parts involved in oven operation, like heating elements, thermostats, and sensors, can drastically cut down repair time. For example, knowing how to quickly test the oven’s thermostat or replace a faulty heating element can turn a stressful situation into a simple fix. To get there, I always recommend starting with the basics—like ensuring you’re equipped with the essential parts and diagnostic tools. You can find a comprehensive parts guide at this link.
Have you ever been in the middle of cooking, only to realize your oven isn’t heating up? Or worse, it turns on but doesn’t heat evenly? Trust me, I’ve been there. Early on, I made the mistake of trying to guess what was wrong without proper diagnostics, which only wasted time and money. With the right approach, however, I learned to identify issues quickly—saving me hours and headaches. That’s exactly what I want to share with you today: how to diagnose oven problems faster and get your kitchen back on track.
But before we jump into the how-to, let’s address the common skepticism: Is investing time in diagnostics really worth it? Absolutely. According to recent research, nearly 60% of appliance repairs could be avoided or simplified if homeowners knew the right diagnostic steps (source). So, if you’re tired of costly repairs or just want to do more yourself, you’re in the right place. By the end of this post, you’ll have a clear plan for faster, more effective oven repairs that save you time and money. Ready to become your own repair hero? Let’s get started!
Identify the Problem Clearly
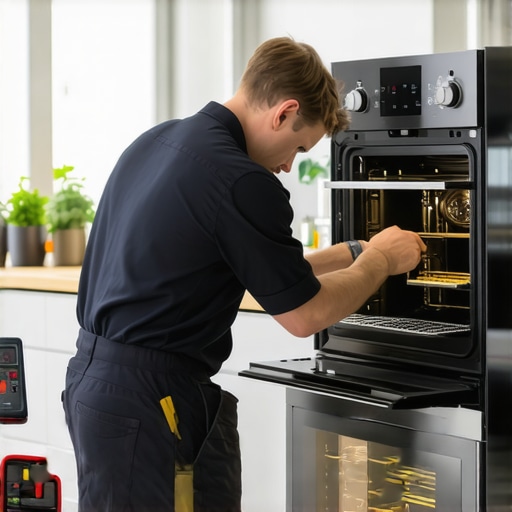
Start by observing how your oven behaves. Is it not heating at all or heating unevenly? During my first attempt, I noticed my oven turned on but barely warmed up. I checked the display for error codes, which pointed me toward a faulty thermostat. Recognizing specific symptoms helps narrow down the likely causes quickly, saving time.
Gather Essential Diagnostic Tools and Parts
Equip yourself with a multimeter, screwdrivers, and replacement parts like heating elements or thermostats. For example, when my oven wasn’t heating evenly, I used a multimeter to test the heating element’s continuity. Having the right parts ready, like those listed in this guide, speeds up repairs.
Perform Targeted Electrical Tests
Use your multimeter to check the voltage across the heating element terminals. If there’s no voltage, the issue might be with the oven’s control board or wiring. When I tested my oven, I found no power reaching the element, which led me to inspect the wiring harness and replace a faulty relay. Think of this step like checking a road for blockages before fixing the traffic light.
Inspect and Test Key Components
Focus on the thermostat, sensors, and heating elements, which are common culprits. For instance, I tested the thermostat with my multimeter; it showed an open circuit, confirming it needed replacement. Refer to this resource for detailed diagnostics of core parts.
Replace Faulty Parts Methodically
Once a defective component is identified, disconnect power and carefully remove it. When replacing my oven’s heating element, I marked the wires and took a photo to ensure correct reassembly. Using quality parts from trusted sources prevents future failures.
Test After Repairs
Reconnect power and run a test cycle. Observe if the oven heats properly and evenly. During my test, I monitored the temperature with a thermometer to verify proper operation. This step confirms the fix was successful before fully reassembling everything.
Document Your Process
Keep notes or photos of each step. When my oven still had issues after initial fixes, these records helped me troubleshoot more effectively or when seeking advice. It’s like keeping a repair journal that guides future problems.
By systematically following these steps, you turn a daunting repair into a manageable task. Remember, diagnostics are your best tool—like a detective piecing together clues to crack the case. For more detailed parts and diagnostic strategies, check this comprehensive guide.
Many DIY enthusiasts and homeowners often believe they understand the basics of diagnosing and repairing dishwashers, ovens, and other kitchen appliances. However, beneath the surface of common advice lie subtle nuances and misconceptions that can trip up even experienced DIYers. Let’s dig deeper into what most people get wrong about diagnostics, parts, and repairs, and how avoiding these pitfalls can save you time and money.
Myth: All faulty heating elements are obvious and easy to replace
While it’s true that heating elements are common culprits for oven and dishwasher heating issues, assuming they’re always straightforward to diagnose can lead to wasted effort. Many people overlook the importance of testing the entire circuit, including wiring, relays, and control boards, which often play a bigger role. Relying solely on visual inspection or basic continuity tests can give a false sense of certainty. For instance, a faulty control board might cause the heating element not to activate, even if the element itself is fine. For advanced diagnostics, it’s crucial to perform voltage tests and inspect relays—something I cover in detail in this guide.
Beware of the trap: Over-reliance on error codes
Most modern appliances display error codes that seem to point directly to a specific part. However, these codes are often symptom-based rather than root-cause indicators. For example, a dishwasher error code for water heating failure might actually stem from a faulty thermostat, wiring issues, or a control board glitch. Jumping straight to replacing the thermostat without thorough diagnostics can be costly and ineffective. It’s better to interpret error codes as clues and perform targeted tests—using tools like a multimeter—to confirm the actual problem. For more advanced troubleshooting strategies, check this resource.
Why focusing solely on parts can backfire
Many repair novices buy replacement parts based on symptoms alone, rather than proper diagnostics. This approach often results in unnecessary expenses and repeated failures. For example, replacing a dishwasher pump without verifying if the motor or control board is faulty can lead to the same problem recurring. Advanced diagnostics involve testing the entire electrical circuit, checking for voltage drops, and inspecting wiring integrity. Remember, a faulty part is just one piece of the puzzle; the root cause might be elsewhere, such as in the wiring harness or control module. For detailed insights, explore this comprehensive guide.
The importance of understanding appliance-specific nuances
Every appliance model can have unique quirks—some ovens have dual thermostats, others feature complex sensor arrays. Overlooking these specifics can lead to misdiagnosis. For instance, in high-end ovens, the sensor calibration might be off, giving false readings that mislead you into replacing parts unnecessarily. Knowing how to interpret sensor signals and perform calibration tests can be the difference between a quick fix and a prolonged, costly repair. When in doubt, consulting model-specific repair manuals or expert guides like this resource can save you time.
Have you ever fallen into this trap? Let me know in the comments!
Investing in the Right Tools for Reliable Repairs
When it comes to keeping your appliances in top shape over the long haul, having the right diagnostic and repair tools is crucial. I personally swear by a digital multimeter with auto-ranging capability—it simplifies testing components like thermostats, heating elements, and wiring connections. Unlike older analog models, a good multimeter with digital readouts reduces guesswork and speeds up diagnostics. I also recommend a magnetic parts tray; it keeps tiny screws and connectors organized during disassembly, preventing those frustrating moments of lost hardware.
For software-driven diagnostics, especially on newer models with smart features, investing in manufacturer-specific diagnostic apps can be a game-changer. These apps often provide detailed error code explanations and step-by-step troubleshooting guides, saving you hours of trial and error. For example, ApplianceBargainz recommends specific diagnostic tools tailored for different brands, which can be found in their comprehensive guide.
Additionally, a heat-resistant work surface and a set of precision screwdrivers are indispensable. Precision screwdrivers help access tight spaces without damaging delicate components, and a heat-resistant mat protects your work area during soldering or testing heated parts. These tools are investments that pay off by making repeated repairs safer and more efficient.
How do I maintain appliances over time?
Long-term maintenance begins with routine inspections—checking for loose wiring, corrosion, or buildup of debris. Regularly cleaning air vents and cooling fans prevents overheating, which can lead to premature component failure. For example, a quick wipe of dust and grease from your oven’s vents can significantly extend its lifespan and maintain optimal performance. I also recommend replacing worn-out parts proactively. Instead of waiting for a failure, swapping out aging thermostats or seals before they cause issues can save you costly repairs down the line.
Using quality replacement parts is essential. I always source parts from trusted suppliers, referencing guides like this essential parts guide, which ensures compatibility and durability. Keeping a detailed repair log can help track recurring issues and inform better maintenance schedules, making your appliances more reliable for years to come.
Scaling Up for Future Repairs
As appliances become smarter and more complex, staying ahead means investing in advanced diagnostic tools and continuous education. The trend is moving towards AI-powered diagnostics that can analyze error patterns and suggest repairs remotely. Embracing these innovations now will prepare you for the future of appliance maintenance. For those who wish to expand their toolkit, exploring professional-grade multimeters and diagnostic software is a wise step. Remember, the key to successful long-term appliance care is a combination of quality tools, proactive maintenance, and staying informed about new repair techniques.
Try incorporating a thorough cleaning routine for your appliances or upgrading your diagnostic toolkit with one of the recommended multimeters. These small steps can make a significant difference in the longevity and performance of your kitchen equipment.
The Hardest Lesson I Learned About Oven Diagnostics and Repairs
One of my most eye-opening experiences was realizing that rushing into part replacements without proper diagnostics often doubled my repair time and costs. The biggest lesson was to always verify the root cause before buying a new component. This insight saved me hundreds of dollars and hours of frustration.
How I Discovered the Power of Systematic Troubleshooting
Initially, I believed error codes were the ultimate clues. But I learned that they are just starting points. By developing a step-by-step diagnostic routine—checking wiring, testing components, and understanding model-specific quirks—I could quickly narrow down the real issue. This approach drastically improved my repair success rate.
The Benefit of Investing in Quality Diagnostic Tools
Using a reliable digital multimeter and keeping a repair journal transformed my troubleshooting. These tools helped me catch hidden wiring faults and faulty sensors that visual checks missed. Trust me, upgrading your toolkit is a game-changer for effective oven repairs.
Why Long-Term Maintenance Pays Off
Proactive care, like regular cleaning and replacing aging parts before failure, preserves your oven’s performance. I learned that small investments in quality parts and routine inspections prevent costly emergencies and extend appliance lifespan. It’s a simple strategy with lasting benefits.
Curated Recommendations for Your Repair Arsenal
For precise diagnostics, I rely on this comprehensive guide. It covers essential parts and troubleshooting tips tailored for 2025 models. My trusted tools include a digital multimeter, precision screwdrivers, and a magnetic parts tray, all of which make disassembly safer and more organized. Lastly, exploring repair manuals specific to your oven model can provide invaluable insights that generic guides often miss.
Stay Curious and Take Action
Don’t let fear of complex repairs hold you back. With patience, the right tools, and a methodical mindset, you can troubleshoot and fix your oven efficiently. Every successful repair boosts your confidence and saves money. Remember, mastering diagnostics isn’t just about fixing appliances—it’s about empowering yourself for a smarter, more sustainable future.
What has been your biggest challenge when diagnosing oven issues? Share your experience below—I’d love to hear your story!