My Journey into Oven Repair: A Personal Tale
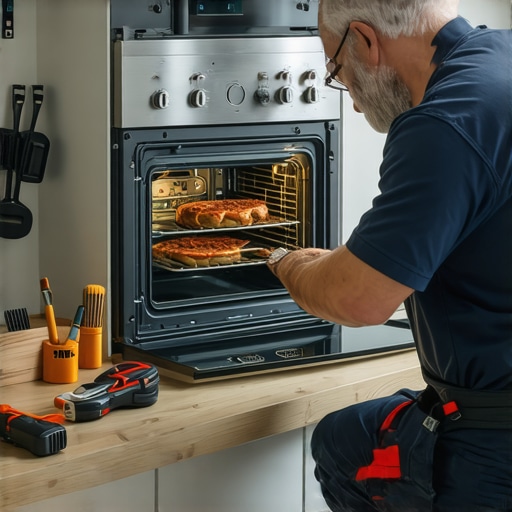
Recently, my trusty oven decided to act up just as I was planning a big family dinner. I vividly remember the moment I realized something was wrong: the oven wouldn’t heat properly, and I was left scrambling. That experience ignited my curiosity about understanding oven diagnostics and repair tips. Over the years, I’ve learned that tackling oven issues can be surprisingly straightforward if you follow the right steps and have a basic understanding of common problems.
Understanding Your Oven’s Symptoms Before You Dive In
One of the first lessons I picked up is the importance of accurately diagnosing the problem. For example, if your oven isn’t heating at all, it might be due to a faulty heating element or a blown thermal fuse. On the other hand, uneven cooking could point to calibration issues or a malfunctioning thermostat. Recognizing these signs early can save you time and money. I often refer to resources like oven troubleshooting guides for reliable diagnostics.
My Favorite Tools and Techniques for Quick Fixes
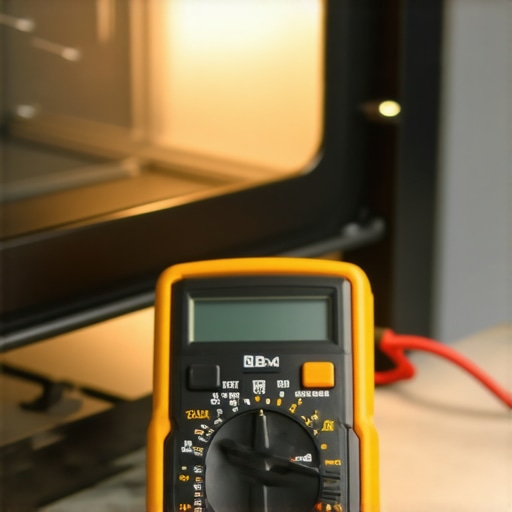
When I started fixing my oven, I found that having the right tools makes all the difference. A multimeter is essential for testing electrical components such as heating elements and thermostats. I also keep a screwdriver set handy for removing panels and accessing internal parts. One technique I swear by is checking the oven’s control board for any visible signs of damage or burnt components. Sometimes, a simple replacement of a faulty part can restore your oven’s functionality without the need for professional help. For detailed part replacements, I often consult diagnostics guides.
What’s the Most Common Oven Problem I’ve Fixed?
Without a doubt, the most common issue I’ve encountered is a non-heating oven caused by a broken heating element. Replacing it is surprisingly simple—most models have accessible heating elements that can be swapped out within minutes. I remember watching a helpful tutorial on YouTube that made this process even easier. Additionally, ensuring your oven’s safety features are working properly is crucial, so don’t forget to inspect the thermal fuse or safety thermostat if problems persist. For comprehensive tips, check out the top repair tips.
How Do I Know When It’s Time to Call a Professional?
It’s a fair question—sometimes, troubleshooting can reveal that the issue is more complex than it appears. If you’ve tested the main components and the oven still doesn’t work, or if you’re uncomfortable working with electrical parts, it’s best to seek professional help. Remember, safety always comes first. When in doubt, consulting an expert or visiting a reliable resource like professional diagnostics can save you from unnecessary risks.
If you’ve had similar experiences or tips to share, please leave a comment below! I love exchanging ideas with fellow DIY enthusiasts. And for those eager to learn more about appliance repairs, exploring comprehensive guides can be incredibly rewarding.
Unveiling the Hidden Signs of Oven Troubles: What the Symptoms Really Mean
As an avid DIYer and appliance repair enthusiast, I’ve learned that understanding the subtle signs your oven gives can make all the difference in diagnosing issues early. For instance, if your oven heats unevenly, it might be a sign of a malfunctioning temperature sensor or calibration problem. Recognizing these clues requires a keen eye and some basic knowledge about oven components. I recommend consulting detailed diagnostics guides like diagnostics guides to interpret these symptoms accurately.
Tools of the Trade: Essential Equipment for Reliable Repairs
Equipping yourself with the right tools can turn a daunting repair into a manageable project. A multimeter is indispensable for testing electrical parts such as heating elements and thermostats. Additionally, a good screwdriver set and a pair of needle-nose pliers are often needed to access internal components. When diagnosing complex issues, I also check the control board for visible damage. Sometimes, a simple part replacement—like a faulty thermal fuse—can restore your oven’s performance. For in-depth part replacement strategies, I often review diagnostics guides.
Most Common Oven Failures and How to Fix Them
From my experience, the most frequent problem is a non-heating oven caused by a broken heating element. Replacing it is surprisingly straightforward—most models have accessible heating elements that can be swapped within minutes. Watching tutorial videos can make this process even easier. Additionally, inspecting the thermal fuse or safety thermostat is crucial if the oven refuses to heat after replacing the element. For comprehensive troubleshooting steps, check out the top repair tips.

How Do I Know When It’s Time to Call a Professional?
While many repairs are manageable for DIY enthusiasts, some issues require professional expertise. If testing components like the control board, sensors, and heating elements still doesn’t resolve the problem, or if you feel uncomfortable working with electrical parts, it’s wise to seek professional help. Remember, safety should always be your priority. Consulting experts or trusted resources such as professional diagnostics can prevent further damage and ensure a safe repair process.
Could There Be Underlying Issues That Experts Know to Check?
Absolutely. Sometimes, the root cause isn’t immediately obvious. For example, a faulty control board might cause inconsistent heating or complete failure, but diagnosing this requires understanding the complex circuitry involved. Additionally, issues like faulty relays or worn-out door switches can also cause problems that mimic more common faults. An experienced technician often uses advanced diagnostic tools and knowledge of appliance circuitry to pinpoint these elusive problems. For those interested in deepening their understanding, exploring resources like diagnostic guides offers invaluable insights.
If you’ve encountered unique oven issues or have troubleshooting tips, I invite you to share your experiences below. Also, for those eager to expand their repair skills, exploring comprehensive repair guides can be a game-changer in maintaining your appliances.
Beyond the Basics: Recognizing Subtle Signs of Oven Troubles
As I’ve gained more experience with oven repairs, I’ve come to appreciate the importance of paying close attention to the subtle clues that an appliance gives. Sometimes, the most telling signs aren’t obvious—like a slight delay in preheating or faint unusual sounds during operation. These nuances often point to underlying issues that, if caught early, can prevent more serious damage. For instance, a slow preheat might indicate a failing thermostat or a partially broken heating element, which could be diagnosed with a multimeter test as detailed in diagnostics guides. Recognizing these signs requires a blend of patience and familiarity with your oven’s normal behavior, turning troubleshooting into an insightful puzzle rather than a frustrating chore.
Refining Your Diagnostic Skills with Advanced Techniques
Initially, I relied on basic visual inspections and simple tests, but over time, I’ve learned that more sophisticated techniques can significantly improve repair accuracy. Using a multimeter to check continuity and resistance in components like heating elements and thermostats is just the start. I also employ infrared thermometers to verify actual temperatures versus the displayed setting, revealing calibration issues or sensor malfunctions. Additionally, inspecting the control board for signs of burn marks or damaged circuitry can uncover faults that aren’t immediately visible but cause erratic oven behavior. For those interested in deepening their diagnostic toolkit, exploring diagnostics guides provides invaluable insights into complex troubleshooting.
How Do I Differentiate Between a Faulty Thermostat and a Control Board Issue?
This is a question I often pondered during my early repair days. Both components can cause similar symptoms like inconsistent temperatures or failure to heat. To tell them apart, I’ve found that testing the thermostat’s resistance with a multimeter—usually reading near zero when cold and open when heated—can pinpoint a faulty part. Conversely, if the thermostat tests fine but the oven still misbehaves, the control board might be the culprit, especially if there are burn marks or damaged traces. Sometimes, the issue lies in relays or sensor connections, which require a more detailed circuit analysis. Consulting authoritative resources like repair tips can help clarify these diagnostic pathways and guide appropriate repairs.
What Are the Most Overlooked Components That Can Cause Oven Failures?
In my journey, I’ve learned that many DIY enthusiasts overlook components like door switches, thermal fuses, or relays, which can cause the oven to refuse to heat or turn on entirely. For example, a worn-out door switch might prevent the oven from starting as a safety measure, but it’s often mistaken for a faulty heating element. Similarly, a blown thermal fuse can cut power to the heating circuit unexpectedly. Diagnosing these issues involves simple continuity tests, but their importance is often underestimated. To explore these components in detail, I recommend reviewing diagnostics guides, which highlight how to identify and replace these critical parts efficiently.

Are There Hidden Underlying Problems That Require Professional Expertise?
Absolutely. Sometimes, what appears to be a straightforward fix is actually a symptom of a deeper, more complex problem. For instance, intermittent heating or sudden oven shutdowns can stem from control board failures, faulty relays, or even wiring issues that are beyond typical DIY scope. Diagnosing these hidden problems often requires specialized tools like oscilloscopes or advanced circuit testers, along with a solid understanding of appliance circuitry—skills that professionals develop over years. When faced with persistent or inexplicable issues, consulting an expert or referring to comprehensive diagnostic resources like professional diagnostics can save you time and prevent further damage. Remember, safety and precision should always guide your repair decisions, especially with high-voltage appliances like ovens.
If you’ve encountered complex oven problems or discovered effective troubleshooting strategies, I encourage you to share your insights in the comments below. Learning from each other’s experiences deepens our collective understanding and makes DIY repairs more rewarding. For those eager to expand their skills, exploring detailed repair guides can unlock new levels of confidence and proficiency in appliance maintenance.
The Subtle Clues That Unveil Hidden Oven Problems
Over the years, my journey into oven repair has taught me that the most insidious issues often manifest through subtle symptoms. For instance, a slight delay in preheating, inconsistent temperature readings, or faint electrical buzzing can be early warning signs of deeper mechanical or electronic failures. Recognizing these nuances requires a heightened sense of observation and familiarity with the typical behavior of your appliance. I’ve found that maintaining a detailed log of preheat times and temperature fluctuations can aid in identifying patterns that point to specific faults, such as a failing sensor or a worn-out relay. Consulting detailed diagnostics guides, like diagnostics guides, enhances our ability to interpret these subtle clues effectively.
Employing Advanced Diagnostic Techniques for Precision Repairs
Initially, my troubleshooting relied on basic visual inspections and multimeter tests. However, I gradually adopted more sophisticated methods that significantly improved my diagnostic accuracy. Using infrared thermometers, I measure the actual temperature versus the oven’s display to detect calibration issues. Additionally, inspecting the control board for burn marks or damaged traces requires a keen eye and sometimes a magnifying glass. For complex faults, I utilize circuit testers and sometimes an oscilloscope to analyze the control signals and identify intermittent faults that aren’t visible to the naked eye. These advanced techniques, coupled with a thorough understanding of appliance circuitry, allow for precise pinpointing of issues. For those seeking to deepen their diagnostic skills, diagnostics guides provide invaluable insights into complex troubleshooting workflows.
Distinguishing Between Thermostat and Control Board Failures: A Diagnostic Deep Dive
This is a question I frequently encountered during my DIY repairs. Both components—thermostats and control boards—can produce similar symptoms like inconsistent temperatures or complete failure to heat. To differentiate, I test the thermostat’s resistance with a multimeter, expecting near-zero readings when cold and an open circuit when heated. If the thermostat tests fine, yet the oven still misbehaves, the control board might be at fault—especially if visual inspection reveals burn marks, damaged relays, or worn-out solder joints. Sometimes, the issue lies in sensor wiring or relay contacts, which require detailed circuit analysis. Consulting comprehensive resources such as repair tips guides helps clarify these diagnostic pathways, enabling accurate repairs and preventing unnecessary replacements.
Engaging with the Community: Sharing Deep Insights and Personal Experiences
One of the most rewarding aspects of my repair journey has been engaging with a community of fellow enthusiasts. Sharing detailed diagnostic stories, innovative troubleshooting techniques, and nuanced experiences enriches our collective knowledge base. I encourage readers to contribute their own insights and ask questions—every shared experience can reveal new troubleshooting strategies. For instance, understanding how to interpret intermittent faults or subtle sensor discrepancies can be crucial. If you’ve discovered a particularly effective method or encountered a complex issue, I invite you to discuss it in the comments. Exploring detailed repair guides, such as diagnostics resources, can empower you to tackle even the most perplexing problems with confidence and precision.
Things I Wish I Knew Earlier (or You Might Find Surprising)
1. The Subtle Signs Matter
Early on, I underestimated how tiny clues like a slow preheat or faint buzzing could indicate bigger issues. Paying attention to these subtleties has saved me from costly repairs and frustration. Recognizing these signs requires patience and familiarity, but it’s worth the effort.
2. Not All Components Are Obvious
Components like door switches or thermal fuses often get overlooked, yet they can cause major problems. Learning to identify and test these parts with a multimeter has been a game-changer in my repair journey.
3. Advanced Tools Make a Difference
While basic testing is helpful, employing infrared thermometers or even oscilloscopes can reveal hidden faults. Over time, adopting these techniques has made troubleshooting more accurate and less stressful.
4. When to Seek Help
If you’re uncomfortable working with electrical parts or if simple tests don’t resolve the issue, knowing when to call a professional is crucial. Safety always comes first, and sometimes, expert diagnostics are the best investment.
5. Patience and Practice Are Key
Repairing appliances is as much about patience as it is about skill. The more you learn and practice, the more confident you become—turning frustrating problems into manageable projects.
Resources I’ve Come to Trust Over Time
- Appliance Repair Forums: An active community sharing real-world experiences and solutions. It’s like having a repair buddy at all times.
- Manufacturer’s Service Manuals: Official guides that provide detailed diagrams and troubleshooting steps, essential for complex issues.
- Diagnostic Guides from ApplianceBargainz: In-depth resources that break down common problems and solutions, which I’ve used frequently to improve my troubleshooting skills.
- YouTube Tutorials: Visual step-by-step guides that make complex repairs approachable, especially for beginners.
Parting Thoughts from My Perspective
Reflecting on my journey into oven repair, I realize how much patience, curiosity, and a few good tools can transform a daunting task into a rewarding experience. Understanding the subtle signs and knowing when to seek help are invaluable lessons that have saved me time and money. If you’re passionate about DIY repairs or just want to save some cash, exploring trusted resources like troubleshooting guides can empower you to tackle problems with confidence. Remember, every repair is a learning opportunity, and sharing your experiences helps build a stronger community. If this resonated with you, I’d love to hear your thoughts or tips—feel free to drop a comment below!”},
