My Unexpected Kitchen Wake-Up Call: When the Oven Stops Heating
One morning, I was eagerly preparing breakfast when suddenly, my oven refused to heat up. It was a frustrating experience, but it also sparked my curiosity about how oven repair diagnostics work. I realized that understanding the key parts involved in oven repairs can make troubleshooting much less daunting, and I want to share my journey and insights with you.
Deciphering the Common Culprits: The Heart of Oven Repair
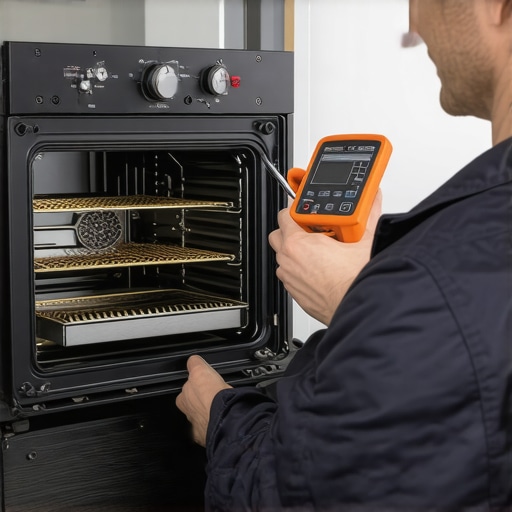
After some research and personal trial and error, I learned that the main components responsible for oven functionality include the heating element, thermostat, oven sensor, and control board. Each part plays a vital role, and diagnosing which one is causing the problem is crucial for a quick fix. For example, if your oven isn’t heating properly, it might be the heating element or a faulty thermostat. I found that testing these parts with a multimeter can save you time and money, and I recommend checking out the essential parts guide for detailed diagnostics.
Personal Tips for Fast and Reliable Oven Fixes
One tip I picked up is to always unplug the appliance before inspecting or replacing parts. Safety first! Also, keeping a repair log helps identify recurring issues and patterns. When I replaced my broken heating element, I realized that using genuine replacement parts, like those found in reliable sources, ensures longer-lasting repairs. Don’t forget to consult the user manual for specific troubleshooting steps, or visit trusted sites like top oven repair tips.
What If My Oven Still Won’t Work After Replacing Parts?
Is it worth calling a professional or should I keep troubleshooting myself?
In my experience, if you’ve replaced the obvious faulty parts and the oven still doesn’t work, it might be time to consult a professional. Sometimes, problems stem from less obvious issues like wiring faults or control board failures. For complex diagnostics, I rely on authoritative sources like Energy.gov for guidance. Remember, safety and proper diagnosis are key to ensuring your oven gets back to baking in no time.
If you’ve navigated similar issues or have tips of your own, I invite you to share your experiences in the comments below. Your insights could help others troubleshoot faster!
Unraveling the Mystery of Oven Heating Failures: An Expert’s Approach
When your oven suddenly stops heating, it’s easy to feel overwhelmed. However, as someone who has navigated these troubleshooting waters myself, I can tell you that understanding the core components involved in oven operation can make all the difference. The key is to approach the problem systematically, focusing on the most common culprits like the heating element, thermostat, oven sensor, and control board. Diving into diagnostics with a multimeter can help you identify faulty parts quickly, saving time and money. For comprehensive guidance, I recommend checking the essential parts guide.
Deep Dive: The Interplay of Oven Components and Troubleshooting Strategies
Understanding how these parts interact is crucial. The heating element acts as the primary heat source, while the thermostat and oven sensor regulate temperature by sending signals to the control board. If any of these components fail, your oven may not heat at all or may do so inconsistently. When diagnosing, I test the heating element for continuity—if it’s broken, a simple replacement often restores function. Similarly, faulty thermostats or sensors can be tested with a multimeter to check for proper resistance levels. If these parts are functioning correctly, the issue might lie within the control board itself, which can be more complex to diagnose and repair. For detailed troubleshooting steps, visit the top oven repair tips.
What Are the Nuances of Advanced Oven Diagnostics?
For the seasoned DIYer, understanding the subtle signs that point to a control board failure or wiring issue is invaluable. For instance, inconsistent heating, error codes, or unusual oven behavior can hint at underlying electronic problems. In these cases, inspecting wiring harnesses and connections is essential, as loose or damaged wires can mimic component failures. Additionally, modern ovens with digital displays might show error codes—consulting the manufacturer’s manual or online resources can help interpret these signals. Remember, safety is paramount: always unplug the appliance before inspecting internal parts, and consider consulting authoritative sources like Energy.gov for guidance on complex repairs.
Enhancing Your Repair Toolkit: Practical Tips and Resources
Having the right tools and knowledge can make troubleshooting more efficient. A quality multimeter, screwdrivers, and replacement parts are staples in my repair kit. When replacing parts, I emphasize the importance of using genuine components, as inferior parts can lead to recurring problems. Documenting your repairs also helps identify patterns and prevent future issues. If your troubleshooting hits a wall, don’t hesitate to seek professional help, especially for complex issues like control board failures or wiring faults. For additional insights, exploring specialized resources or forums dedicated to appliance repair can be incredibly helpful.
Curious About the Hidden Complexities in Oven Repair?
Ever wondered how a tiny wiring fault can stop your entire oven from working? What subtle signs indicate a control board is on its way out?
Understanding these nuances enhances your diagnostic skills. For instance, a faulty oven sensor may give inconsistent temperature readings, leading to uneven cooking. Similarly, a control board with damaged circuits might still power on but fail to communicate with other components properly. Recognizing these signs requires a keen eye and a good understanding of electronic systems. Regularly inspecting wiring connections and testing sensors can preempt larger failures. Remember, a well-maintained oven not only cooks better but also lasts longer. For more detailed diagnostics and troubleshooting tips, visit the troubleshooting guide for other appliances, which shares valuable insights applicable across various home appliances.
If you’ve faced similar issues or have advanced troubleshooting tips, I encourage you to share your experiences in the comments. Your insights could help fellow DIY enthusiasts diagnose and fix their ovens more effectively!
The Hidden Complexities of Oven Control Boards and Wiring Mysteries
As I delved deeper into oven repairs, I realized that the control board often remains an enigma for many DIY enthusiasts. Its complexity is akin to a miniature computer, orchestrating every function from heating to timer settings. One subtle sign of a failing control board is inconsistent oven behavior—sometimes it heats, sometimes it doesn’t, or it exhibits erratic digital displays. I remember troubleshooting my own oven where the display flickered, hinting at internal circuit issues. Inspecting wiring harnesses for corrosion or loose connections is critical because these seemingly minor faults can cause major malfunctions. An expert tip I learned is to gently tug on wiring connectors; if they wiggle or feel loose, it’s time to re-secure or replace them. For those interested in understanding the electronic underpinnings, consulting detailed resources like this diagnostic guide can be invaluable.
What Subtle Signs Indicate an Impending Control Board Failure?
Beyond the obvious symptoms, there are nuanced indicators that your control board may be nearing the end of its life. For instance, if your oven randomly resets, displays strange error codes, or refuses to respond to commands, these are red flags. I once experienced an oven that would turn on but never reach the set temperature, despite a brand-new heating element. This pointed me towards the control board’s inability to communicate effectively with sensors and heating components. Recognizing these signs requires a keen eye and understanding of how electronic signals flow within the appliance. Consulting authoritative sources like Energy.gov emphasizes the importance of systematic diagnostics in such complex electronic failures. Remember, safety always comes first—never attempt to repair or test these parts while the oven is plugged in.
How Do Advanced Diagnostics Elevate Your Repair Skills?
Advanced diagnostics involve not only testing individual components but also understanding their interactions under different scenarios. Using a multimeter to check resistance and continuity is standard, but I’ve also employed oscilloscopes to analyze signal waveforms in more advanced troubleshooting. For instance, if the oven’s sensor gives inconsistent readings, it could be due to wiring issues or a faulty sensor needing replacement. Moreover, error codes displayed on modern ovens serve as invaluable clues—if you see codes like F1 or E0, referencing the manufacturer’s manual can pinpoint specific electronic faults. This approach transforms troubleshooting from guesswork into a precise science. If you’re eager to expand your skills, exploring detailed guides like top repair tips can provide a structured pathway to mastery.
Why Is Maintaining a Troubleshooting Log a Game Changer?
Keeping a repair journal might seem tedious at first, but it proved invaluable in my own experience. Documenting each diagnosis, part replaced, and the results helps identify recurring issues and patterns that might otherwise be overlooked. For example, I noticed that my oven’s control board would intermittently malfunction after heavy usage, hinting at possible overheating or wiring stress. Over time, this log helped me anticipate failures and perform preventive maintenance. It also streamlines future repairs, saving time and reducing frustration. For those venturing into complex repairs, I highly recommend integrating a troubleshooting log into your process. Additionally, participating in online forums or communities can provide fresh insights—sharing your experiences often leads to collective wisdom that accelerates problem-solving. For further guidance, explore this troubleshooting resource for comprehensive tips across appliances.
How Can You Safeguard Your Repairs and Extend Appliance Lifespan?
Preventive care is often overlooked but essential. Regularly inspecting wiring connections, cleaning sensors, and ensuring proper ventilation reduces stress on electronic components. Using high-quality, genuine replacement parts minimizes the risk of recurring failures, which I learned the hard way. For example, inferior sensors or control boards tend to fail sooner, leading to repeated repairs. Additionally, educating yourself about the typical lifespan of parts helps set realistic expectations and prompts timely replacements before catastrophic failures occur. If complex issues arise, don’t hesitate to seek professional help—sometimes, a seasoned technician can diagnose subtle electronic failures that are beyond DIY scope. Remember, a well-maintained oven not only performs better but also offers peace of mind and longevity. For further insights into preventive maintenance, consider visiting this resource.
Decoding the Subtle Clues of Electronic Wear and Tear
Over time, I’ve observed that advanced oven issues often manifest through nuanced signs that aren’t immediately obvious. For instance, intermittent heating or inconsistent digital readouts can indicate underlying electronic fatigue within the control board or wiring harnesses. Recognizing these signs requires a blend of technical acumen and keen observation, especially since modern ovens integrate sophisticated electronic systems that are sensitive to even minor faults. When diagnosing such problems, I delve into inspecting wiring harnesses for signs of corrosion or frayed insulation, which can be subtle yet impactful. Additionally, monitoring error codes displayed on digital panels—such as F1 or E0—provides critical insights into specific electronic malfunctions. Consulting manufacturer-specific diagnostic manuals, like those from Whirlpool or Bosch, enriches this process, offering precise troubleshooting pathways that go beyond basic multimeter tests.
How Do You Differentiate Between Sensor and Control Board Failures?
Distinguishing whether a malfunction stems from a faulty oven sensor or the control board is a common challenge I’ve faced. The key lies in systematic testing and understanding the interplay between these components. For example, if the oven’s temperature fluctuates unpredictably or the digital display behaves erratically, I start by testing the oven sensor with a multimeter—checking for resistance values within manufacturer specifications. If the sensor is functioning correctly, my focus shifts to the control board, examining for signs of burnt circuits, damaged capacitors, or loose solder joints. The subtlety here is that control board failures often present with error codes that don’t resolve after replacing sensors, implying an electronic fault. For comprehensive diagnostics, I highly recommend exploring detailed resources like this diagnostic guide which deep dives into electronic troubleshooting strategies.
What Advanced Diagnostic Tools Elevate Your Repair Precision?
Beyond a multimeter, employing oscilloscopes or specialized circuit testers can significantly elevate your diagnostic accuracy. Oscilloscopes allow me to visualize signal waveforms, detecting irregularities in sensor outputs or control signals that might not be apparent through resistance measurements alone. For instance, irregular voltage fluctuations or inconsistent PWM signals can reveal wiring issues or failing electronic components. Additionally, leveraging manufacturer-specific diagnostic software—often accessible via USB interfaces—enables real-time monitoring of internal parameters, error logs, and system responses. This layered approach transforms troubleshooting from a trial-and-error process into a precise science, reducing unnecessary part replacements and accelerating repairs. If you’re eager to deepen your technical skill set, exploring advanced tutorials and forums dedicated to appliance electronics can be invaluable, especially when tackling complex control board failures.
Can Preventive Electronic Maintenance Extend Your Oven’s Lifespan?
Absolutely. Incorporating regular checks of wiring integrity, cleaning of sensors and connectors, and updating firmware where applicable can preempt electronic failures. From my experience, performing these routine inspections during scheduled maintenance, such as annual check-ups, not only ensures optimal performance but also catches minor issues before they escalate. For example, I’ve seen how corrosion on wiring harnesses can cause intermittent faults, which, if identified early, are simple to rectify with cleaning or securing connections. Using high-quality, manufacturer-approved replacement parts during repairs also mitigates the risk of recurrent electronic component failures. Remember, a proactive approach to electronic health—akin to preventive medicine—can extend the functional life of your oven significantly. To gain further insights into preventive electronics care, I recommend reviewing comprehensive guides available at this resource.
How Do Firmware and Software Updates Impact Electronic Diagnostics?
Firmware updates can play a pivotal role in resolving underlying electronic issues, especially in modern ovens equipped with smart features. In my journey, I’ve found that manufacturers periodically release updates to fix bugs, improve stability, and enhance diagnostic accuracy. For example, applying the latest firmware can resolve erratic display behaviors or false error codes caused by software glitches. However, updating firmware requires careful adherence to manufacturer instructions and, in some cases, specialized tools. Failing to do so might lead to bricking the control board or voiding warranties. Therefore, I always consult official repair manuals or authorized service centers before attempting firmware updates. This practice ensures that your diagnostic capabilities are aligned with the latest software improvements, effectively reducing the incidence of false positives and improving troubleshooting precision. For detailed procedures, visiting manufacturer support sites or trusted repair forums can provide step-by-step guidance and real-world tips.
Engage with Your Journey: Share Your Advanced Troubleshooting Experiences
If you’ve delved into complex oven diagnostics or discovered unique solutions, I invite you to share your insights. Personal stories and technical tips not only enrich our collective knowledge but also empower fellow DIY enthusiasts to tackle challenging electronic failures with confidence. Remember, mastering the electronic intricacies of appliance repair demands continuous learning and curiosity. So, keep exploring, experimenting, and sharing your journey. For more in-depth strategies and expert insights, don’t hesitate to explore this comprehensive troubleshooting guide and join our community of passionate repair aficionados. Your experience could be the key to solving the next complex repair challenge for someone else!
Things I Wish I Knew Earlier (or You Might Find Surprising)
The Subtle Signs of Electronic Wear
One of the most eye-opening lessons I learned is how minute electronic issues can cause major oven malfunctions. For example, a slight fluctuation in the digital display or occasional error codes were early warning signs I often overlooked, leading to bigger problems down the line. Recognizing these subtle clues early can save you a lot of frustration and money, especially if you’re diving into DIY repairs.
The Power of Systematic Troubleshooting
I used to jump straight into replacing parts without a clear diagnosis, which sometimes made things worse. Over time, I discovered that following a methodical approach—testing components like the thermostat, sensor, and control board with a multimeter—makes all the difference. This systematic troubleshooting not only saves time but also ensures you’re addressing the root cause, not just the symptoms.
The Importance of Genuine Parts
In my repair experiences, I found that using authentic, high-quality replacement parts significantly extends the lifespan of your repairs. Cheap or incompatible components may seem like a money-saver initially, but they often lead to recurring issues. Trusting sources like this diagnostic guide has helped me choose the right parts consistently.
Wiring and Connection Checks Are Crucial
One thing I underestimated at first was how often wiring issues cause problems. Loose or corroded connections can mimic more serious component failures. Regularly inspecting wiring harnesses and connectors—especially in the control board area—can prevent many headaches. A gentle tug test can reveal loose connections that need re-securing or replacing.
Firmware Updates Can Fix Electronic Glitches
Discovering that firmware updates can resolve stubborn electronic glitches was a game-changer. Keeping your oven’s software up-to-date, following manufacturer instructions, can fix erratic behavior without hardware replacement. I recommend checking the manufacturer’s support site for updates and guidance.
Resources I’ve Come to Trust Over Time
- Energy.gov: This site offers invaluable advice on appliance repair safety and diagnostics, which I’ve relied on for complex issues.
- Manufacturer Support Pages: Official manuals and firmware update instructions provide detailed and trustworthy repair guidance.
- Online Forums and Communities: Platforms like ApplianceJunk or Reddit’s appliance repair subreddit are gold mines for shared experiences and troubleshooting tips from seasoned DIYers.
- Specialized Repair Guides: The comprehensive guides at this resource have helped me navigate complex repairs with confidence.
Parting Thoughts from My Perspective
Reflecting on my journey, I realize that understanding the often-hidden electronic nuances of oven repair is incredibly empowering. From recognizing subtle signs of wear to using the right diagnostic tools and genuine parts, each step improves not only your repair success rate but also your confidence. Remember, patience and systematic troubleshooting are your best allies in this process. If this article resonated with you, I’d love to hear your own experiences or tips—sharing our stories helps us all become better DIY enthusiasts. Feel free to drop a comment or share this with someone who might find it helpful. Happy repairing!
Rachel Anderson
I found this article really insightful because I recently had an issue with my oven not heating, and I underestimated the importance of diagnosing the control board. Testing with a multimeter helped me identify that the sensor was actually fine, but the control board was causing the glitches. It’s amazing how small electronic issues, like loose wiring or faulty sensors, can lead to major problems. I’ve also started keeping a detailed log of repairs, which has saved me time when troubleshooting recurring issues. Has anyone here used oscilloscopes or similar advanced tools to analyze their oven’s electronic signals? I’m curious about how accessible these tools are for DIY enthusiasts and whether they make a significant difference in complex diagnostics. Would love to hear about others’ experiences with higher-end diagnostic equipment!
Michael Johnson
This post hits close to home for me. I recently faced a similar situation where my oven stopped heating, and I was initially overwhelmed. What really helped me was focusing on the sequence of components—checking the heating element first, then the thermostat, and finally the control board. Testing with a multimeter was a real eye-opener; it confirmed my suspicion that the control board was acting up. I also found that inspecting the wiring connections thoroughly can reveal hidden issues like corrosion or loose plugs, which are often the silent culprits. Regarding the advanced tools like oscilloscopes that Rachel mentioned, I haven’t used one myself, but I’ve read that they can provide detailed signals that help pinpoint electronic anomalies very precisely. Do others find these tools practical for DIY repairs, or do they mainly require professional setup? I’m curious about how accessible they are for home enthusiasts and if they truly improve diagnostic accuracy enough to justify their cost.
Daniela Porter
Reading through this post reminded me how complex oven repairs can seem at first, but breaking down the diagnostics into manageable steps makes a big difference. I recently replaced my oven’s sensor after noticing inconsistent temperature readings, but further issues persisted. It was only after I checked the control board with a multimeter that I found a damaged capacitor. I wonder, though, how many DIYers feel confident enough to test the control board directly, or is it better to leave those more intricate electronic diagnoses to the professionals? Personally, I’ve started investing in a good-quality multimeter and some basic diagnostic tools, which has helped with simpler parts like thermostats and heating elements. Do others here think that advanced tools like oscilloscopes are too much for home use, or do they really offer a game-changing advantage? I’d love to hear your thoughts on balancing practical DIY diagnostics versus professional-grade equipment. The key, I believe, is knowing when to call in help, especially for high-risk electrical testing.
Jessica Lee
This post really hits home. I recently experienced a similar issue where my oven suddenly refused to heat, and I was overwhelmed at first. What really helped me was taking a systematic approach—checking the heating element first, then the thermostat, and finally the control board. Testing with a multimeter was an eye-opener; it confirmed my suspicion that the control board had issues. I’ve also learned that inspecting wiring connections carefully can sometimes reveal hidden problems like corrosion or loose plugs, which are often the silent culprits. Regarding advanced diagnostic tools like oscilloscopes, I haven’t used one myself, but I’ve read that they can help visualize electronic signals more precisely. Does anyone here find these tools practical for DIY use, or are they primarily for professionals? I’d love to hear experiences on whether these tools genuinely make a noticeable difference in scaling down troubleshooting time and cost. Overall, I think patience and a step-by-step diagnostic process are crucial for effective repairs. Have others found specific tools or techniques particularly helpful in their DIY repairs?
James Carter
This article really resonated with me, especially since I’ve recently been tackling similar oven issues. I agree that understanding the core components like the heating element, thermostat, and control board is essential for effective DIY repairs. I’ve found that testing these parts with a multimeter can definitely save a lot of headache and expense. The point about advanced tools like oscilloscopes is interesting—I’ve dabbled in using basic circuit testers, but I wonder if investing in more sophisticated equipment really makes a noticeable difference for the average DIYer. Personally, I think for most home repairs, a good multimeter combined with patience can do the job, but I can see how oscilloscopes and specialized software could help in diagnosing complex electronic problems more accurately. Has anyone here tried using such tools at home? How user-friendly are they, and do they genuinely improve troubleshooting outcomes?