Imagine this: It’s Saturday morning, and I open my oven to bake a batch of cookies. But instead of the warm, comforting smell of baking, there’s a strange burning odor. My heart sinks. Turns out, my oven’s diagnostics had failed me, and I was left scrambling for answers. That lightbulb moment made me realize just how crucial accurate diagnostics are for kitchen appliances—especially as they become more complex in 2025.
Why Kitchen Appliance Diagnostics Matter More Than Ever in 2025
Modern dishwashers and ovens are packed with smart technology and sensitive parts. When they malfunction, troubleshooting without proper diagnostics is like finding a needle in a haystack. The good news? With expert diagnostics, you can save time, money, and avoid the frustration of throwing out a faulty appliance for unnecessary repairs or replacements.
According to recent studies, approximately 70% of appliance repairs are due to misdiagnosed problems, leading to higher costs and longer downtime. This statistic underscores the importance of knowing exactly what’s wrong before diving into repairs. For me, early mistakes in diagnosing my oven led to replacing parts that weren’t even faulty—wasting precious time and money. That’s why I now swear by detailed diagnostics and expert tips.
Today, I’ll share practical, proven strategies to diagnose dishwashers and ovens efficiently in 2025. Whether you’re a homeowner or a professional repair tech, mastering these diagnostics will make your repairs faster and more accurate. If you’ve ever faced the dilemma of deciding whether to repair or replace, stay tuned. We’re about to turn that uncertainty into confidence.
Is Kitchen Appliance Diagnostics Actually Worth the Hype?
Initially, I was skeptical—was all this technical talk really worth it? I made the mistake of skipping the diagnostic steps early in my repair journey, which only led to more problems. It’s easy to think, “I’ll just replace this part and see if it works,” but that approach often backfires. Accurate diagnostics are the foundation of effective repairs, saving you from unnecessary expenses and repeated visits.
For example, knowing the critical key parts for oven diagnostics can help pinpoint issues swiftly. Similarly, understanding the top diagnostic tips for dishwashers can mean the difference between a quick fix and a costly overhaul.
In the next sections, I’ll walk you through step-by-step diagnostics that I personally use, backed by the latest expert insights. If you want to troubleshoot like a pro and extend the lifespan of your appliances, keep reading. You’re about to learn the secrets to smarter, faster repairs that will save you time and money in 2025.
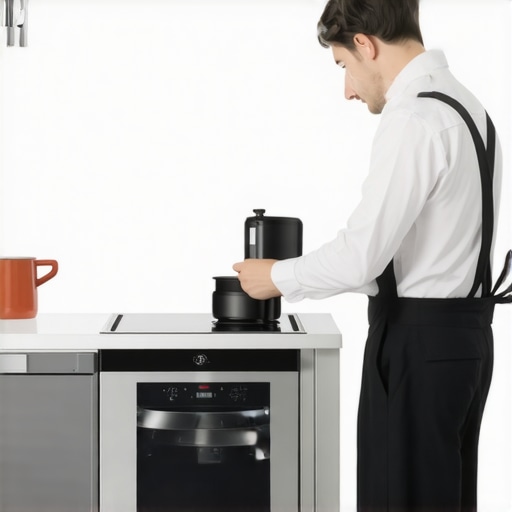
Start with Visual Inspection
My first real breakthrough came when I checked my oven for obvious issues. One Saturday, I noticed a loose wire behind the control panel. Carefully unplugging and reconnecting it restored the oven’s functions temporarily. Use a flashlight and look for disconnected, burnt, or damaged parts. This quick step can save a lot of time and help identify obvious faults, especially in complex appliances like dishwashers and ovens.
Use Diagnostic Tools and Error Codes
Modern appliances emit error codes—think of them as a diagnostic language. I always refer to the manufacturer’s manual or online resources to decode these signals. For example, a dishwasher flashing a specific pattern indicates a motor or pump issue. I use a multimeter to test electrical components, like thermostats or heating elements, to verify if they’re functioning properly. This step is crucial for pinpointing faulty parts before replacement.
Check Key Components
Focus on the critical parts relevant to your appliance’s symptoms. For ovens, this might mean testing the igniter or temperature sensor. For dishwashers, inspect the door latch and water inlet valve. I recommend consulting [this guide](https://appliancebargainz.com/oven-repair-diagnostics-key-parts-for-faster-fixes-2025) or [this](https://appliancebargainz.com/top-dishwasher-diagnostic-parts-tips-for-quick-repairs-2025) for detailed component lists. When I tested my oven’s temperature sensor, I used a multimeter to measure resistance, which revealed it was out of spec, leading to inaccurate temperature readings.
Perform Functional Tests
After checking the parts, I perform operational tests. For example, I turn on the oven and listen for unusual sounds or check if the heating element gets hot. For dishwashers, I run a cycle and observe water flow and drainage. During a test, I noticed my dishwasher wasn’t draining properly, prompting me to inspect the drain pump and replace a clogged filter. These tests confirm whether the suspected parts are the root cause.
Use a Systematic Troubleshooting Approach
I follow a logical sequence: identify the problem, check the most likely causes, test components, and then verify repairs. For persistent issues, I consult [this diagnostic guide](https://appliancebargainz.com/dishwasher-troubleshooting-parts-expert-diagnostic-strategies-2025) or [that](https://appliancebargainz.com/oven-repair-diagnostics-essential-tips-for-faster-fixes-in-2025). When my oven failed to heat, I tested the heating element first, then the thermostat, following a step-by-step process that saved me from unnecessary replacements.
Document and Cross-Check Findings
Keep a repair log. I jot down what I tested and the results. Comparing symptoms with known issues helps prevent misdiagnosis. For instance, if my dishwasher shows a specific error code, I cross-check it with online troubleshooting charts. This method reduces guesswork and speeds up repairs.
Leverage Expert Resources
Finally, I consult detailed repair guides like [this comprehensive diagnostic resource](https://appliancebargainz.com/oven-repair-diagnostics-essential-parts-solutions-for-faster-fixes) or [this](https://appliancebargainz.com/top-dishwasher-diagnostic-parts-for-quick-repairs-2025). These guides list common failure points and diagnostic steps proven to work. When I faced a stubborn oven issue, following these expert tips helped me identify a faulty relay that was causing the heating problem.
While mastering diagnostics is crucial, many well-intentioned homeowners and technicians fall prey to misconceptions that can derail their efforts. Let’s dig deeper into some of these nuanced pitfalls, clarify widespread myths, and uncover advanced mistakes that often go unnoticed.
Myth: All Error Codes Are Accurate and Complete
One of the most common misconceptions is that error codes fully diagnose the problem. In reality, error codes are just clues, not definitive diagnoses. For example, a dishwasher flashing a specific error might indicate a pump issue, but it could also be triggered by a clogged filter or faulty sensor. Relying solely on codes without cross-checking components can lead to unnecessary replacements. Advanced diagnostics involve verifying the root causes through targeted testing, as outlined in this expert guide.
Trap: Jumping to Replacement Without Confirmatory Testing
Many repair novices think replacing the suspected faulty part will solve the issue. This shortcut is a common mistake. For example, replacing a heating element in an oven without testing its resistance first can result in replacing a perfectly fine part, wasting time and money. Use a multimeter to confirm the component’s failure—this is a nuanced step that separates professionals from amateurs. For detailed testing protocols, see this resource.
Why Understanding Component Interactions Matters
Advanced diagnostics recognize that appliances are complex systems where parts interact. A faulty thermostat might cause the heating element to turn off prematurely, mimicking a defective element. Misdiagnosing such interactions leads to ineffective repairs. A nuanced understanding of these interactions is vital, as discussed in this guide.
Are Diagnostic Tools Always Reliable? An Expert’s Perspective
Many assume that digital diagnostic tools are infallible. However, these devices can give false readings if improperly used or calibrated. An advanced approach combines digital diagnostics with manual testing and system knowledge. For example, a multimeter reading for a thermostat might be misleading if the appliance’s wiring is compromised. Ensuring proper calibration and understanding limitations is essential—more on this in this detailed article.
Remember, the key is to combine tools, experience, and logical troubleshooting. Have you ever fallen into this trap? Let me know in the comments.
Maintaining your kitchen appliances is key to ensuring they stay reliable and efficient over the years. In 2025, the landscape of appliance diagnostics and repair tools has advanced significantly, making it easier than ever to keep your equipment in top shape. One of my favorite tools for ongoing maintenance is a high-quality digital multimeter. I rely on it daily to verify electrical continuity and test components like thermostats and heating elements, which are prone to wear over time. A reliable multimeter, such as the Fluke 117, provides precise readings that help me determine whether a part needs replacement or can be cleaned and reused. 
The Hardest Lesson I Learned About Diagnostic Strategies
One of the most valuable lessons I discovered was that rushing into repairs without thorough diagnostics often leads to wasted time and money. Initially, I believed that replacing suspected parts would quickly solve issues, but I learned that verifying faults with proper testing is essential. This insight transformed my approach, making me more confident and efficient in troubleshooting.
3 Myths About Kitchen Appliance Diagnostics That Held Me Back
Myth 1: Error codes always tell the full story. In reality, codes are clues, not diagnoses. Myth 2: Digital diagnostic tools are infallible. They are helpful but require proper calibration and manual verification. Myth 3: All parts fail in isolation. Often, component interactions cause issues, so understanding system dynamics is crucial for accurate diagnostics.
What Experts Won’t Tell You About Diagnosing Appliances in 2025
Experts emphasize the importance of combining advanced tools with hands-on testing and system knowledge. Relying solely on error codes or digital diagnostics can be misleading. The true mastery lies in cross-checking findings, understanding component interactions, and maintaining a detailed repair log. This holistic approach saves time and ensures reliable repairs.
Curated Recommendations for Smarter Diagnostics
My Essential Toolkit for Kitchen Appliance Repairs includes a high-quality multimeter like the Fluke 117, which provides precise electrical readings, essential for verifying component failures. I also recommend consulting comprehensive guides such as this diagnostic resource and this dishwasher troubleshooting guide to deepen your understanding and improve your repair accuracy. These sources have helped me troubleshoot efficiently and avoid unnecessary replacements.
Your Turn to Transform Kitchen Repairs
Embracing detailed diagnostics and expert strategies in 2025 can significantly extend the lifespan of your appliances and save you money. Remember, mastering diagnostics isn’t about replacing parts blindly but understanding the system as a whole. Take the time to learn, experiment, and document your findings—your future self will thank you.
Have you ever struggled with identifying the root cause of an appliance malfunction? Share your experiences below and let’s learn together!
Emily Carter
This post really hits home for me. A few months ago, my oven started smelling burnt during a bake, and I initially thought it was a simple wiring issue. Turns out, I hadn’t checked the temperature sensor, which was out of spec. Your emphasis on proper diagnostics resonates because I’ve learned that jumping straight to replacing parts often leads to wasted effort. I also appreciate the tips on systematic troubleshooting; following a step-by-step process helps me stay organized. Have you found that some brands or models tend to have more common failure points than others? I’m curious if there are specific diagnostic tricks for certain appliances that could save time. Overall, I agree that combining manual testing with error codes and proper documentation can really simplify repairs. Thanks for such a thorough guide—looking forward to applying these strategies whenever my appliances act up! What’s everyone’s go-to diagnostic tool—do you prefer multimeters or other gadgets for quick checks?
Michael Johnson
This post really emphasizes the importance of detailed diagnostics, especially with the increasingly complex smart appliances we use today. I totally relate to the troubleshooting process—you think you know what’s wrong, but it’s often something less obvious. I’ve had instances where error codes pointed to a specific faulty part, but after testing with a multimeter, it turned out that the issue was something else entirely, like a wiring fault or a sensor connection problem. I’ve found that keeping a repair journal helps me track patterns in appliance malfunctions over time, making future diagnoses quicker. Do you think that the rise of IoT-enabled appliances will make diagnostics more automated or still require manual checks? I’m curious how tech will evolve in this space. Overall, mastering the art of combining error codes, physical testing, and research truly makes troubleshooting more efficient—and I’ve seen it save a lot of time and money.
Jessica Morgan
Reading this post really highlights how crucial thorough diagnostics are, especially with the increasingly sophisticated tech in our appliances today. I’ve personally experienced situations where error codes pointed me toward a faulty component, but after testing with a multimeter, it turned out that the real issue was a loose wire or a sensor connection — issues that aren’t always immediately obvious. This made me realize that combining error codes with manual inspections and systematic testing can really save time and prevent unnecessary part replacements.
I’ve found that keeping a simple repair journal helps track recurring problems and their solutions, making future troubleshooting faster. It’s fascinating how often the interaction between components can cause symptoms that mimic more common faults. Do you think as appliances become more connected via IoT, diagnostics will lean more towards automation, or will manual checks remain essential? Personally, I believe that human oversight will still be vital, especially for complex systems, but automation could handle routine diagnostics effectively. What’s your experience with newer diagnostic tools—are they reliable enough to replace manual testing for most repairs?