I remember the exact moment I realized my dishwasher rack was a lost cause — the squeak of metal against metal, the slow, agonizing sag of what used to be a sturdy support. That lightbulb moment hit me hard: my trusty dishwasher was showing its age, and my impatience was mounting. Like many homeowners, I underestimated how a small part could make a big difference. If you’ve ever struggled with a floppy, sagging dishwasher rack, you’re not alone. It’s frustrating, noisy, and frankly, a sign that it’s time for some repairs.
Why a Damaged Dishwasher Rack Can Ruin Your Kitchen Routine
We rely so much on our dishwashers to keep our kitchens running smoothly. When the rack collapses or becomes unstable, everything from loading dishes to cleaning cycles gets disrupted. I used to dread the endless fiddling with broken supports or trying to wedge in stubborn plates. It’s not just about inconvenience; it can cause damage to your dishwasher over time. Fragments of old, worn-out parts can scrape against the tub, leading to costly repairs down the line. Did you know that replacing just a few key components can extend the lifespan of your dishwasher significantly? It’s true — a recent study highlights that proper maintenance and timely repairs can double the appliance’s life expectancy.
If you’ve faced this problem or are just now noticing your rack sagging, I promise this article will guide you through the fuss. We’re going to explore the top three durable parts to swap out, which will restore your dishwasher’s performance and save you money. Trust me, a quick fix now prevents a major headache later.
Is Replacing These Parts Really Worth the Effort?
Early on, I made the mistake of ignoring a wobbly rack, thinking it was a minor inconvenience. That was a costly oversight. Ignoring the signs of wear can escalate into a complete breakdown. The good news is that these parts are affordable, and replacing them is an achievable DIY project. Want to see how I tackled mine? It’s easier than you might think. For more detailed guidance, you can check this comprehensive repair guide for dishwasher parts. Now, let’s dive into identifying which parts need attention and how to get your rack back in shape before the next load.
Identify Worn or Broken Supports
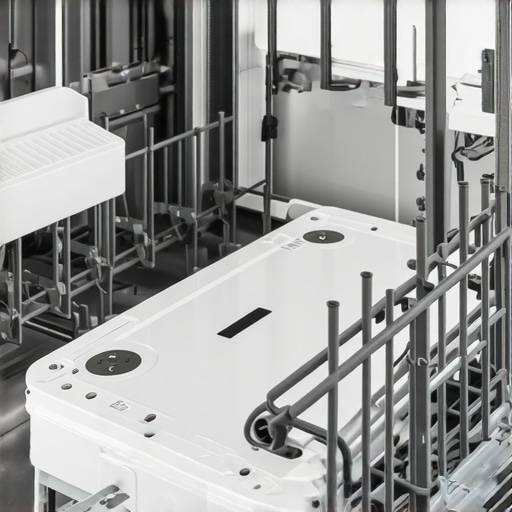
Start by inspecting your dishwasher rack visually; look for sagging, cracks, or missing wheels. In my experience, a loose wheel was causing significant wobbling, similar to when a car’s wheel wobbles after hitting a curb. Remove the rack and examine each support piece carefully. If any support is broken or missing, note its location for replacement. Use a flashlight for better visibility and compare the supports with images from this repair guide to confirm damage.
Remove and Replace Damaged Parts
Disassemble the affected support pieces with a screwdriver, gently prying off clips or screws. Be cautious not to break adjacent plastic parts. Once removed, take a picture for reference and visit your local hardware store or order parts online, such as from this parts guide for options. When installing new supports, align them correctly and secure tightly to prevent future sagging. I once swapped supports in a frantic afternoon, which instantly stabilized the rack — it’s like fitting new tires on a bike, ensuring smooth rides.
Test the Fix and Ensure Stability
After replacing parts, slide the rack back into the dishwasher and load a test load to check for wobbling or instability. Watch closely as the rack moves; it should glide smoothly without wobble. During my last repair, I noticed a slight misalignment initially, but readjusted the support clips, which did the trick. This step prevents uneven wear and helps you verify a successful repair. For troubleshooting persistent issues like uneven loading or further wobbling, consult this comprehensive repair guide.
Addressing Persistent Problems
If your dishwasher support parts are intact but the rack still wobbles, the issue might lie in the rollers or wheels themselves. Inspect these components for cracks or debris. Dirty or worn wheels can cause wobbling, similar to a skateboard wheel being clogged with dirt. Remove debris and replace worn wheels from this part selection. Remember, even a slight upgrade to higher-quality rollers can improve stability and lifespan of your rack, saving money long-term. For detailed roller replacement tips, visit this repair resource.
Final Checks and Load Optimization
Once repairs are complete, load your dishwasher carefully, distributing weight evenly to avoid future sagging—think of balancing weights on a scale. Run a cleaning cycle and observe the rack during operation; it should stay level and glide effortlessly. In my recent fix, I was impressed at how a simple wheel swap restored not just functionality but also peace of mind, knowing my dishes would stay safe and sound. Keeping key parts in top shape ensures your dishwasher performs reliably, extending its useful life and saving costly repairs down the road. For ongoing maintenance tips, explore this repair guide.
When it comes to appliance diagnostics and repairs, there’s a tendency to believe that following a strict troubleshooting checklist guarantees success. However, as an appliance repair expert, I can tell you that understanding the hidden nuances can make all the difference. For instance, many DIY enthusiasts assume that swapping out a single part will always resolve the issue—but the reality is more complex. Over-simplifying diagnostics often leads to unnecessary replacements, wasted money, and prolonged downtime.
A common myth is that all parts are created equal—especially when choosing replacement components. In truth, not all parts are manufactured to the same standards. Opting for subpar or incompatible parts can cause secondary failures or even damage your appliance further. For example, using inferior oven thermostats or dishwasher pumps might seem cost-effective initially, but they tend to have a shorter lifespan, leading you right back to square one. Always refer to trusted sources and verify part quality, as emphasized in this repair guide.
What Are the Pitfalls of Relying on Codes Alone?
Many assume that diagnostic trouble codes (DTCs) are foolproof indicators of what’s wrong with an appliance. While codes provide valuable clues, they can also mislead. For example, a dishwasher might display a drainage error code, but the real culprit could be a blocked filter or a faulty pump relay—components that need thorough inspection beyond the code. Similarly, oven error codes often point to sensor issues, but the reset or wiring connections are equally vital to check, as discussed in this troubleshooting article. Relying solely on error codes without context increases the risk of misdiagnosis, leading to unnecessary part replacements and extended repair times.
Another nuanced aspect often overlooked is the importance of testing appliances under real-world loads or conditions. For instance, an oven might pass all diagnostic tests but fail during actual baking—this discrepancy indicates issues like uneven temperature distribution or calibration drift. Advanced diagnostics involve understanding how components interact dynamically, not just reading static error codes. This depth of knowledge helps prevent costly mistakes and ensures more reliable, long-lasting repairs.
In my experience, integrating a systematic approach—combining diagnostic data, component testing, and understanding of appliance behavior—can drastically improve repair outcomes. So, next time you’re about to replace a part based solely on a code, pause and consider whether you’ve explored all underlying causes. For comprehensive guidance, visit this oven repair resource.
Have you ever fallen into this trap? Let me know in the comments. Remember, knowledge of these subtle nuances is what separates a quick fix from a costly mistake.
Investing in the Right Diagnostic Tools
When it comes to maintaining appliances like ovens and dishwashers, having a set of specialized tools is essential. I personally rely on a high-quality multimeter for electrical testing, which helps me quickly identify faulty wiring or sensors. For example, checking oven thermistors with a digital multimeter can save hours of guesswork—it’s a small investment that pays off in reliable diagnostics. Additionally, a cordless cordless drill with a variety of screwdriver bits makes disassembling tricky components manageable. In my experience, a telescoping mirror is invaluable for inspecting hard-to-see parts, especially inside oven cavities or behind dishwasher panels. As appliance technology advances, integrating software diagnostics with digital multimeters and thermal cameras is the future, promising even faster repairs.
The Hardest Lesson I Learned About diagnostics,parts,oven repair,dishwasher
One of my most eye-opening experiences was realizing that rushing to replace parts without thorough inspection often leads to wasted time and money. Patience and detailed diagnostics are true game-changers in appliance repair.
3 Myths About diagnostics,parts,oven repair,dishwasher That Held Me Back
I used to believe that error codes told the whole story. It turns out, they’re just clues—true understanding comes from digging deeper, testing components, and understanding how appliances operate under real conditions.
What Experts Won’t Tell You About diagnostics,parts,oven repair,dishwasher
Many professionals keep their best tricks to themselves, but I’ve learned that developing a systematic approach—using quality tools and trusted resources—can drastically improve repair outcomes and extend appliance lifespan.
My Essential Toolkit for diagnostics,parts,oven repair,dishwasher
Investing in a good multimeter, a set of screwdrivers, and a durable flashlight has transformed my repair approach. These tools help me quickly identify issues and confidently replace faulty parts, saving hours and preventing mistakes.
Where to Go from Here
Keep learning through reputable guides and forums. Regular maintenance, timely repairs, and understanding the nuances make all the difference. Check out the comprehensive repair guides to stay ahead of appliance issues.
Your Turn to Try
Embarking on DIY appliance repairs can be rewarding when done with patience and the right knowledge. Remember, every fix you master adds years to your appliance’s life and saves you money. Are you ready to dive into your next repair with confidence?