The first time my dishwasher stopped mid-cycle, I felt that familiar sinking feeling—panic mixed with a dash of frustration. I’ve been there, staring at that unruly appliance, wondering if I should just call in a technician or dive deep into troubleshooting myself. It was a lightbulb moment for me; I realized that understanding the ins and outs of dishwasher parts and diagnostics wasn’t just for pros. It could save me time, money, and a lot of headaches.
Why DIY Dishwasher Troubleshooting Makes a Difference
Today, I want to share what I’ve learned—tips and tricks to empower you to tackle common dishwasher problems with confidence. Whether it’s an unexpected leak, failure to drain, or poor cleaning results, knowing the right diagnostic steps can make all the difference. Plus, with the wealth of expert resources available, like professional diagnostics and parts guides, you’re never alone in this journey.
Feeling Skeptical About DIY Repairs? You’re Not Alone
One mistake I made early on was rushing to replace parts without proper diagnosis, which only ended up wasting my money and time. The key is to learn how to identify the root cause before jumping to conclusions. Sure, some repairs require a professional touch, but many common issues can be fixed with a little patience and knowledge. Did you know that according to industry reports, proper diagnostics can reduce repair costs by up to 30%? That’s a compelling incentive to get familiar with the process.
In this post, I’ll guide you through step-by-step diagnostics, share essential parts to keep on hand, and direct you to reliable resources. Ready to turn your frustration into confidence? Let’s get started with understanding the core components that keep your dishwasher running smoothly and how to identify the ones causing trouble.
Identify the Problem Clearly
Before diving into repairs, define the issue precisely. For example, if your dishwasher isn’t draining, observe when the problem occurs—during a cycle or at the end. Recall a time I faced this—my dishwasher started leaking and wouldn’t drain, disrupting my whole kitchen. I checked if the drain hose was clogged or kinked, and that initial inspection saved me from unnecessary part replacements.
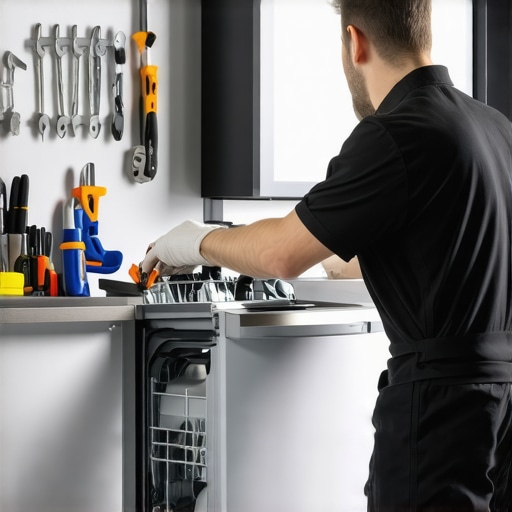
Gather Essential Diagnostic Tools and Parts
You don’t need fancy tools—basic multimeters, screwdrivers, and a flashlight are sufficient. Keep a list of common parts like the drain pump, filter assembly, and door latch, which often cause issues. I learned this the hard way, realizing that having the right parts on hand reduced my repair time significantly. For detailed info on critical parts, visit this resource.
Disassemble with Purpose
Carefully Remove Panels
Start by disconnecting power and water supply. Use a screwdriver to remove the control panel or access panel—think of it like peeling an onion layer by layer. During my first attempt, I gently pried the panel, avoiding breakage, and exposed the inner components. Remember, keeping track of screws ensures reassembly is smooth.
Inspect for Visible Damage
Look for broken hoses, burnt-out motor wires, or trapped debris. This visual inspection is crucial; I once found a tangled sponge blocking the drain, which was an easy fix. Similar to inspecting a car engine, thorough inspection prevents unnecessary part swaps.
Test Components Methodically
Use your multimeter to check electrical parts like the drain pump or float switch. For example, testing the float switch involves disconnecting it and verifying continuity—think of it like a doorbell: if it doesn’t ring, the switch might be faulty. This step often reveals issues hidden to the naked eye, saving you from unnecessary replacements.
Apply Logical Repairs Based on Findings
If the drain pump is faulty, replace it following manufacturer instructions or guides from this resource. When components check out but issues persist, revisit your diagnosis or consider consulting professional diagnostic tips to identify less obvious faults. I once replaced the water inlet valve, only to find the problem was a clogged filter, highlighting the importance of checking simple fixes first.
Reassemble and Test
Once repairs are complete, reattach panels carefully, restore power and water, and run a test cycle. Monitor for leaks, strange noises, or incomplete cycles. After a successful diagnosis and fix, I felt confident, knowing I’d tackled the issue myself—an empowering experience similar to troubleshooting a stubborn oven.
Document Your Process
Keep notes on what you inspected, tested, and replaced. This habit simplifies future repairs and helps troubleshoot recurring problems. My note-taking once helped me quickly identify a recurring drain issue, saving time during subsequent cycles.
Next time your dishwasher acts up, remember—diagnostics are your best tool. With patience, the right parts, and proper techniques, you can fix many common problems yourself, turning a frustrating day into a satisfying victory.
,Many DIY enthusiasts believe that troubleshooting appliances like ovens and dishwashers is straightforward—simply swap out the suspected part and hope for the best. However, this oversimplification often leads to unnecessary expenses and prolonged repair times. In reality, the nuances of diagnosing appliance issues require a keen understanding of system interactions and common pitfalls.
A prevalent myth is that faulty parts are always the root cause when an appliance malfunctions. While replacing a worn component can resolve certain issues, many problems stem from overlooked factors such as electrical connections, control boards, or improper assembly. For example, some assume that a non-heating oven must have a faulty heating element, but in many cases, the culprit is a malfunctioning relay or thermostat. To effectively troubleshoot, consulting comprehensive diagnostic guides like this resource can be invaluable.
Another common mistake is neglecting the importance of system sequencing. Appliances have complex cycles governed by sensors and control boards. Short-circuiting this process by replacing parts prematurely often delays repairs and wastes effort. Advanced diagnostics involve testing electrical signals, reviewing error codes, and understanding how components interact during each cycle. Recognizing that many faults are caused by control board issues rather than single faulty parts is a crucial insight for experienced repairers.
Don’t fall into the trap of assuming all parts are equal in quality. Buying cheap or generic replacement parts might seem cost-effective, but these often lack the durability and compatibility of OEM components. For instance, a dishwasher’s pump motor from a reputable supplier, paired with proper diagnostics, can extend its lifespan significantly. To ensure you’re getting quality parts, consider guides like this repair parts overview.
Have you ever fallen into this trap? Let me know in the comments! Let’s dig deeper into mastering appliance diagnostics so you can fix smarter, not harder.
Maintaining Your Appliance Arsenal for Reliable Repairs
Having the right tools in your repair toolkit is paramount for ensuring long-term success when fixing appliances like ovens and dishwashers. From multimeters to specialized diagnostic software, each instrument serves a distinct purpose and can save you significant time and frustration. Personally, I swear by a high-quality digital multimeter housed in a durable case. It allows me to quickly check electrical continuity or voltage, which is often the first step in troubleshooting complex issues. For example, testing the heating element’s resistance can be the difference between replacing a costly part or discovering a simple wiring problem. To further streamline diagnostics, I use a service like this resource for the latest repair guides and part schematics.
Keep Your Tools Organized and Ready
Investing in a modular toolbox with clearly labeled compartments helps me keep everything from screwdrivers to electrical testers in order. I also recommend maintaining a digital inventory of spare parts for common issues. For instance, knowing the model numbers of your oven’s temperature sensors or your dishwasher’s drain pumps ensures quick replacements without searching through countless boxes. Regularly calibrating your multimeter and inspecting blades and probes prevents inaccurate readings that can lead to improper repairs.
Advanced Software and Diagnostic Methods
Modern appliances increasingly rely on embedded microcontrollers. Using manufacturer-specific diagnostic software can reveal hidden error codes and system faults. While professional-grade tools like this can be costly, several budget-friendly apps are compatible with smartphones and offer detailed diagnostic steps. For example, some apps can calibrate sensor readings or simulate control board signals, giving you a clearer picture of the underlying issue. As appliance diagnostics evolve, staying abreast of updates from brands like GE or Whirlpool can make your repairs faster and more precise.
Why Regular Maintenance Extends Appliance Lifespan
Adopting a routine maintenance schedule saves money and prevents unexpected breakdowns. In my experience, cleaning filters, inspecting door seals, and checking wiring connections every few months dramatically reduce emergency repairs. For dishwashers, inspecting the drain hose for kinks and cleaning spray arms offers immediate benefits. For ovens, calibrating temperature sensors ensures accurate cooking results, avoiding unnecessary part replacements. Remember, many issues stem from overlooked simple tasks that keep components functioning optimally.
Predicting Future Trends in Appliance Care
Looking ahead, automation and IoT integration will likely revolutionize appliance maintenance. Imagine receiving real-time alerts about worn-out parts or system irregularities directly on your smartphone—allowing preemptive repairs instead of reactive fixes. Investing now in diagnostic tools that are compatible with smart home platforms can future-proof your repair approach and extend your appliance’s lifespan.
How do I keep my appliances functioning smoothly over time?
The key is consistent, targeted maintenance combined with keeping a well-stocked set of diagnostic tools. Regularly inspecting and cleaning critical components prevents buildup and corrosion, while advanced diagnostic methods can quickly pinpoint emerging problems before they escalate. For instance, routinely testing your oven’s temperature sensor with your multimeter helps maintain cooking accuracy. For a more comprehensive approach, explore this detailed guide on oven care. Why not challenge yourself this weekend by calibrating your dishwasher’s sensors? It’s a simple step that can result in noticeably better cleaning performance and fewer repairs down the line.
The Hardest Lesson I Learned About Dishwasher Troubleshooting and Parts
One of the toughest lessons I discovered was the importance of thorough diagnosis before replacing components. Rushing into part swaps without clear evidence not only drained my budget but also prolonged the repair process. Now, I always take a moment to identify the real culprit, which has transformed my troubleshooting from guesswork into precision.
Uncovering Hidden Myths That Could Trip You Up
I used to believe that faulty parts were always the root cause of problems. But experience taught me to look deeper—sometimes, wiring issues or control board glitches are at fault. Debunking these myths has allowed me to approach repairs with a smarter, more effective mindset, saving time and preventing unnecessary replacements.
The Unexpected Power of Checklists and Notes
Keeping a detailed repair log might seem trivial, but it became my secret weapon. Recording what I tested, replaced, or inspected has streamlined subsequent troubleshooting and made complex problems manageable. It’s like having a personal repair mentor right in your notebook.
Curated Tools and Resources That Truly Make a Difference
I trust a quality multimeter for electrical tests because accurate readings lead to correct diagnoses—no guesswork. Reliable repair guides from this resource have been invaluable, offering step-by-step procedures tailored for common dishwasher issues. Lastly, having a well-organized toolset keeps the repair flow smooth and frustration-free.
Embrace the Challenge and Take Control of Your Repairs
Word of advice—don’t shy away from diagnosing and fixing your appliances. The process, while sometimes tedious, empowers you with skills that last a lifetime. Start small, learn from each repair, and soon, you’ll handle those stubborn dishwasher problems with confidence. Ready to roll up your sleeves and become your own repair hero? Share your experience below—what’s the trickiest fix you’ve tackled?
Laura Bennett
Reading this post really resonated with me, especially the part about the importance of proper diagnosis before replacing parts. I used to rush into swapping out components and would end up wasting both time and money. Over time, I learned that taking a systematic approach—checking electrical connections, testing individual parts with a multimeter, and observing the cycle carefully—yields much better results.
One thing I discovered is how often simple issues like a clogged filter or a kinked drain hose cause problems that seem complex at first glance. Does anyone have tips on how to quickly identify these common culprits without tearing everything apart? Also, I’m curious if others use any specific diagnostic software for modern dishwashers or rely solely on multimeters and manual tests. Happy to share, I’ve found that keeping a repair log helps me track recurring issues and prevents me from repeating the same mistakes. What’s been your most effective diagnostic trick?