I remember the exact moment I realized I was in over my head with my dishwasher. It was a Saturday morning, and my once-reliable machine suddenly started leaking water all over the kitchen floor. Panic set in. I had no idea where to even begin troubleshooting. That lightbulb moment—when I understood that diagnosing dishwasher problems wasn’t just guesswork—changed everything for me. Now, I want to share that journey and help you avoid the frustration I went through.
Why Diagnosing Your Dishwasher Matters More Than Ever in 2025
Dishwashers are a staple in our daily routines, but when they break down, it’s like losing a trusty sidekick. The good news? Many common issues are fixable with the right knowledge of diagnostics and parts. The catch is, spotting the problem early and knowing which parts are causing the trouble can save you hundreds of dollars and hours of hassle. As technology advances, so do the diagnostic tools and repair strategies — which means staying updated is crucial.
In 2025, the landscape of dishwasher repair is more sophisticated, but also more accessible. The key is understanding the core diagnostic steps and having the right parts at hand. Trust me, when I first tried to fix my dishwasher without proper diagnostics, I ended up replacing parts I didn’t need to, wasting time and money. That’s an all-too-common mistake. Instead, I learned to leverage expert diagnostic tips, which you can find here.
Is Relying on Diagnostics Worth the Hassle?
Honestly, I was skeptical at first. I thought, “How complicated can it be?” But early on, I replaced a faulty door latch only to find out later that the real culprit was a clogged drain pump. My mistake was skipping the diagnostic phase and jumping straight into parts replacement. That’s why I now emphasize the importance of thorough diagnostics before buying parts. It’s a game-changer and saves you from unnecessary expenses.
If you’ve ever faced a stubborn dishwasher that won’t start, leaks unexpectedly, or stops mid-cycle, you know how frustrating it can be. The good news is, with the right diagnostic approach and understanding of parts, you can often fix these issues yourself. To get started, I recommend checking out comprehensive guides like this troubleshooting resource.
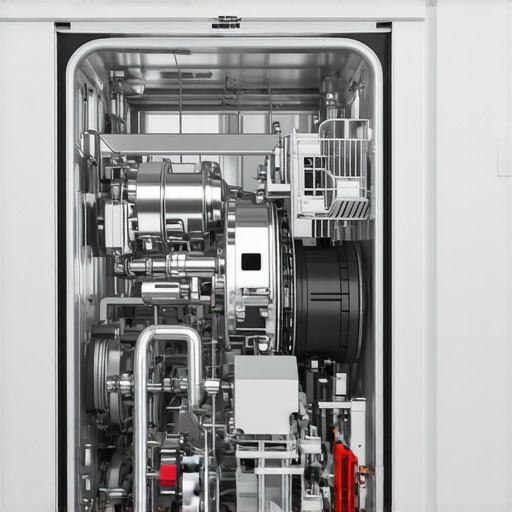
Let’s dive into the practical side of things and learn how to identify the key parts that make or break your dishwasher’s performance. Trust me, mastering these diagnostic skills will make your repair process smoother and less intimidating. Ready? Let’s go!
Start With a Visual Check
Before diving into complex diagnostics, perform a quick visual inspection. Look for obvious issues like leaks, loose hoses, or debris blocking the spray arms. I remember last summer, I found a clog in the drain filter that was causing water to back up. Clearing this simple problem immediately restored my dishwasher’s performance without needing new parts. This initial step can save a lot of time and frustration.
Identify the Symptoms Clearly
Pinpoint what’s wrong: Is it not starting? Leaking? Not cleaning properly? For example, I recently had a dishwasher that stopped mid-cycle. I checked the control panel and discovered an unresponsive display. Such clues narrow down the possible causes and guide the next diagnostics. Document these symptoms for reference as you proceed.
Check the Power and Water Supply
Ensure the unit is receiving power. Confirm that the outlet is functional by testing with another appliance. Also, verify the water inlet valve is open and delivering water. In my case, a loose power connection was the culprit, which was an easy fix—tightening the cord resolved the issue. This step prevents unnecessary part replacements and is often overlooked.
Test the Key Components
Use a multimeter or diagnostic mode to test essential parts. Start with the door latch; if it doesn’t engage properly, the dishwasher won’t start. Remember when I replaced a door latch prematurely, only to find out later that the control board was faulty? Proper testing avoided unnecessary purchases.
Door Latch and Switch
Inspect the latch for damage or misalignment. Use your multimeter to check continuity. If defective, replace it with a compatible diagnostic parts.
Control Panel and Buttons
Test the buttons for responsiveness. Sometimes, a simple reset or cleaning fixes unresponsive controls. If they’re faulty, swap in a new panel or repair the circuit board.
Examine the Pump and Drain System
The pump is like the heart of your dishwasher, circulating water and draining it out. If your dishes aren’t getting clean or your machine leaks, this is a prime suspect. I once found a broken impeller in the drain pump, which caused water to stagnate. Replacing the pump restored full function.
Check the Drain Pump
Remove the access panel and manually spin the pump impeller. If it’s stuck or broken, replace it. Confirm there’s no debris blocking the impeller or drain hose. These small obstructions can mimic larger, more costly problems.
Test the Heating Element
Proper drying depends on the heating element. Use a multimeter to measure its resistance; a broken element shows infinite resistance. I once replaced a faulty heater, and my dishwasher’s drying improved dramatically. For efficient repairs, consult a parts guide.
Use Diagnostic Mode if Available
Modern dishwashers have built-in diagnostic modes. Refer to your user manual to activate this feature; it runs self-tests on various components. I used this feature on my model, which highlighted a faulty float switch, leading me directly to the problem without guesswork.
Order and Replace Parts Smartly
Once you identify the faulty component, order the correct replacement parts. Always double-check compatibility. When replacing, follow manufacturer instructions carefully to avoid further damage.
Test After Repairs
Run a short cycle to verify your fix. Observe for leaks, proper water filling, and effective cleaning. If issues persist, revisit diagnostics or seek expert advice. This step ensures your repair was successful and prevents future headaches.
Many homeowners operate under misconceptions about diagnosing dishwasher issues, which can lead to costly mistakes and prolonged frustration. Let’s dig deeper into some of the most prevalent myths and uncover the hidden nuances that can make your repair efforts more effective. First off, a widespread belief is that all dishwasher problems stem from the same parts, like the door latch or control panel. While these components are common culprits, relying solely on this assumption can be misleading. For example, a leak might seem like a door seal issue but could actually be caused by clogged filters or a faulty drain pump. It’s crucial to understand the diagnostic flow and test each part systematically, rather than jumping straight to replacement. You can find expert diagnostic strategies here.
Another myth is that modern dishwashers are so advanced that DIY repairs are futile. The truth is, while newer models do have integrated diagnostic modes, mastering basic troubleshooting steps can save you a lot of money. Advanced diagnostic tools, like multimeters, and knowledge about key components, such as pumps and heating elements, empower you to identify issues accurately. For instance, testing the heating element with a multimeter is straightforward and can prevent unnecessary replacements. Discover more about expert diagnostic parts that make DIY fixes easier.
Are there hidden traps in diagnosing dishwasher problems?
Absolutely. One common trap is assuming that a single symptom points to one specific problem. For instance, a dishwasher that doesn’t drain might be dismissed as a clogged hose, but the real issue could be a malfunctioning drain pump or float switch. Overlooking the diagnostic process can lead to replacing parts that aren’t defective—an expensive mistake. It’s better to follow a logical diagnostic sequence, including visual checks, component testing, and, if available, using diagnostic modes. This approach minimizes guesswork and helps pinpoint the true cause efficiently. For comprehensive guidance, check out this troubleshooting resource.
Finally, many get caught up in the myth that all issues require a professional. While complex repairs like replacing the control board or motor may need expert help, most common problems can be diagnosed and fixed with proper knowledge and tools. Remember, understanding the nuances—like how to test a relay or measure resistance—can significantly speed up your repair process. Don’t fall into the trap of oversimplification; instead, embrace the diagnostic steps that reveal the real problem. And if you’re eager to sharpen your skills, explore the top diagnostic tips for 2025.
Have you ever fallen into this trap? Let me know in the comments.
How do I maintain my dishwasher over time?
Maintaining your dishwasher isn’t just about fixing problems when they arise; it’s about adopting a proactive approach that extends its lifespan and keeps it performing at peak efficiency. One of my favorite strategies is regular cleaning of the filters and spray arms, which prevents clogs and ensures optimal water flow. I recommend setting a monthly reminder to check and clear debris from these parts—this simple step can save you from more costly repairs down the line.
Another key maintenance tip involves inspecting the door seal and latch periodically. Over time, rubber gaskets can wear out or collect grime, leading to leaks or poor sealing. A quick wipe-down with a damp cloth and a light application of silicone lubricant keeps the seal flexible and effective. This not only prevents water damage but also ensures your dishwasher operates quietly and efficiently.
Using the right diagnostic tools is essential for long-term maintenance. As I’ve learned from recent trends, digital multimeters and specialized diagnostic modes are becoming more integrated into modern appliances. For example, testing the heating element with a multimeter is straightforward: set the device to measure resistance, and if the reading is infinite, it’s time for a replacement. This proactive testing helps catch issues early before they escalate into major failures.
Furthermore, keeping your dishwasher’s software updated—if applicable—can improve diagnostics and functionality. Manufacturers are increasingly rolling out firmware updates that optimize performance and fix known bugs. Check your appliance manual or manufacturer website periodically to see if updates are available, and follow the provided instructions to install them safely.
Looking ahead, I believe the trend will lean toward smarter diagnostics and remote monitoring. Some models now include Wi-Fi connectivity that alerts you to potential issues before they become serious, allowing for timely maintenance and repairs. Embracing these innovations can make long-term upkeep easier and more effective, reducing downtime and repair costs.
For anyone serious about keeping their dishwasher in top shape, I highly recommend investing in a quality digital multimeter. It’s versatile, affordable, and essential for diagnosing electrical components quickly and accurately. Plus, pairing it with the latest diagnostic guides will empower you to handle most common issues without calling a technician.
Finally, remember that regular maintenance combined with smart diagnostic tools can drastically reduce your repair costs and extend your appliance’s lifespan. Don’t wait for a breakdown—start implementing these tips today and keep your dishwasher running smoothly well into 2025 and beyond. Ready to give your maintenance routine an upgrade? Try testing your heating element with a multimeter this week, and see how much you can catch early!
The Hardest Lesson I Learned About Diagnosing Dishwashers
One of the biggest mistakes I made early on was assuming that a single symptom, like leaking, pointed to one specific part. It took me multiple tries to realize that a leak could be caused by anything from a worn door seal to a clogged drain. This taught me the importance of a systematic diagnostic approach rather than jumping straight into part replacements.
Three Myths About Dishwasher Repairs That Cost Me Big
I used to believe that all modern dishwashers are too complex for DIY repairs. Turns out, understanding basic components like the pump, heating element, and control board can empower you to fix many issues yourself. Additionally, I thought that diagnostic tools were only for professionals, but now I know a good multimeter and diagnostic guides are game-changers for home repair.
What Experts Won’t Tell You About Troubleshooting Dishwashers
Many overlook the importance of a thorough visual check before testing components. I learned the hard way that debris blocking spray arms or a loose hose can mimic more serious problems. Taking the time to inspect these simple issues first can save you hours and money by preventing unnecessary replacements.
Curated Tools That Made My Repairs Easier
- Multimeter: An affordable, essential tool for testing electrical components like heating elements and relays. I trust mine for quick diagnostics.
- Diagnostic Mode Manuals: Many newer dishwashers have built-in self-test modes. Knowing how to activate and interpret these can pinpoint issues rapidly.
- Replacement Parts Guides: Reliable sources like this guide helped me select the right parts without guesswork.
- Cleaning Supplies: Regular cleaning of filters and spray arms prevents many common problems and prolongs your dishwasher’s lifespan.
Your Turn to Take Control of Dishwasher Repairs
Hand-on diagnostics can seem intimidating at first, but with the right tools and knowledge, you can save money and extend your appliance’s life. Start by learning how to test your heating element or check the door latch—small steps that lead to big savings. Are you ready to become your own appliance repair hero? Share your experiences or ask questions below!
Henry Mitchell
I completely relate to the story at the beginning; that moment of realizing I was in over my head was a real eye-opener. When my dishwasher started leaking, I also jumped straight into replacing parts without proper diagnostics, which ended up costing more, both in money and time. Since then, I’ve started to follow a more systematic approach, like inspecting the drain filter and testing the door latch with a multimeter first. I think having the right diagnostic tools has really changed the game for me. I especially find the built-in diagnostic modes in newer models incredibly helpful for pinpointing issues quickly. Have others noticed that these features save a lot of troubleshooting time? Also, for those new to home repairs, do you recommend certain beginner-friendly diagnostic tools or guides to start with? It seems like mastering these basics not only saves money but also gives a lot more confidence in tackling future appliance issues.
Emily Clark
Reading about the importance of diagnostics really resonated with me. I used to do the same thing—jump straight to replacing parts without proper testing—and it was such a waste of time and money. Since I started using a multimeter and following structured diagnostic steps, my success rate has improved dramatically. One thing I found helpful is documenting symptoms carefully; it makes troubleshooting more precise. I also recommend newer models with built-in diagnostic modes if you’re considering a new dishwasher, as they make troubleshooting much faster.
For beginners, are there particular diagnostic guides or tutorials you all trust? I’m curious whether community-shared resources are just as effective as professional manuals. Also, how do you handle situations where multiple issues seem to happen simultaneously? Do you recommend focusing on the most obvious symptom first or following a specific diagnostic sequence?
Overall, I believe investing in the right tools and learning the diagnostic process has made me more confident and self-sufficient in home repairs. It surprises me how much a small tool like a multimeter can reveal about electrical problems—the initial investment pays off quickly.
Amanda Roberts
This post hits home for me, especially the emphasis on diagnostics before jumping to parts replacement. I remember the first time my dishwasher stopped mid-cycle, and I was about to buy a new control panel. Luckily, I found a detailed guide on using a multimeter to test the relay and heating element, which saved me from unnecessary expense. Over time, I’ve learned that being systematic and patient in diagnostics not only saves money but also builds confidence. I’ve also started using the diagnostic modes in my newer dishwasher models, which can perform self-tests and pinpoint issues quickly. Has anyone else found that these built-in diagnostics simplify repairs significantly? Also, are there particular tools or apps you’d recommend for beginners trying to learn these diagnostic techniques? Understanding the nuances of each component really demystifies the repair process and makes DIY fixing more approachable.